
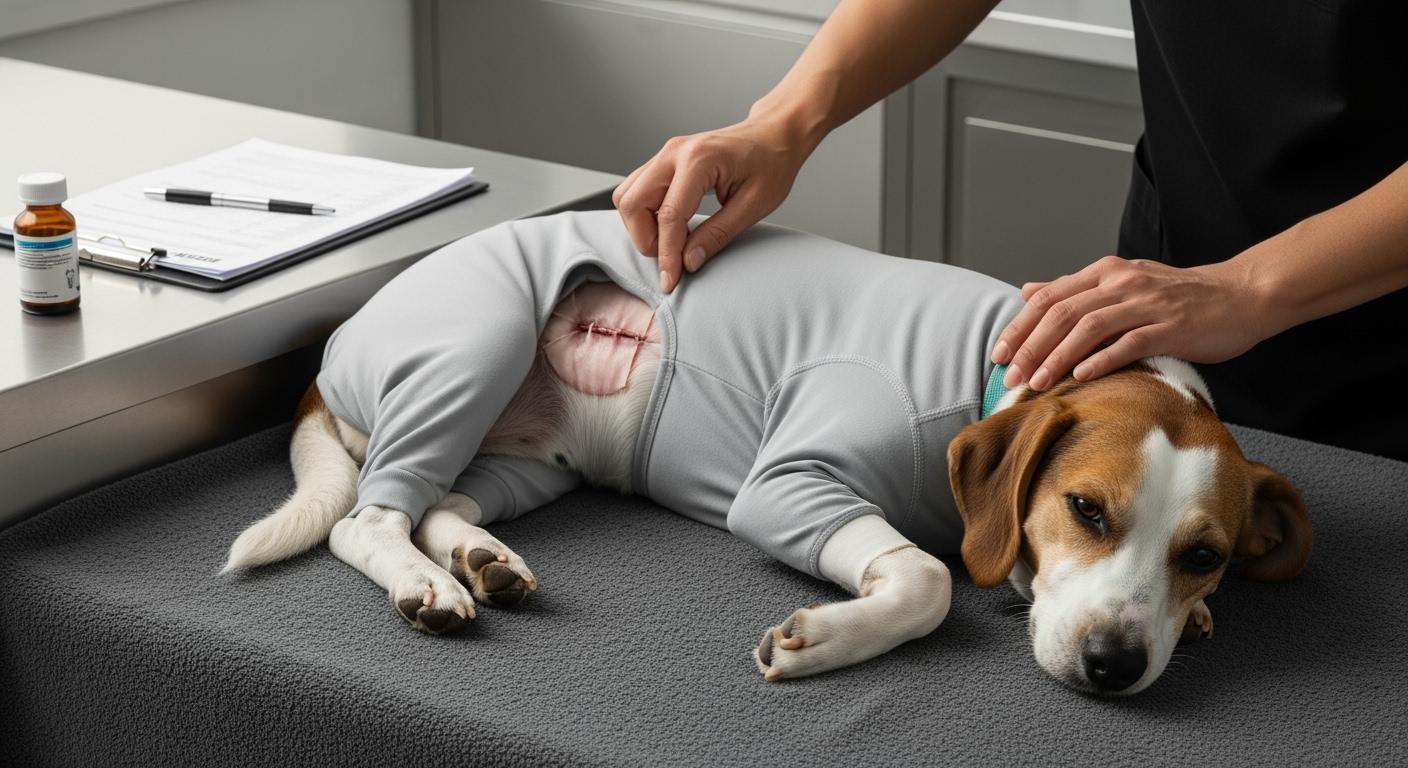
A dog recovery suit helps protect your dog’s incision. It also helps stop your dog from licking the wound while healing. You use a recovery suit to keep wounds covered after surgery or skin problems. Vets suggest using a dog recovery suit because it lets your dog move easily. It also keeps the surgery area safe. The recovery suit uses soft, stretchy fabric made for your dog’s body. It is important for dogs healing from spay, neuter, or other surgeries. You should follow your vet’s advice. Check the incision and the recovery suit two times each day for 14 days. This helps your dog heal safely.
Key Takeaways
A dog recovery suit keeps cuts safe and stops licking. Use it after surgery to help your dog heal well.
Look at the recovery suit and the cut two times each day for 14 days. This helps you find problems early.
Pick the right recovery suit for your dog’s injury. Full-body suits are best for belly cuts. Cones may be better for face or leg injuries.
Watch your dog’s actions closely. If your dog can reach the cut, try a cone for more safety.
Always do what your vet says. The recovery suit helps keep your dog from touching the wound, but it is not a cure.
Dog recovery suit basics and limitations
Blocking access to incisions
Dog recovery suits help you prevent dogs from licking or scratching their wounds. You use a medical recovery suit to cover the incision and keep it clean. The suit acts as a barrier, stopping your dog from reaching the area with their mouth or paws. You should check the suit and incision twice a day for 14 days. This routine helps you spot problems early. Remember, a recovery suit for dogs does not heal the wound. It only blocks access. Always follow your veterinarian’s instructions for wound care and monitoring.
Comfort vs coverage
When you choose the right recovery suit, you want both comfort and coverage. Medical recovery suits provide full body protection, which works best for torso injuries. High-quality dog recovery suits use soft, breathable fabric. Your dog can move, sleep, and eat with less stress. Traditional cones feel more restrictive and can cause anxiety. A recovery suit for dogs helps reduce stress and supports better mobility. You may need a torso recovery suit for belly or back wounds, a limb recovery suit for leg injuries, or a postpartum recovery suit after birth. Always check for rubbing or tight spots during your twice-daily checks.
Tip: Plan for two suits in rotation. Wash one while your dog wears the other. Air dry only, and wash up to 90°C if needed.
When to add a cone
Sometimes, a medical recovery suit is not enough. If your dog has an incision on the limbs, face, or tail, you should add a cone. The cone prevents your dog from reaching areas that a suit cannot protect. For chest, belly, or back wounds, you can use either a recovery suit for dogs or a cone. If your dog is very flexible or determined, a cone may offer better protection. Always follow best practices for using a dog recovery suit and switch to a cone if your dog can still reach the wound.
Use a full-body recovery suit for trunk injuries.
Use a cone for face, neck, or limb wounds.
Monitor your dog’s behavior and adjust as needed.
A medical recovery suit helps you control access, but your vet’s protocol always comes first. Never remove the suit early unless your veterinarian says it is safe.
When dog recovery suits work best
Belly and spay incisions
You often see the best results from dog recovery suits when your dog has a belly or spay incision. These suits cover the entire trunk, which helps protect the surgical site. You can use them to keep your dog from licking or scratching the wound. This coverage is important because the belly area is easy for dogs to reach. You want to block access without causing stress. Dog recovery suits give you a gentle way to do this. They let your dog move, rest, and eat with less restriction than a cone.
Full body suits work well for:
Spay incisions
Belly surgeries
Large wounds on the trunk
Note: Always check with your veterinarian before using a recovery suit. The suit controls access but does not treat the wound.
Skin irritation coverage
Dog recovery suits also help when your dog has skin irritation or hot spots. These suits cover large areas and prevent your dog from biting or scratching the skin. You can use sleeveless options if your dog needs more freedom of movement. These suits still cover the torso and lower neck. You want to keep the area clean and dry. Dog recovery suits make it easier to follow your vet’s instructions for skin care.
Use a suit for:
Hot spots
Allergic reactions
Healing after skin procedures
Matching suit to dog behavior
You need to think about your dog’s behavior before choosing a recovery suit. Some dogs have strong willpower and may try harder to lick or scratch. Dog recovery suits can help reduce stress because they feel less restrictive than cones. You may see your dog relax more and rest better. If your dog is very determined, you may need extra protection. Always watch your dog closely and talk to your vet if you have concerns.
Dogs with calm behavior often do well with suits.
Dogs who dislike cones may feel more comfortable in a suit.
Dogs who chew or twist the suit may need a cone for safety.
Tip: Dog recovery suits are a tool for access control. Always follow your veterinarian’s protocol for the best results.
When a medical recovery suit is not enough
Dog recovery suits help many dogs heal, but some wounds need extra protection. You must know when a suit cannot do the job alone. Always follow your veterinarian’s advice if you have questions about wound care.
Face, ear, and neck wounds
Dog recovery suits do not cover the head, ears, or neck well. If your dog has a wound in these areas, the suit will not block licking or scratching. Dogs can reach these spots with their mouth or paws. You should use other devices for these injuries. Here is a table showing when dog recovery suits may not work:
Limitation Type | Description |
|---|---|
Not Suitable for All Injuries | Less effective for wounds on the head, neck, or lower legs. |
Limited Application | Only suitable for injuries on the limbs, not effective for wounds on the body, neck, or head. |
You can ask your vet about soft e-collars, inflatable collars, or face masks for better protection.
Paw injuries and flexible dogs
Dog recovery suits do not always stop dogs from reaching their paws. Some dogs are very flexible or determined. They may twist or chew the suit to get to the wound. If your dog can reach the injury during a reach test, you need more protection. You can try these alternatives:
Inflatable Collars
Soft E-Collars
Protective Sleeves
Bandage Wraps
Flat Frisbee-type Cones
You should check the fit and coverage every morning and evening. If your dog keeps getting to the wound, switch to a hard cone right away.
Multi-pet and nighttime risks
Dog recovery suits may not protect your dog if you have other pets at home. Other animals may lick or chew the suit or the wound when you are not watching. At night, you may not see problems right away. You should keep your dog separated from other pets during recovery. Always check the suit and incision twice a day. If you see new redness, swelling, or discharge, call your vet.
Note: Dog recovery suits help you control access, but they do not treat wounds. Your veterinarian’s protocol always comes first. If you have any doubts, ask your clinic for advice.
Fit and comfort tips for recovery suits
Sizing and adjustment checks
You want your dog’s recovery suit to fit just right. A good fit keeps your dog comfortable and safe. Always measure your dog’s neck, chest, and body length before you choose a size. Use the sizing chart from the suit’s manufacturer. The suit should feel snug but not tight. Your dog should move, sit, and lie down without trouble. Look for stretchy, breathable fabric. This helps your dog stay cool and makes cleaning easier. You also want a suit that is easy to put on and take off. Openings for potty breaks make life simpler for you and your dog.
Here is a quick table to help you remember what to check:
Factor | Description |
|---|---|
Finding the Perfect Fit | The suit should be snug but not too tight; measure neck, chest, and length against sizing charts. |
Look for stretchy, breathable material for comfort and easy cleaning. | |
Convenience and Accessibility | Ensure the suit is easy to put on and remove, with openings for waste elimination. |
Durability | The suit must withstand attempts to bite or scratch at the area. |
Coverage | Ensure the suit covers the specific area related to the surgery. |
Washability | Choose a suit that is machine washable and retains its shape after multiple washes. |
Design | Aesthetic appeal can be a consideration for some dog owners. |
Tip: Use the quick reference card to double-check fit and comfort each day.
The reach test for safety
You need to make sure your dog cannot reach the incision. Use the 60-second reach test. Watch your dog for one full minute after you put on the suit. See if your dog can lick, chew, or scratch the wound. If your dog can reach the area, the suit does not fit well enough. You may need to adjust the suit or add a cone for extra safety. Always check after walks, playtime, or suit changes.
Skin checks and friction spots
Check your dog’s skin and the suit’s fit two times every day. Look for redness, swelling, or sore spots under the suit. If you see any problems, adjust the suit or call your veterinarian. Dogs can get friction sores if the suit rubs too much. Make sure the fabric stays smooth and dry. If you notice new discharge, odor, or pain, contact your vet right away.
Perform skin checks and suit adjustments twice daily during the recovery period.
Check for signs of redness, swelling, or sores under the recovery suit.
If you see worsening redness or signs of pain, call your veterinarian.
Note: The recovery suit helps you control access to the wound. It does not replace your veterinarian’s care plan. Always follow your vet’s instructions for the best results.
14-day recovery suit plan for dogs
A 14-day recovery plan helps you protect your dog’s incision and supports safe healing. You use a recovery suit for dogs as a barrier to stop licking, chewing, or scratching. You must follow your veterinarian’s instructions at every step. The suit does not treat the wound. It only blocks access. You need to check the incision and the suit twice daily and adjust your plan if your dog’s behavior changes.
Days 0–3: building routines
The first three days after surgery are the most important for your dog’s recovery. You need to set up routines that keep your dog safe and comfortable. Start by identifying the wound location and your dog’s behavior risk. If the wound is on the belly or trunk, a recovery suit for dogs usually works well. If your dog is very flexible or determined, you may need to add a cone.
Follow these steps during days 0–3:
Pain control: Give all prescribed medications as directed by your vet.
Limit movement: Use strict confinement. Only allow short, slow leashed walks for potty breaks.
Barrier selection: Choose a recovery suit for dogs that fits the wound location. For face, neck, or paw wounds, use a cone or sleeve instead.
Reach/slip test: After putting on the suit, watch your dog for 60 seconds. Make sure your dog cannot reach or slip out of the suit.
AM/PM checks: Inspect the incision and suit every morning and evening. Look for redness, swelling, or discharge.
Cold compress: If your vet approves, apply a cold compress to the surgical site for 10–15 minutes, 2–4 times a day to reduce swelling.
Sling-assisted walking: For leg surgeries, use a sling for support during bathroom breaks.
Supervision: Watch your dog closely. Avoid stairs, running, or jumping.
Focus on pain control and limiting movement. The first 48 hours are critical for healing. Watch for signs of complications like refusal to eat or extreme restlessness.
Days 4–14: maintaining protection
After the first three days, you need to keep the incision protected and the recovery suit for dogs clean. Continue to limit your dog’s activity. Do not allow running, jumping, or rough play. Keep your dog on a leash for all potty breaks.
Here is a table to guide you through the 14-day recovery period:
Recovery Phase | Guidelines |
|---|---|
First 14 Days | Strict confinement is mandatory; only very short, slow leashed walks for potty breaks are allowed. |
Activity Level | No running, jumping, or playing; stairs are off-limits. |
Supervision | Must supervise to prevent interference with healing; use recovery suits for comfort. |
You should wash the recovery suit for dogs daily or every other day. If you notice discharge, strong odor, or summer heat, wash it every day. Use a pet-safe, fragrance-free detergent. Wash on a delicate cycle with cold water or up to 30°C (86°F). Do not use bleach, fabric softener, or ironing. Air dry the suit flat in the shade. Rotate at least two suits so your dog always has a clean one. Inspect the suit each day. Replace it if you see stretching, tearing, or persistent odor.
Tip: Always perform the reach test after each suit change. If your dog can reach the wound, switch to a hard cone right away.
Potty breaks and suit changes
You need to plan for safe potty breaks and suit changes during the 14-day recovery. Use a recovery suit for dogs with easy-open panels or snaps for quick bathroom access. Keep your dog on a leash and supervise every trip outside. Avoid letting your dog run or jump. If your dog soils the suit, change it right away.
Follow these steps for suit changes:
Remove the suit gently. Check the incision for redness, swelling, or discharge.
Clean the suit as needed. Wash daily if there is discharge or odor.
Use a second recovery suit for dogs while the first one dries.
Perform the reach test after each change.
If you see any problems with the incision or suit, call your veterinarian.
Note: The recovery suit for dogs is a tool for access control. It does not replace your vet’s care plan. Always follow your veterinarian’s instructions and escalate to a hard cone if your dog can reach the wound.
By following this 14-day plan, you give your dog the best chance for safe healing. Stay alert, keep routines simple, and always put your dog’s safety first.
Decision and comparison tables
Traffic-light safety table
You can use a simple traffic-light table to decide if a recovery suit is safe enough for your dog today. This table helps you check for risks and know when to switch to a hard cone.
Status | What You See | What You Should Do |
|---|---|---|
🟢 Green | Suit covers incision. Dog cannot reach or chew. No redness or discharge. | Continue using the suit. Check AM + PM. |
🟡 Yellow | Suit slips, exposes wound, or dog tries to chew fabric. Mild redness or swelling. | Adjust fit. Watch closely. If problems continue, switch to a cone. |
🔴 Red | Dog reaches incision, new discharge, odor, or swelling. Suit fails reach test. | Switch to a hard cone today. Call your vet if wound looks worse. |
Always use the 60-second reach test after each suit change. If your dog can reach the wound, switch to a cone right away.
Recovery suit vs cone vs sleeve vs bandage
You have several options for anti-lick protection. Each tool works best for different wounds and dog behaviors. Use this table to compare your choices:
Option | Best For | Comfort Level | Monitoring Needed | Protection Duration | Cone Sizing Fallback |
|---|---|---|---|---|---|
Belly, trunk incisions | High | 2x/day | 14 days | Use cone if suit fails | |
Hard Cone | Face, neck, paws | Low | 2x/day | 14 days | Edge 4–8 cm past nose |
Sleeve | Leg wounds | Medium | 2x/day | 14 days | Use cone if sleeve fails |
Bandage Wrap | Small spots, paws | Low | 2x/day | 14 days | Use cone if wrap fails |
The recovery suit helps block access. It does not treat wounds. Always follow your veterinarian’s instructions.
Discharge checklist for clinics
You should follow this checklist when your dog leaves the clinic after surgery. This helps you plan for safe healing at home.
Confirm wound location and risk.
Choose the right barrier (suit, cone, sleeve, or wrap).
Review protection duration (usually 14 days).
Plan for monitoring (AM + PM checks, total 28 checks).
Learn the reach test and cone sizing (edge 4–8 cm past nose).
Get two suits for rotation and washing.
Know when to call your vet (redness, discharge, odor, or wound opening).
You must use the recovery suit as a tool for access control. Your veterinarian’s protocol always comes first.
Mini-calculations using Quick Reference Card numbers:
Monitoring workload: 2 checks/day × 14 days = 28 checks.
Protection duration planning: 14 days is the standard window unless your vet says otherwise.
Cone sizing fallback: The cone edge should extend 4–8 cm past your dog’s nose for best protection.
Top mistakes with dog recovery suits
Dog recovery suits help protect your dog’s incision, but you can run into problems if you do not use them correctly. Here are the most common mistakes pet owners make and how you can avoid them:
Moisture and rubbing issues
Letting the suit stay wet or dirty
Wet fabric can cause skin irritation or infection.
Prevention tip: Change and wash the suit right away if it gets wet or soiled.Ignoring friction spots
Tight or bunched fabric can rub and create sores.
Prevention tip: Check for redness or swelling under the suit during your AM and PM checks.Not drying the suit properly
Damp suits can lead to skin problems.
Prevention tip: Always air dry the suit completely before putting it back on your dog.Using harsh detergents
Strong cleaners can irritate your dog’s skin.
Prevention tip: Use a gentle, fragrance-free detergent for washing.
Device switching errors
Switching between devices too often
Changing from suit to cone and back can confuse your dog and reduce protection.
Prevention tip: Stick with one device unless your vet tells you to switch.Skipping the reach test after changes
Your dog may reach the wound if you do not check after each device change.
Prevention tip: Watch your dog for 60 seconds after every suit or device change.Not having a backup suit
If you only have one suit, you may leave the wound exposed during washing.
Prevention tip: Keep two suits so your dog always has protection.Forgetting to adjust for potty breaks
Leaving the suit closed can cause messes or discomfort.
Prevention tip: Clip up or open the suit for bathroom trips, then secure it again.
Removing suit too soon
Taking off the suit before 14 days
Early removal can lead to wound breakdown, infection, or even a second surgery.
Prevention tip: Keep the suit on for the full 14 days unless your vet says otherwise.Allowing too much activity too soon
Dogs may want to play, but this can disrupt healing.
Prevention tip: Limit activity for the entire recovery period.Not following the full recovery plan
Stopping restrictions early can delay healing.
Prevention tip: Follow your vet’s instructions until the final recheck.Skipping trial runs before surgery
Dogs may resist the suit if you do not introduce it early.
Prevention tip: Let your dog try the suit before surgery to reduce stress.
Remember: The recovery suit is a tool for access control, not a treatment. Always follow your veterinarian’s protocol for the safest recovery.
FAQs and tips for dog recovery suits
Wear time and comfort
You should keep your dog in the recovery suit for the full 14-day protection window unless your veterinarian gives different instructions. The suit is designed for extended wear and helps your dog feel secure. Many dogs adjust quickly and show less stress compared to wearing a cone. You want to check for signs of discomfort, such as rubbing or tightness, during your morning and evening checks. If your dog seems restless or tries to escape, you may need to adjust the fit or consult your vet.
Tip: Always monitor your dog’s behavior and comfort. The suit should allow easy movement and rest.
Sleeping in the suit
Most dogs sleep well in a recovery suit. The suit’s gentle pressure can have a calming effect, similar to a weighted blanket. Many owners notice their dogs sleep more soundly and wake up less anxious. You should watch dogs that tend to chew or escape, especially at night. If your dog tries to remove the suit, increase supervision or ask your vet for advice. The suit is made for overnight use, so you do not need to remove it at bedtime.
Dogs often sleep better in the suit.
The suit helps reduce nighttime licking and scratching.
Monitor dogs that chew or escape for safety.
Incision check frequency
You need to check your dog’s incision at least twice a day. Morning and evening inspections help you spot changes early. Use a well-lit area so you can see redness, swelling, or discharge. Regular checks help you learn what normal healing looks like. If you notice anything unusual, contact your veterinarian right away.
Check Time | What to Look For | Action |
|---|---|---|
Morning | Redness, swelling, odor | Adjust suit, call vet |
Evening | Discharge, pain, sores | Adjust suit, call vet |
Tip: Consistent checks are the best way to catch problems early and keep your dog safe.
Washing and suit care
You want to keep the recovery suit clean to protect your dog’s skin and incision. The suit is designed to be disposable for hygiene. Washing can reduce its antimicrobial properties. If the suit gets dirty, replace it with a new one instead of washing. This practice helps maintain effectiveness and keeps your dog comfortable.
Replace the suit if it becomes soiled.
Avoid washing to preserve antimicrobial benefits.
Use two suits in rotation for daily care and use tips.
Note: Always follow your veterinarian’s instructions for suit care and wound monitoring. The recovery suit is a tool for access control, not a treatment.
You are important in helping your dog heal after surgery. Always use the recovery suit as your vet tells you. Check your dog every day to find problems early and help with pain. The suit gives your dog many good things during recovery:
Benefit | Description |
|---|---|
Protection | Stops licking and scratching, so infection is less likely. |
Comfort | Soft fabric lets your dog rest and heal better. |
Ease of Use | Simple design makes changing the suit and helping with pain easy. |
Minimizing Stress | Helps your dog feel less anxious and more calm. |
Keep watching your dog and stay alert. Every dog heals in their own way, so ask your vet if you worry about anything.
FAQ
How long should your dog wear the recovery suit?
You should keep the suit on for 14 days unless your veterinarian gives different instructions. This time frame helps protect the incision during healing.
Can your dog sleep in the recovery suit?
Yes, your dog can sleep in the suit. The soft fabric helps your dog rest comfortably and reduces nighttime licking or scratching.
How often should you check the incision and suit?
Check the incision and suit twice daily—once in the morning and once in the evening. This routine helps you spot problems early.
What should you do if your dog can reach the wound?
Situation | Action |
|---|---|
Dog reaches wound | Switch to a hard cone |
Suit slips/twists | Adjust or replace suit |
Signs of infection | Call your veterinarian |
Always follow your vet’s protocol for safety.
