
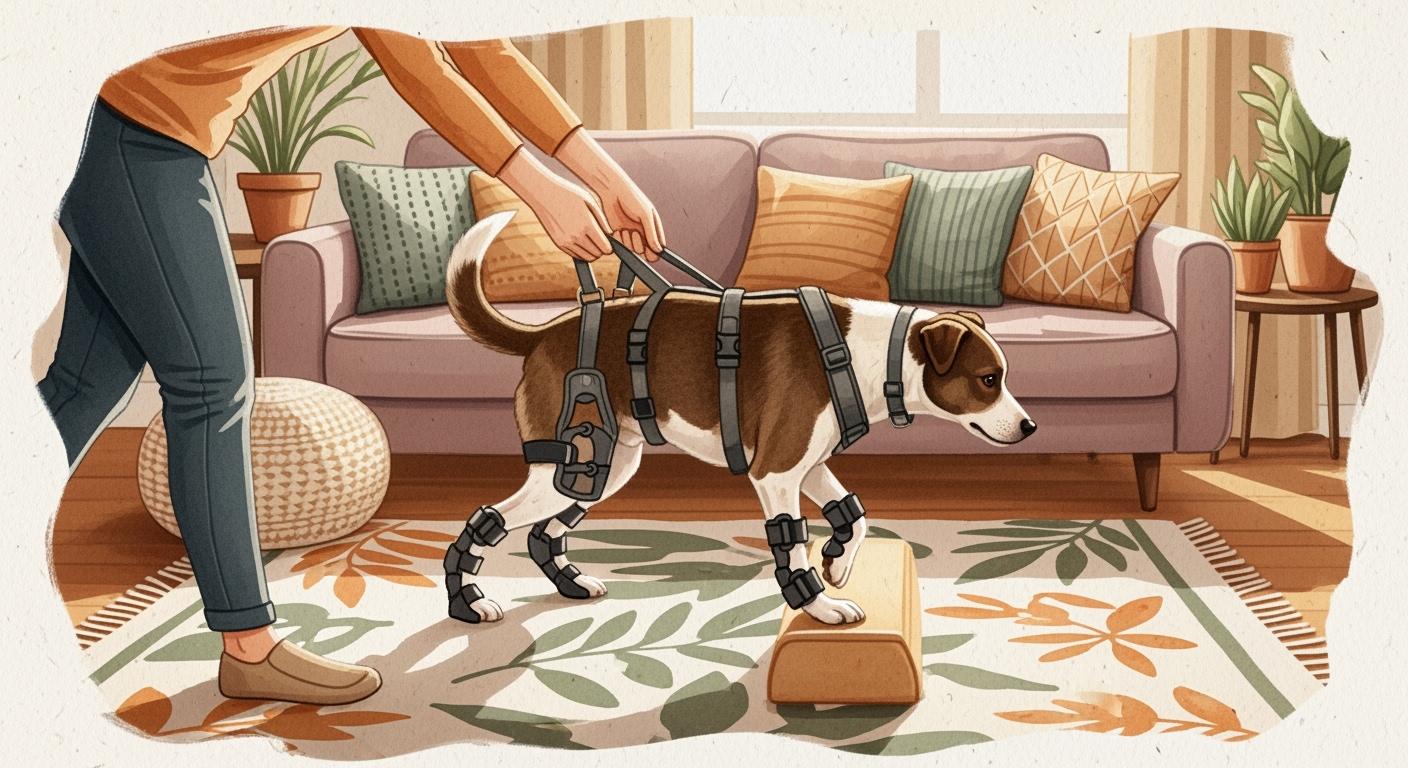
You want your dog to recover effectively at home. Utilizing braces and harnesses can assist in supporting your dog during their rehabilitation journey. These aids are beneficial in every step of the recovery process. Research indicates that braces can alleviate pain and provide the necessary support for improved mobility.
Dogs wearing knee braces show a 65% improvement in movement within eight weeks.
Experts recommend braces for managing knee pain and minor injuries.
Adhere to your dog rehab exercise schedule and maintain regular communication with your veterinarian for the best outcomes.
Key Takeaways
Use braces and harnesses to help your dog heal. They stop falls and lower pain. This helps your dog move better.
Always talk to your veterinarian before you start rehab exercises. The veterinarian will make a plan just for your dog. This keeps your dog safe and helps them get better.
Check your dog’s brace fit and skin often. Look for red spots or sore skin. This stops pain and helps your dog heal well.
Start Dog Rehab Exercise Schedule Safely
Assess Injury and Movement Limits
You need to know how your dog can move before rehab starts. After orthopedic surgery, your dog might hurt, lose muscle, or not use the leg that was fixed. These problems can make your dog walk unevenly or get new injuries. Your dog may also feel tired and sore at first. Watch for these signs and look for changes in how your dog walks or stands. Always use a brace or harness when you help your dog move or go for short walks. This support stops falls and lowers the chance of pressure sores. Take pictures or videos of your dog moving to show your vet at checkups.
Confirm Braces or Harnesses Are Needed
Your veterinary surgeon will decide if your dog should use a brace or harness. They check what kind of injury your dog has and how bad it is. Braces help with arthritis, sprains, strains, and joint deformities. Some bad injuries need surgery first, but mild or medium ones can use braces. The most important thing is that the brace fits well and gives good support. The brace should be tight but not slide or rub. For very small dogs or special cases, custom solutions might work best. You can learn how to measure your dog for a brace so your vet can make a good plan for rehab.
Veterinarians check:
What kind of injury and how bad it is
If the brace fits and supports well
If custom solutions are needed
Vet Check Before Home Rehab
You must talk to your veterinary surgeon before you start any gentle rehab at home. A certified veterinary professional will make a rehab plan that fits your dog’s needs. If you skip this step, you might use unsafe or useless methods. Your vet will check how your dog is doing at certain times:
Time Frame | Evaluation Focus |
|---|---|
2-week post-op | Check pain, healing, and early limb use |
4–6 week follow-up | Look at weight-bearing, walking, and movement |
8–12 week reassessment | See if your dog is ready for harder rehab or done |
Your vet may do a physical exam, strength tests, and nerve tests. They will also ask you about your dog’s behavior and movement at home. Bring your notes, photos, and brace fit records to every visit. Working together helps you follow the best rehab and keeps your dog safe.
Choosing Braces and Harnesses After TPLO Surgery
Match Gear to Surgery Type and Recovery Stage
You must pick the right gear for your dog’s rehab after tplo surgery. The kind of brace or harness you use depends on how far along your dog is in recovery. Your vet will tell you what is best. In the first weeks, your dog may need a rear-lift harness or a sling. These help your dog stand up and walk without falling. When your dog gets stronger, you can use a knee brace for more support. Always make sure the gear fits well and feels good for your dog. You can look at size guides and product lists to help you choose.
Tip: Try a rear-lift harness first to help your dog move. Later, use a knee brace when your dog is ready.
See our brace and harness size guide for more details.
Gear Type | Early Recovery | Mid Recovery | Late Recovery |
|---|---|---|---|
Rear-lift Harness | ✅ | ✅ | ❌ |
Knee Brace | ❌ | ✅ | ✅ |
Sling | ✅ | ❌ | ❌ |
Braces vs. Support Harness vs. Sling
You will need different gear for different parts of rehab after tplo surgery. Braces keep the knee joint steady and safe. This helps stop pain and keeps your dog from getting hurt again. Support harnesses hold up your dog’s body and spread out their weight. Slings are good for lifting dogs who cannot walk well or have trouble moving. They work best for short times.
Braces: Keep joints steady and protect healing spots.
Support Harnesses: Help your dog walk and move around.
Slings: Lift your dog and help with short walks.
Explore our product categories to find the right solution for your dog’s protocol.
When to Combine or Switch Devices
You might need to use more than one device as your dog gets better after tplo surgery. Start with a sling or harness if your dog needs lots of help. When your dog can stand on their own, try a knee brace. Always check your dog’s skin for red spots or rubbing. If you see any problems, fix the fit or ask your vet for help.
Note: Take pictures and write down how the gear fits for your vet visits.
Learn about pressure point prevention for braces to keep your dog safe.
Fit and Wear Check for Dog Braces
How to Check Fit and Comfort
You want your dog’s brace to fit well and feel comfortable. Start by making sure the brace matches your dog’s size and shape. A custom fit helps spread pressure evenly and keeps joints aligned. Begin with short wear sessions and slowly increase time as your dog adapts. Check the brace twice daily, especially during the first week. Look for signs like slipping, swelling, or redness. Bring photos and notes to your vet for regular checkups. Use diagrams to see correct angles and friction points.
Tip: Download our printable fit-check checklist to track daily comfort and fit.
Key Indicator | Description |
|---|---|
Custom Fit | Made from a cast or scan for even pressure. |
Gradual Introduction | Start with short sessions, increase as tolerated. |
Veterinary Oversight | Regular checks for skin and brace position. |
Owner Compliance | Daily monitoring and record keeping. |
Meaningful Improvements | Better mobility and comfort during rehab. |
Skin Safety and Pressure Points
You must protect your dog’s skin from irritation and pressure sores. Check under the brace before and after each wear. Look for redness, swelling, wet spots, or tender areas. Keep the skin clean and dry. Use soft bedding and change your dog’s position often.
Make sure the brace fits snugly but does not rub or pinch.
Monitor for slipping or bunching.
Ask your vet for advice if you see any skin changes.
See our guide on skin care and brace fit tips for more details.
Skin Check Checklist (Pre/Post Wear):
Skin is clean and dry
No redness or swelling
No wetness or open sores
Brace sits flat and does not slip
Dog moves comfortably
When to Adjust, Pad, or Pause Use
You need to adjust, pad, or pause brace use if you notice discomfort or skin problems. If the brace causes pain or limits movement, stop and consult your vet. Add padding to relieve pressure points. Pause use if you see any sores or swelling.
Discomfort or improper fit can lead to injury or delayed healing.
Regular checks help prevent problems and improve recovery.
Use diagrams to spot friction points and correct angles.
Download our fit and stop-signal checklist to reduce returns and keep your dog safe.
Recommended Gear Types:
Rear-lift harnesses, knee braces, and slings all support safe movement. Choose gear based on your dog’s recovery stage. For more information, see our skin care and brace fit tips.
Daily Dog Rehab Exercise Schedule Template
A set dog rehab exercise schedule helps your dog heal at home. You can use this template every day during weeks 3–6 of recovery. Always listen to your veterinarian and change the plan if needed. Braces and harnesses are important for each activity. They give support, keep your dog steady, and protect healing joints.
Walks, Standing, and Transfers with Support
Start each day with gentle range of motion exercises. These slow moves help your dog stay flexible and stop stiffness. Use a good brace or support harness when your dog stands or moves. This gear keeps your dog safe and stops slips or falls.
Morning Routine
Do passive range of motion exercises for 5–10 minutes. Move your dog’s joint slowly and gently. Make sure the brace fits well and does not rub. [See how to measure for a dog brace]
Take a short leash walk for 5 minutes on flat ground. Use a rear-lift harness or knee brace for safety. This helps your dog walk without hurting the healing joint.
After the walk, check the brace for red spots or sore skin. Add padding if you need to.
Tip: Walk your dog on a leash often instead of letting them roam. This keeps your dog safe and helps you watch their movement.
Transfers and Standing
When you help your dog stand or move rooms, always use a support harness or sling. This spreads out weight and protects weak legs.
Check the harness fit before you use it. Make sure straps do not twist or dig into the skin. [See pressure points and friction prevention for braces]
Light Strength and Balance Training
You can add easy strength and balance training as your dog gets better. These activities build muscle and help your dog move better without hurting joints.
Evening Routine
Do sit-to-stand exercises 5–10 times. Use a knee brace to keep the joint steady. Hold your dog with a harness if needed.
Walk up a small hill or ramp for 3–5 minutes. Always use a harness or brace for control. This helps your dog learn to walk on different surfaces safely.
Your rehab specialist may suggest swimming or underwater treadmill therapy. These give gentle exercise and help joints move without stress. Always use a flotation harness for water rehab.
Note: Watch your dog for signs of tiredness or pain. If you see limping, swelling, or your dog does not want to move, stop and call your vet.
Relaxation and Cold Therapy
Rest is just as important as exercise. Plan quiet time and cold therapy to lower swelling and help healing.
Midday Routine
Give a gentle massage or cold pack for 10 minutes if there is swelling. Take off the brace during cold therapy, then check the fit before putting it back on.
Let your dog rest in a crate or bed with little movement. Use a harness for bathroom breaks or short moves. This stops sudden moves that could hurt the healing joint.
Reminder: Always check your dog’s skin and brace fit after rest. Look for red spots, wetness, or pressure marks. [See skin care and brace fit tips]
Daily Log Template
Keep a daily log to track your dog’s progress and find problems early. This helps your vet change the dog rehab exercise schedule if needed.
Date | Activity | Brace/Harness Used | Skin Check | Notes/Concerns |
|---|---|---|---|---|
Download the full schedule and checklist to make tracking easy. Ask our team for help with picking, sizing, and fitting gear. Using the right gear lowers returns, helps you follow the plan, and keeps your dog comfy during recovery.
[Download Templates]
[Contact Us for Brace/Harness Sizing Help]
Progression in Post-Surgery Recovery
Phases from Protection to Strength
You help your dog recover in different steps after surgery. Each step has its own goals and activities. Your therapist and veterinarian tell you when to move to the next step. The table below shows the main steps and what your dog does in each one.
Phase | Duration | Key Activities | Gear Needed | Decision Rule |
|---|---|---|---|---|
Immediate Post-Op Care | Days 1–3 | Rest, pain control, ice packs, passive range of motion exercises | Soft brace, rear-lift harness | Move to next phase when pain is controlled and dog tolerates gentle movement |
Early Rehab Phase | Week 1–2 | Short leash walks, moist heat therapy, light massage, daily PROM exercises, cookie bends | Rear-lift harness, adjustable brace | Progress when dog bears weight and shows no new swelling or redness |
Strengthening Phase | Week 3–6 | Sit-to-stand, controlled stair climbing, hill walking, cavaletti poles, balance pad work | Custom knee brace, support harness | Advance when dog completes exercises without fatigue or pain |
Tip: Look at pictures or diagrams to check how the brace fits. This helps you see if there are any sore spots. [See walking after surgery: what to watch for]
Adjusting Braces and Activity by Phase
You change the brace and activities as your dog gets better. In the first days, use soft braces and harnesses to keep your dog safe. When your dog starts rehab, switch to adjustable braces for more support. Custom braces can help as your dog’s needs change. Add five more minutes to walks each week. Your therapist and veterinarian help you know when to change gear or do harder exercises. How fast your dog heals depends on age, weight, and fitness. Always check your dog’s skin before and after each session.
Note: Bring photos and your daily notes to every checkup. This helps your therapist see how your dog is doing and change the plan if needed.
Tracking Progress and Setbacks
You keep track of your dog’s rehab by writing in a journal every day. Write down small wins, like better walking or less pain. Record how far your dog can move their leg during exercises. Measure your dog’s knee and take a photo of the cut every week. Watch for pain, swelling, or tiredness. If your dog has problems, stop and call your vet or therapist. Keeping good records helps you and your rehab team make safe choices for your dog.
Write down daily activity and comfort.
Record how well your dog puts weight on the leg and moves it.
Take a photo each week to show healing.
Watch for changes in skin or how the brace fits.
Download our tracking sheets and ask for help picking products. This can help you return less gear and follow the plan better.
When to Change, Pause, or Stop Braces
Signs of Overuse or Skin Issues
You need to watch your dog closely during rehabilitation. Many dogs experience skin irritation or minor sores when using braces. You may notice redness, swelling, or your dog licking the area under the brace. Sometimes, the brace may slip or cause discomfort. If you see these signs, adjust the fit or add padding. Most issues improve with rest or small changes.
Stop-Signal Checklist:
Limping after rest
Intermittent skipping
Reluctance to jump or climb
Sideways sitting
Popping or clicking sounds
Knee swelling
Muscle loss in the leg
Shorter strides or bunny hopping
Stiffness after rest
Sensitivity to touch
Increased skipping
No improvement with light support
If you check any of these, pause brace use and review fit. Use diagrams or photos to help spot friction points.
When to Contact Your Vet
You should call your vet if your dog shows fatigue, soreness, or sudden limping. Watch for swelling, warmth, or a bad smell near the incision. These can mean infection or a problem with healing. If your dog will not put weight on the leg after two weeks, seek help. Your vet may want to see your daily log and photos. For more details, see our guides on skin care and walking after surgery.
Tip: Always consult your vet if you see warning signs. Early action helps prevent bigger problems.
Using a Daily Log for Safety
Keep a daily log of your dog’s activities, brace use, and skin checks. Write down any changes in movement or comfort. Bring your notes and photos to every checkup. This helps your vet adjust the plan and keeps your dog safe. Download our stop-signal checklist and log template to make tracking easy.
Scenario Examples for Rehab with Braces
Bathroom Breaks and Hallways
You help your dog with braces move safely during bathroom breaks and hallway walks. Use a short leash and a support harness to control speed and direction. This prevents jumping or slipping on smooth floors. Stick to a strict potty schedule. Take your dog out at the same times each day and guide them to the same spot. Supervise your dog every time they leave their crate or bed. Keep bathroom breaks brief and focused on elimination, not exercise. Walk slowly and let your dog set a comfortable pace. Always check the brace fit before and after each trip. Watch for redness or pressure marks.
Checklist for Safe Bathroom Breaks:
Use a short leash and harness
Maintain close control
Keep breaks brief
Check brace fit and skin after each trip
Stairs and Car Rides
You support your dog with braces when using stairs or getting into the car. Choose a full-body harness for these tasks. Make sure the harness fits well and does not cause discomfort. Hold the harness securely and guide your dog up or down each step. For car rides, lift your dog gently and avoid twisting movements. Monitor for signs of strain or pressure spots after each use. Lightweight and waterproof harnesses work best for outdoor conditions. Always check the brace and harness for proper fit before starting.
Tip: Review our guide on assisting your dog on stairs or in the car for step-by-step instructions.
Vet Visits and Outings
You prepare your dog for vet visits or short outings by using a brace and harness. Bring your daily log and photos to show your vet progress. Use a support harness to help your dog walk safely in busy or unfamiliar places. Check the brace fit before leaving home and after returning. Watch for signs of fatigue or discomfort. If you notice any skin issues or changes in movement, pause activity and consult your vet. Download our templates to track outings and brace use.
Reminder: Always prioritize safety and comfort. Proper gear and fit checks reduce the risk of injury and help your dog recover smoothly.
Cleaning and Maintaining Rehab Gear for Dogs
Cleaning Routines for Braces and Harnesses
You need to clean your dog’s braces and harnesses often. This stops germs and bad smells from building up. Dirt and body fluids can collect fast when your dog is healing. Here are some easy cleaning steps:
Put the brace in warm water with laundry soap for five minutes.
Rub the brace gently to get rid of dirt.
Rinse the brace well with warm water.
Let the brace air dry all the way before using it again.
For harnesses, blot stains first, then soak in a bucket of warm water with gentle soap. Swish the harness softly, rinse it well, and let it air dry. If there is a strong smell, try a vinegar soak or baking soda paste. You can also use pet-safe cleaners made for smells.
Tip: Always read the instructions from the company that made your gear. For more help, check our full guide to brace care and maintenance.
Rotating and Inspecting Gear
You should switch and check your dog’s gear often. This helps you find problems before they get worse. Make sure each brace and harness fits right and works for your dog’s needs. Change out any gear that is old or broken to keep your dog safe.
Item Type | Recommended Cleaning Frequency |
|---|---|
Braces/Harnesses | Weekly or after heavy use |
Collars/Leashes | After outdoor play |
Dog Bed | Weekly |
Note: Bring pictures of how the gear fits and looks to your vet visits.
Preventing Skin Irritation and Odor
Cleaning your dog’s gear often keeps bacteria and smells away. Wash your dog’s harness at least once a month. For strong odors, soak the gear in a mix of hydrogen peroxide, baking soda, and dish soap for 20–30 minutes, then rinse and let it air dry. This helps your dog’s skin stay healthy and lowers the chance of sore spots.
Gear Cleaning Checklist:
Soak and wash braces/harnesses every week
Rinse and air dry after each wash
Check for damage, fit, and pressure spots
Switch gear if you can
Use pet-safe cleaners to stop bad smells
See our guide on pressure points and friction prevention for braces.
You can support your dog’s recovery by following these steps:
Schedule follow-up vet visits for exams and X-rays.
Begin gentle walks with braces or harnesses after week 4, only with vet approval.
Monitor pain and check the surgical site daily.
Download our rehab schedule and fit checklists. Explore more tips and gear options for safe recovery.
FAQ
How often should you check your dog’s brace fit?
You should check the brace fit twice daily. Look for redness, swelling, or slipping. Take photos and bring them to your vet for review.
What should you do if your dog resists wearing a harness or brace?
Start with short sessions. Use treats and praise. Check for pinching or rubbing. Adjust the fit. Ask your vet for advice if problems continue.
Can your dog sleep with a brace or harness on?
Most dogs should not sleep with braces or harnesses. Remove gear at night. Check skin for pressure marks. Ask your vet about exceptions.
