
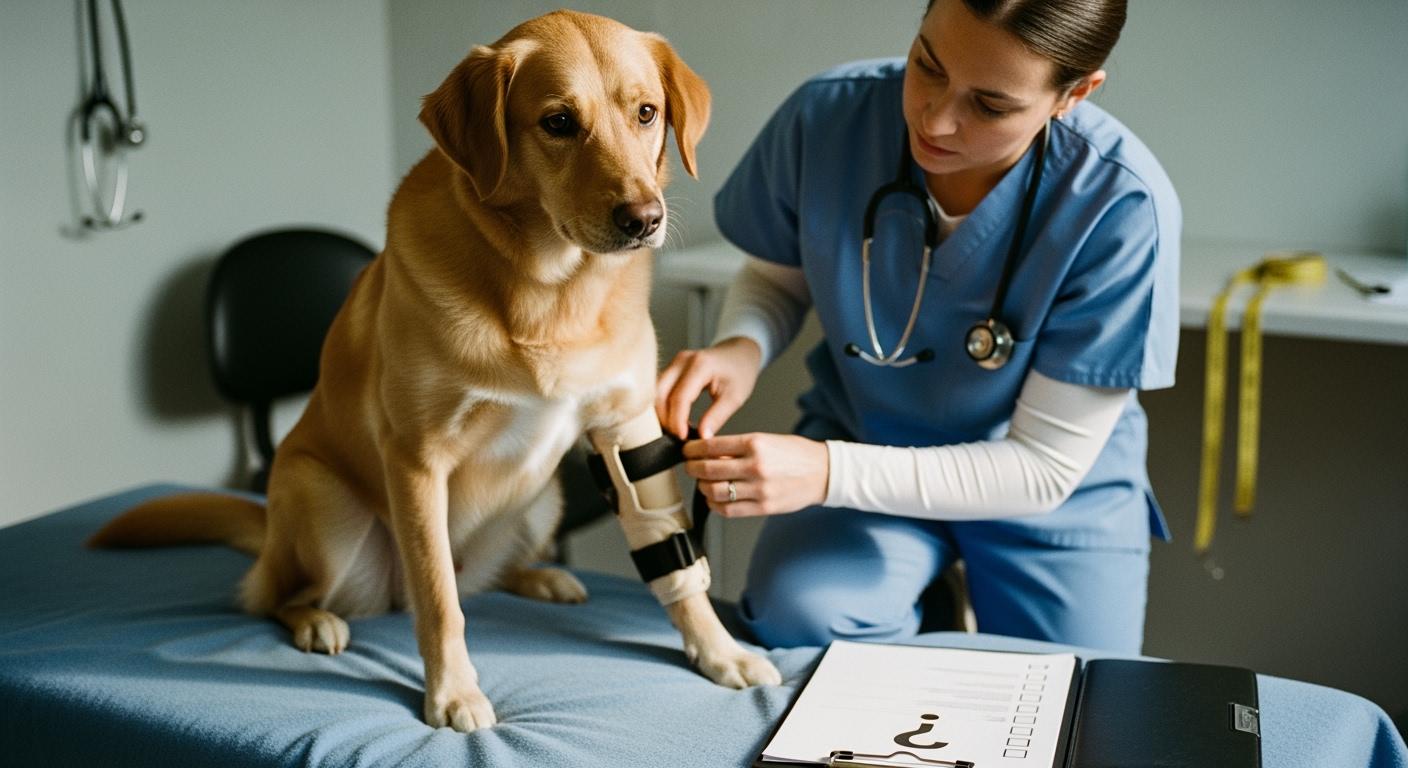
A custom dog knee brace is molded to a leg at a single point in time. The leg changes. Swelling drops. Muscle atrophies. The shell does not follow. That gap between a static mold and a dynamic leg is where most custom braces fail.
The failure is not always dramatic. Often it starts small: the brace drifts half an inch down the thigh during a walk. A strap leaves a mark that does not fade within ten minutes of removal. The dog hesitates before the third step instead of the first. Each of these is a signal that the shell-to-leg relationship has shifted, and every day that shift goes uncorrected, the brace trades support for skin stress.
This article walks through the specific ways a custom dog knee brace loses contact quality over time, which design details make the difference between a brace that adapts to change and one that fights it, and how to read the early signals before they become sores or refusal.
Where a Custom Knee Brace Fails First
Three failure patterns show up most often in the first week of wear. They share a root cause: the leg the brace was molded to is not the leg the brace is now on.
Slipping down the leg
The brace slides because gravity and motion exploit the gap between the shell’s inner contour and the leg’s outer surface. When swelling drops after the initial fitting — common with any inflammatory knee condition — the thigh circumference can decrease enough that the upper cuff loses its mechanical lock against the quadriceps group. The brace then relies entirely on strap friction to hold position. Strap friction alone is not enough.
After ten minutes of walking, check whether the top edge of the brace has drifted more than half an inch below its starting position. If it has, the suspension system is no longer doing its job and strap retensioning alone will not fix it — the shell-to-leg gap needs to be addressed with fit adjustments or padding redistribution.
Rotating off the knee joint
Rotation is a harder problem to spot than slipping because the brace can look correctly positioned from the side while the hinge has migrated laterally away from the joint line. The mechanism is straightforward: the canine stifle does not move in a pure sagittal plane. There is a rotational component to every step — internal rotation during flexion, external during extension. A hinge that is even slightly offset from the true joint axis converts that natural rotation into a twisting force on the shell. The shell twists. The leg inside it does not.
The result is a torque path that travels from the hinge, through the shell wall, into the strap anchors, and ultimately into the skin at the strap edges. What the owner sees is the brace “rotating outward.” What is actually happening is the hinge axis and the joint axis are fighting each other, and the soft tissue at the strap line is losing.
This is why rotation and slipping tend to appear together in braces with shallow shell contours. A deeper shell that wraps further around the leg provides a longer lever arm to resist the twist, reducing the load that reaches the strap edges.
Pressure marks, rubbing, and edge irritation
Hard shell edges, thin padding that bottoms out under strap tension, and seams placed over bony prominences create concentrated pressure. This is not a comfort problem — it is a contact-area problem. The force that a strap applies does not change. Distributing that force over two square inches of padding versus half a square inch of edge is the difference between tolerable pressure and tissue damage.
Flip the lining edge back after removal and press a dry fingertip against the skin under the areas that felt tightest. Dampness means the lining is trapping moisture — breathability is insufficient for this dog’s activity level and coat density. A red line that stays visible more than ten minutes after brace removal means edge pressure exceeded capillary refill pressure while the brace was on. Both signals mean the contact zone design needs adjustment, not just the strap tension.
| What you see | Why it may happen | Product design factor | What to do next |
|---|---|---|---|
| Brace slips down | Thigh contour changed, strap path loose | Shaped upper cuff, anti-slip lining | Check suspension, refit straps |
| Brace rotates outward | Hinge axis off joint line, shallow shell | Deeper contour, hinge alignment | Balance strap tension, check shell contact |
| Red line under an edge | Edge too hard, padding compressed | Rolled edge, replaceable padding | Add padding, loosen straps |
| Dog freezes or chews | Poor tolerance, pressure point pain | Lighter shell, smoother lining contact | Shorten wear time, check for hot spots |
| Strap marks linger after removal | Strap tension concentrated at edge | Pressure-distributing shell bridges | Loosen straps, redistribute with padding |
| Dog walks worse with brace | Joint misalignment, pain, wrong angle | Shell shape, hinge-to-joint match | Remove brace, seek professional evaluation |
In practice: A dog that walks worse with the brace on is giving you the clearest signal there is. Do not override it. Remove the brace. The problem is not the dog’s tolerance — it is the brace-to-leg interface, and continuing wear will not improve it.
The Design Details That Make or Break Daily Fit
Fit failure is rarely about one thing going wrong. It is about design choices that interact under load in ways that are hard to predict from a static casting.
Shell shape determines whether the brace tracks or drifts
A shell that closely follows the natural taper of the canine thigh and the flare of the tibial crest creates a mechanical lock that resists both downward slip and rotational drift. When the shell contour is too generic — too straight, too shallow, too symmetrical — it depends on strap cinching to hold position. Strap cinching creates a ring of pressure. A ring of pressure is what the dog feels as discomfort. The shell should do the locating; the straps should do the securing. When the straps do both, they fail at both.
This distinction matters especially as the leg changes shape. A shell that relies on precise contour matching from the start has no reserve when swelling drops. Orthopedic knee brace designs that build in adjustment range at the shell level — through modular padding, removable liners, or multi-point strap paths — can adapt to leg shape changes without losing joint alignment. A shell with no adjustment strategy starts losing contact the moment the leg changes.
Strap angle decides whether tension stabilizes or concentrates
Most custom knee braces use two to four straps. The angle at which each strap crosses the leg determines how the tension force resolves. A strap set perpendicular to the leg axis resists downward slip but does nothing against rotation. A strap set at a diagonal — crossing the thigh at roughly 30 to 45 degrees from horizontal — creates a force vector with both vertical and rotational components, resisting slip and twist simultaneously.
Narrow straps amplify a different problem. Under side loading, a narrow strap has almost no anti-rotation surface. The force concentrates at the inner and outer edges. Those edges roll. The rolling shifts the strap’s effective anchor point a few millimeters. A few millimeters at the strap becomes half an inch at the shell. The brace migrates. Hinge-based braces with wider, angled strap beds spread that side-load across a broader contact patch, making edge rolling less likely and migration slower.
Padding, edge finish, and the moisture problem
Padding serves two functions that are in tension with each other: it must cushion against pressure points, and it must not retain moisture. Closed-cell foams resist moisture but conform poorly to surface contours, creating gaps under the shell that concentrate force at the few contact points. Open-cell foams conform well but absorb moisture, and wet padding loses both thickness and resilience — a pad that is four millimeters thick when dry can compress to less than two when saturated, doubling the effective pressure on the skin underneath.
Replaceable padding is not a convenience feature. It is a wear component. Once the foam cells collapse from repeated compression and moisture cycling, the pad is functionally thinner than its measured thickness. Check by pressing a fingernail into the padding surface after a week of use — if the indent does not rebound within three seconds, the foam structure is fatigued and the pad is no longer distributing pressure as designed.
Edge finish matters for the same reason. A raw-cut edge creates a linear pressure line. A rolled or beveled edge distributes the same force over a wider contact band. The force has not changed. The area absorbing it has. That is the entire difference between a red line and no mark at all.
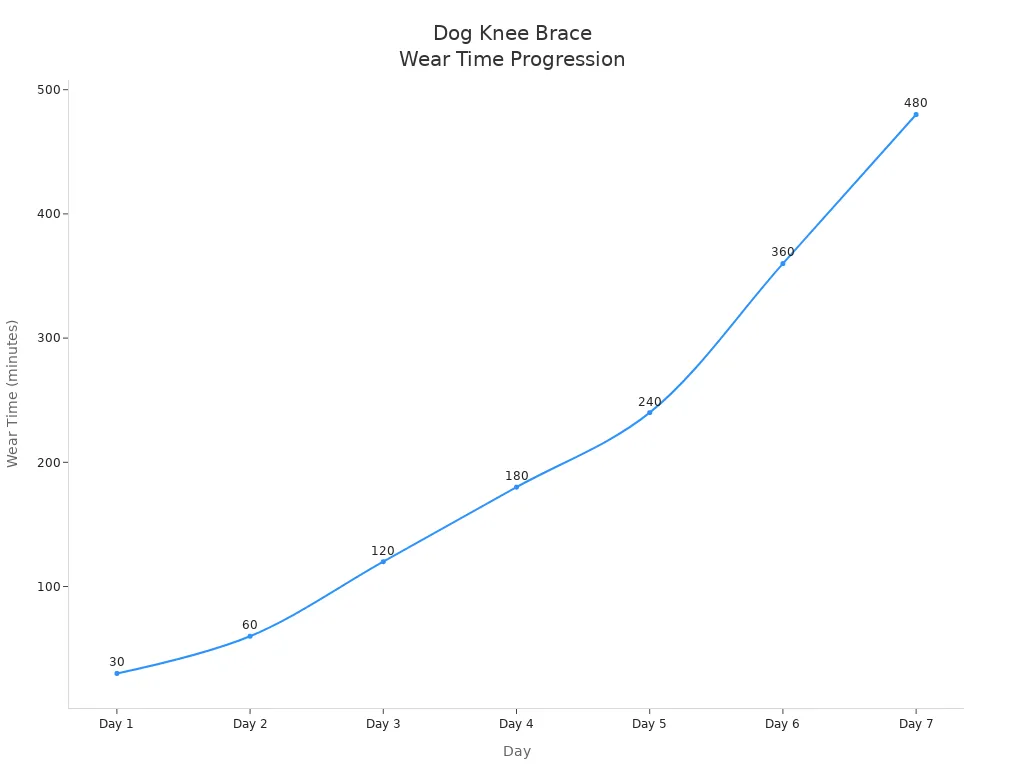
Break-in: the first week as a diagnostic period
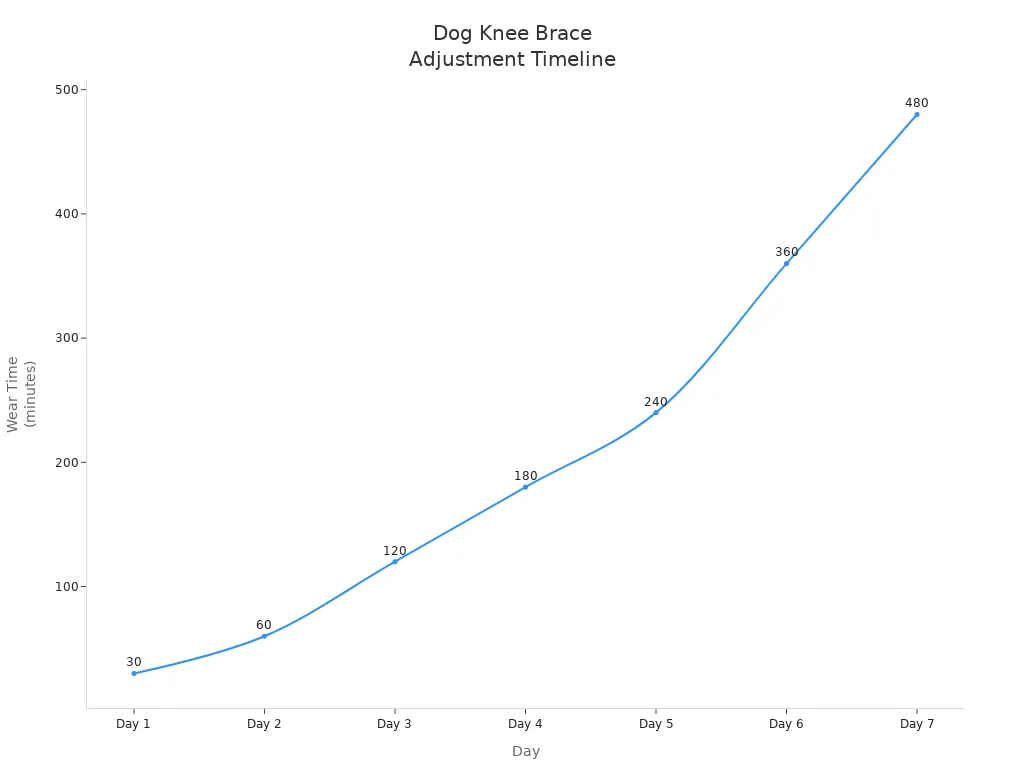
The first week is not about conditioning the dog to the brace. It is about letting the brace reveal where it does not fit. Short, supervised sessions with skin checks between each one turn the break-in period into a diagnostic tool. The schedule below is a starting point, not a prescription — some dogs tolerate three hours on day three without a mark, others show red lines at thirty minutes on day one. The skin is the scorecard.
| Day | Wear Time (per session) | Frequency per day |
|---|---|---|
| 1 | 30 mins | 2-3 times |
| 2 | 1 hour | 2-3 times |
| 3 | 2 hours | 2-3 times |
| 4 | 3 hours | 2-3 times |
| 5 | 4 hours | 2 times |
| 6 | 6 hours | 1 time |
| 7 | 8 hours | 1 time |
| Continue up to 12 hours a day | Off at night while sleeping |
What you are watching for: redness that does not clear within ten minutes of removal, strap marks with defined edges rather than diffuse fading, heat at any contact point, and any behavior shift — hesitation, freezing, turning to mouth the brace. Each is data about the shell-to-leg interface, not a judgment on the dog’s cooperativeness.
For dogs that freeze or refuse to move in the brace, the impulse is to shorten sessions further. Sometimes that works. Sometimes the problem is not duration but design: a custom brace that is too rigid or covers too much surface area for a sensitive dog may trigger refusal regardless of wear time. A lighter shell or a design with more open areas can shift tolerance dramatically without reducing knee support.
When a Custom Knee Brace Is Not the Answer
Custom does not mean universal. There are specific conditions where a custom-molded knee brace either adds no value or creates problems that a different approach would avoid.
A custom brace depends on a stable leg contour. Dogs in active muscle-wasting phases — particularly in the first four to six weeks after a complete CCL tear with non-weight-bearing lameness — can lose enough quadriceps mass that the shell no longer has a surface to index against. The brace was molded to a leg with muscle. It is now on a leg without it. No amount of strap adjustment can close a volumetric gap that large. In these cases, a brace that was molded after the atrophy stabilized tends to be more consistent in day-to-day fit than one rushed into production at peak swelling or pre-atrophy.
Skin integrity is another hard boundary. Dogs with existing wounds, surgical incisions that have not fully closed, or chronic dermatitis in the brace contact zone should not wear a rigid shell until those surfaces are intact. The brace creates a warm, low-airflow environment directly against the skin — ideal conditions for bacterial overgrowth on compromised tissue. Knee support solutions that rely on softer, more breathable materials may be a safer bridge during the wound-healing phase, with a rigid custom brace introduced later once the skin barrier is restored.
Behavior is not a disqualifier, but it is a predictor. A dog that panics at the sensation of rigid constraint — not just hesitation, but thrashing, bolting, or stress panting — will not habituate through extended wear. The custom brace becomes a source of injury risk rather than support. Soft support options or activity restriction alone may be the more appropriate path.
Disclaimer: This fit assessment framework assumes a short-coated dog where skin changes are visible at a glance. Double-coated breeds and dogs with heavy skin folds around the stifle can show subtler pressure marks that require hand-palpation rather than visual inspection alone. If the dog’s leg conformation is atypical for their breed — particularly dogs with angular limb deformities or a very deep chest relative to hindquarter width — the edge-contact and strap-tension checks described here may not catch every pressure point, and a professional fit evaluation is the safer course.
Custom knee braces also have a practical lifespan that is often shorter than owners expect. The shell material itself may hold up for years, but the fit relevance degrades as the dog’s leg changes — from recovery, from aging, from weight fluctuation, from the other-leg compensation that builds muscle unevenly. A brace that fit perfectly at month one may create pressure points by month four. Knee brace designs that build in modular padding systems and multi-point strap configurations can extend that useful window, because the adjustment lives in the brace rather than requiring a new cast.
FAQ
How often should you check fit after the first week?
After the break-in period, check once daily — after a walk, not before. Fit problems show up under load. A brace that looks perfect on a standing dog can drift within minutes of movement. Run through the three checks: measure slip distance from the starting edge line, look for strap marks that do not fade within ten minutes, and palpate the skin under every edge and strap crossing for heat or tenderness.
Can the brace be worn overnight?
Not unless specifically instructed by the veterinarian managing the case. Overnight wear removes the owner’s ability to monitor skin and behavior. It also keeps the leg in a fixed position for hours without movement-driven circulation, which can mask pressure problems until significant tissue irritation has already developed. Remove the brace at night and let the skin fully air-dry before the next session.
What is the first thing to adjust when the brace starts slipping?
Check strap sequence before strap tension. Many braces require a specific tightening order — typically the lowest strap first, working upward — and reversing that order changes how the shell seats against the leg. If the sequence is correct and slipping continues, the issue is likely shell-to-leg volume mismatch, not strap tightness. Adding a padding shim to close the gap is usually more effective than cranking straps harder.
When does a custom brace need to be replaced rather than adjusted?
When the shell itself can no longer make consistent contact across more than half of its inner surface, or when hinge alignment has shifted more than can be corrected through strap and padding adjustments. A brace that requires daily retensioning to maintain position has exceeded what adjustments can compensate for — the leg it was built for no longer exists, and a re-cast is the more appropriate step.
