
You can stop chafing in your dog by doing three easy things every walk. Use the two-finger fit rule to see if the straps are too tight. Make sure the harness gives enough space under the armpits. Check your dog’s skin after each walk. These steps help you find early signs of dog harness chafing and stop chafing before it hurts your dog. Checking every day keeps your dog comfy, lowers sore spots, and keeps their skin safe.
Key Takeaways
Use the two-finger rule to check harness fit. This ensures it is snug but not too tight, preventing chafing.
Always check your dog’s skin after walks. Look for redness or irritation in areas where the harness touches.
Adjust harness straps to keep them clear of sensitive areas like armpits. This helps reduce the risk of discomfort.
Choose a harness with soft padding and breathable materials. This keeps your dog comfortable and lowers chafing risk.
Monitor your dog’s behavior for signs of discomfort. If you notice excessive scratching or reluctance to walk, reassess the harness fit.
Dog harness chafing: what to look for and why it happens
Common friction zones on dogs
You need to know where your dog is most likely to get sore from a harness. The most common friction zones include:
Under the armpits, especially behind the front legs
Along the chest and breastbone
Around the shoulders
Where the harness straps touch the skin
You may see redness or irritation in these areas. Sometimes, you will notice hair loss or bald spots where the harness sits. Your dog might lick or scratch near these spots. Movement problems, like limping or slowing down, can also show discomfort. Spotting the signs of chafing early helps you prevent bigger problems.
Moisture, movement, and chafing risk
Moisture and movement make dog chafing more likely. Hot or humid weather causes sweat to build up under the harness. Rain or swimming can leave your dog’s skin damp. Wet skin gets soft and rubs more easily. When your dog moves, the harness can slide and create friction. Ill-fitting harnesses, long walks, or materials that do not breathe can make things worse. You should always dry your dog and the harness after getting wet. Only use the harness during walks to lower the risk of harness chafing.
Early signs vs. serious dog chafing
You can catch dog chafing early if you know what to look for. Early signs include:
Red marks or mild irritation at contact points
Excessive scratching or licking
Pawing at the harness
Reluctance to walk or sudden stops
Serious chafing looks worse. You may see open sores, bleeding, or swelling. Your dog might cough or have trouble breathing if the harness is too tight. If you see these signs, remove the harness and call your vet. Checking your dog’s skin after every walk keeps them safe and comfortable.
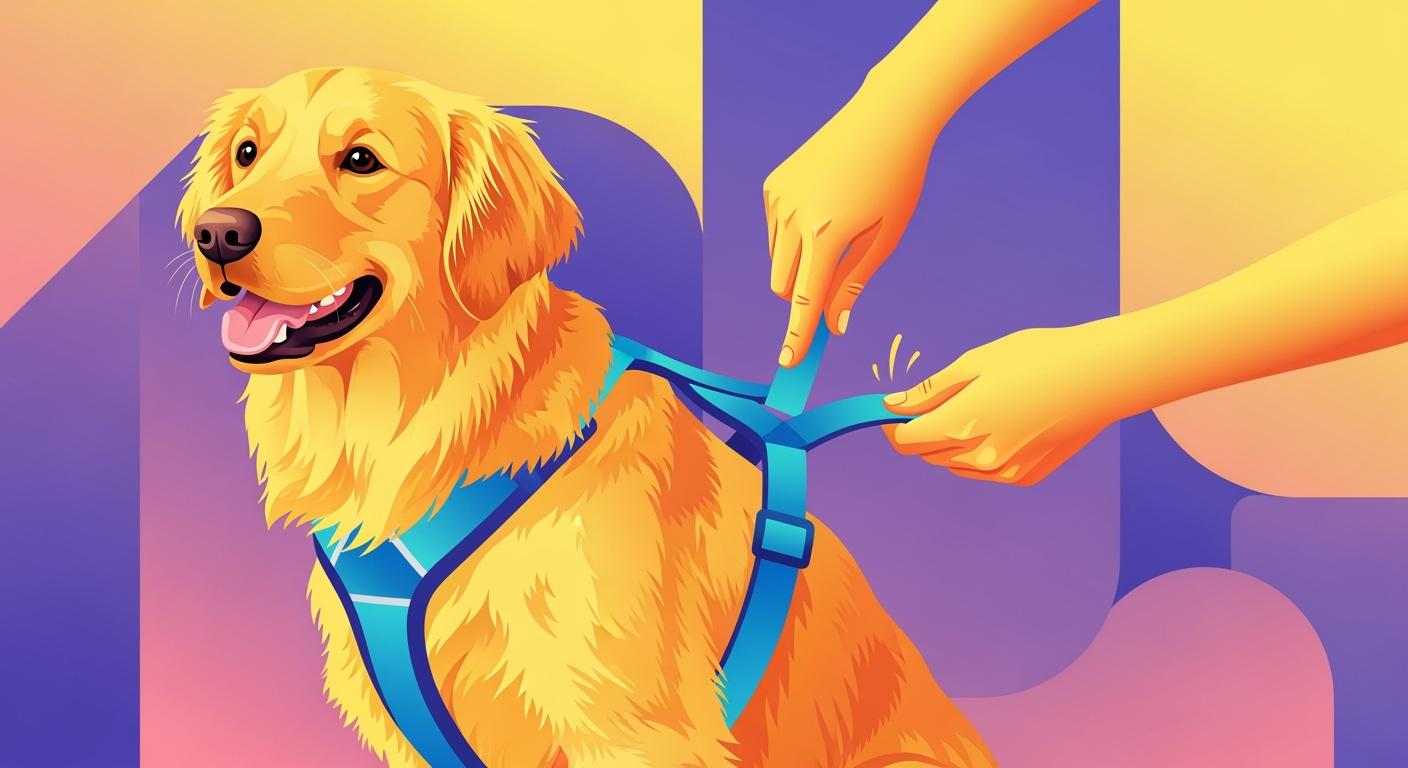
How to fit a harness to prevent chafing
Fitting your dog’s harness the right way keeps their skin safe and comfortable. You can prevent dog harness chafing by following a few simple steps every time you measure your dog for a harness or check your harness fit. Use these steps for both adult dogs and when you fit a puppy harness. A properly fitted harness helps your dog move freely and lowers the risk of sore spots.
The two-finger rule at key points
The two-finger rule is the gold standard for a proper dog harness fit. You should always use this rule when you measure your dog for a harness and after you put the harness on. Here’s how you do it:
Slide two fingers between the harness strap and your dog’s body.
The fit should feel snug but not tight. Your fingers should move easily, but there should not be extra space.
Test this at three main spots: behind the front legs, across the chest, and under the belly strap if your harness has one.
Tip: Always use the two-finger rule when you fit a puppy harness. Puppies grow fast, so check the fit weekly.
Proper strap placement and armpit clearance
Strap placement matters as much as tightness. You want to keep straps away from sensitive areas, especially the armpits. Follow these placement tips for a proper dog harness fit:
Measurement Type | Instructions |
|---|---|
Belly Strap | Measure around the widest part of the belly, just behind the rib cage. The tape should be snug. |
Back Strap | Should fit snugly with about two fingers’ width of space between the strap and the dog’s body. |
Inner Leg Distance | Measure between the base of the front legs, allowing about two fingers’ width of space. |
Chest Girth | Measure around the widest part of the chest, ensuring the tape is snug but not tight. |
Chest Depth | Measure from the base of the neck to the sternum to ensure proper harness depth. |
Make sure the chest strap sits on the breastbone, not the throat.
The belly and girth straps should stay clear of the armpits.
Adjust all straps so they do not press into the skin or shift during movement.
Note: If you see redness, hair loss, or your dog moves differently, check the strap placement and adjust for more clearance.
Spotting harness twisting or shifting
A harness that twists or shifts can cause rubbing and discomfort. You can spot problems early by watching your dog move and checking the harness after walks.
Look for straps that slide into the armpit area or twist around the body.
Check for uneven pressure or bunching of the harness material.
Watch for signs like scratching, licking, or reluctance to walk.
If you notice any of these issues, adjust the straps for a better fit. Use the two-finger rule again to make sure the harness is not too loose or too tight.
Step-by-Step: How to fit a harness and check for chafing
Step 1: Measure your dog for a harness
Use a soft tape measure.
Measure around the widest part of the chest, just behind the front legs (girth).
Write down the measurement and compare it to the brand’s size chart before you buy. This is called measuring before you buy.
Step 2: Select the right fit
Choose the size that matches your dog’s girth.
If your dog is between sizes, pick the larger one for more comfort.
Step 3: Put on the harness and adjust
Place the harness on your dog.
Adjust each strap so you can slide two fingers between the strap and your dog’s body.
Make sure straps do not touch the armpits or throat.
Step 4: Check your harness fit
Watch your dog walk and move.
Look for twisting, shifting, or bunching.
Re-adjust if needed.
Step 5: Perform a post-walk skin check
After every walk, remove the harness.
Check the skin under the armpits, chest, and belly for redness or hair loss.
If you see any irritation, pause harness use and let the skin heal.
Printable Quick Checklist for Proper Dog Harness Fit
Measure your dog for a harness before buying.
Use the two-finger rule at all contact points.
Keep straps clear of armpits and throat.
Adjust for even pressure and no twisting.
Check your harness fit after every walk.
Perform a post-walk skin check for early signs of chafing.
Re-check fit weekly for puppies or after weight changes.
A properly fitted harness means fewer sore spots, better comfort for seniors and post-op dogs, and a lower risk of dog harness chafing. Always use these steps to fit a puppy harness or adjust an adult harness. If you see raw skin, swelling, or pain, stop using the harness and call your vet.
Daily routine for preventing dog chafing
Post-walk skin checks: what and where
You should check your dog’s skin every time you remove the harness after a walk. This habit helps you spot early signs of harness chafing before it becomes a problem. Focus on the areas where the harness touches your dog’s body. These include under the armpits, around the chest, behind the front legs, and under any belly straps. Look for redness, hair loss, or small sores. If you see any of these signs, give your dog a break from the harness and let the skin heal.
Step-by-step post-walk skin check:
Remove the harness gently.
Use your hands to part the fur and look at the skin in contact zones.
Feel for any bumps, heat, or wet spots.
Check both sides of the body and under the belly.
If you notice irritation, pause harness use and monitor the area.
Tip: Daily checks help you catch problems early and keep your dog comfortable.
Cleaning, drying, and grooming tips
Keeping your dog clean and well-groomed lowers the risk of harness chafing. Dirt, debris, and matted fur can make rubbing worse.
Brush your dog’s coat regularly to remove loose hair and prevent mats.
Wipe down your dog’s body after walks, especially if they get wet or muddy.
Dry your dog and the harness before putting it back on.
Wash the harness as needed to remove dirt and bacteria.
Regular grooming keeps your dog’s coat healthy and reduces the risk of irritation from harness chafing.
When to remove the harness at home
You should remove the harness when your dog is indoors and not walking. This gives the skin time to breathe and recover. Leaving the harness on for long periods increases the risk of sore spots, especially for dogs with sensitive skin or short coats. Always take off the harness if you see any redness or discomfort.
Photograph and track skin changes
Take clear photos if you notice any changes in your dog’s skin. Use your phone to document redness, swelling, or hair loss. Keep a simple log with dates and notes. Tracking changes helps you decide if home care works or if you need to call your vet. This routine supports early action and better comfort for your dog.
Harness features for adjusting for comfort
Padding and edge protection
Picking a harness with soft padding helps stop dog harness chafing. Padding keeps your dog’s skin safe from rubbing in spots that get sore. Many vets say these padding types work well:
Type of Padding | Material |
|---|---|
Faux Fleece | Soft synthetic |
Leather Padding | Durable leather |
Real Sheepskin Padding | Natural wool |
Soft padding makes the straps gentle and spreads out pressure. Smooth edges stop sharp lines from hurting the skin. If your harness does not have enough padding, you can add more or use strap wraps. This helps protect sensitive spots, especially for older dogs or those with short coats.
Breathable materials and moisture control
Harnesses with breathable materials help keep your dog dry. These materials pull moisture away from the skin. Your dog stays cooler and less sweaty, even when it is hot. Sandwich mesh harnesses let more air move around your dog’s body. The design uses yarn pillars and foam channels to make an air gap. This lets heat and moisture leave, which lowers skin irritation and chafing. Always dry the harness after walks to keep your dog’s skin healthy.
Tip: Pick harnesses with moisture-wicking fabric for better comfort on long walks or in hot weather.
Multiple adjustment points
A good harness has many places you can adjust. You can change the fit around the chest, belly, and neck. This helps you get a snug fit without making it too tight. Multiple adjustments also help you avoid pressure on sensitive spots. If your dog gains or loses weight, you can change the harness easily. Always check the fit after grooming or as your dog grows. A harness that fits well means fewer sore spots and less discomfort.
Comparison table: harness styles and chafing risk
Table: style, use case, rub points, fit risks, tips
You can lower the risk of dog harness chafing by choosing the right style for your dog’s needs. Use this table to compare common harness types, where they may rub, and how to fix fit mistakes. This helps you spot problems early and keep your dog comfortable.
Harness Type | Best For | Common Chafe Zones | Fit Mistakes | Fix |
|---|---|---|---|---|
Y-front | Active walks, daily use | Armpits, chest | Straps too close to armpits | Adjust for clearance, check weekly |
H-front | Everyday, easy on/off | Shoulders, behind elbows | Chest strap too high/low | Align on breastbone, use two-finger rule |
Step-in | Quick trips, calm dogs | Underarms, belly | Too loose, shifts easily | Tighten straps, check after walks |
Vest | Small breeds, seniors | Sides, under chest | Over-padding, poor airflow | Choose breathable fabric, dry fully |
Support | Mobility, post-op care | Belly, groin, chest | Too tight, uneven pressure | Adjust evenly, monitor skin daily |
Tip: Always inspect contact points after walks. Adjust the harness as your dog grows or changes weight. Regular grooming helps prevent irritation.
Examples: Y-front, H-front, step-in, vest, support harness
Each harness style fits a different need. You can prevent chafing by matching the harness to your dog’s activity and body shape.
Y-front: Good for active dogs. Keeps pressure off the throat. Watch for rubbing near the armpits. Adjust for clearance.
H-front: Works for most dogs. Easy to put on. Make sure the chest strap sits on the breastbone, not the neck.
Step-in: Simple for calm dogs. Can shift if too loose. Check fit after each walk.
Vest: Best for small breeds or seniors. Soft and padded. Pick a vest with breathable material to avoid moisture buildup.
Support: Helps dogs with mobility issues or after surgery. Needs careful adjustment. Monitor skin daily for any signs of rubbing.
You may need to try a new harness if your dog keeps getting sore spots. Choosing the right style can mean fewer problems and better comfort, especially for seniors or dogs recovering from surgery. If you see redness or sores that do not improve, pause harness use and call your vet.
Inspect contact points often.
Adjust fit as your dog grows.
Keep your dog’s coat clean.
Soothe irritated skin with vet-approved creams.
Limit harness wear time.
Ask your vet about any skin issues before using a harness.
This approach helps you keep your dog safe, happy, and ready for every walk.
Troubleshooting dog chafing and harness fit
Adjusting for comfort: step-by-step
You can solve most harness chafing problems by adjusting for comfort. Start by checking the harness fit at all contact points. Make sure you can slide two fingers under each strap. Look for straps that sit too close to the armpits or hang too low. If you see red marks or your dog scratches at the harness, loosen the straps slightly. Add a thin layer of padding if the material feels rough. Choose a harness with enough space around the shoulders and armpits. Try a double-clip harness and avoid attaching the leash at the back. Teach your dog to walk calmly to reduce pulling. Use a shock-absorbing leash for extra comfort.
Tip: Always check the harness after walks and adjust as needed. This helps prevent sore spots and keeps your dog happy.
When to pause harness use for healing
Stop using the harness right away if you notice chafing, sores, or open skin. Let your dog’s skin heal before using the harness again. Clean the affected area gently with a pet-safe antiseptic. Give your dog time without the harness indoors. If you see sores or if the skin does not improve, contact your veterinarian for advice.
Persistent or worsening signs explained
Some signs mean you need to stop home care and get help. If redness, swelling, or hair loss gets worse, pause harness use and call your vet. Watch for pain, strong odor, or oozing. These symptoms need professional care.
Symptom | Likely Cause | Quick Fix | When to Stop and Call the Vet |
|---|---|---|---|
Red marks, mild itch | Strap too tight/rough | Loosen strap, add padding | If redness persists or worsens |
Scratching, licking | Poor fit/material | Adjust fit, switch harness | If skin breaks or hair loss appears |
Open sores, bleeding | Severe chafing | Stop harness use, clean area | Call vet immediately |
Swelling, pain | Pressure injury | Remove harness, rest skin | Call vet if pain or swelling increases |
Safety Note: Always stop harness use if you see open or raw skin, bleeding, or if your dog shows pain. Quick action protects your dog’s health.
Red flags: when to call the vet for dog chafing
You want to keep your dog safe and comfortable. Sometimes, home care is not enough. You need to know when to stop using the harness and call your veterinarian. Use the table below to help you decide what to do if you see changes in your dog’s skin or behavior.
Skin and behavior: red/yellow/green table
What you see | What it may mean | What to do next |
|---|---|---|
Skin looks normal, no irritation | Healthy skin, good harness fit | Keep using your routine. Check after every walk. |
Mild redness or slight irritation | Early chafing or pressure | Adjust harness fit. Add padding. Recheck daily. |
Hair loss, bald patches, or licking | Ongoing rubbing or discomfort | Pause harness use. Let skin heal. Call vet if no improvement in 2 days. |
Open sores, bleeding, swelling, or pain | Severe chafing or infection | Stop harness use. Call your veterinarian right away. |
Changes in walking or movement | Harness too tight or causing pain | Remove harness. Seek veterinary advice if problem continues. |
Note: If redness, hair loss, or irritation gets worse or does not improve, always contact your veterinarian for guidance.
Special caution for sensitive dogs
Some dogs need extra care when using a harness. You should watch these groups closely:
Short-coated breeds (like Boxers or Greyhounds)
Senior dogs with arthritis or weak muscles
Dogs recovering from surgery or illness
Older dogs often have thin skin and less padding. They may feel pain sooner and heal slower. Post-operative dogs need support but also have fragile skin. Short-coated breeds have less fur to protect them from rubbing.
You can help these dogs by:
Using a harness with soft padding and multiple adjustment points.
Checking the fit every week, especially after grooming or weight changes.
Limiting harness time indoors to let the skin breathe.
Watching for any sign of discomfort, like licking, scratching, or changes in walking.
If you see any open sores, swelling, or your dog seems in pain, stop using the harness and call your vet. Quick action means fewer sore spots and a happier, healthier dog.
FAQ: dog harness chafing quick answers
How tight should a harness be?
You want your dog’s harness to fit snugly but never squeeze. Use the two-finger rule at each strap. Slide two fingers between the harness and your dog’s body. Your fingers should fit easily, but the harness should not hang loose. A harness that is too tight can cause skin irritation or restrict movement. If the harness feels loose, your dog may slip out or the straps may rub and lead to irritation. Always check the fit before every walk, especially after grooming or weight changes.
How often to check for irritation?
Check for irritation every time you remove the harness. Look closely at the skin under the armpits, around the chest, and behind the front legs. Daily checks help you spot skin irritation early. If you see redness, hair loss, or your dog scratches more than usual, give the skin time to heal before using the harness again. Puppies, seniors, and dogs with short coats need extra attention. Weekly fit checks help you catch changes as your dog grows or their coat changes.
What if my dog slips the harness?
If your dog slips out of the harness, take these steps to keep them safe and prevent future escapes:
Use the two-finger rule to make sure the harness is snug but not tight.
Perform a gentle pull test by trying to slide the harness over your dog’s head. If it comes off easily, adjust the straps.
Watch for signs of misfit, such as the harness rotating or loosening during walks.
Re-adjust the harness regularly, especially every few months or after weight changes.
Choose a harness designed to prevent escapes if your dog keeps slipping out. Some harnesses tighten safely when your dog tries to wriggle free.
A secure harness lowers the risk of skin irritation and keeps your dog comfortable. Regular checks and adjustments help you avoid sore spots and keep your dog safe on every walk.
You keep your dog safe by following the two-finger fit, checking armpit clearance, and doing post-walk skin checks. These steps help you spot dog harness chafing early and prevent sore spots. Regular monitoring and adjustment protect your dog’s skin and support keeping walks comfortable.
Remember: Quick action and daily checks lower the risk of skin problems. Adjust the harness if you see irritation. Choose the right harness style for your dog’s needs.
Check fit and skin after every walk.
Adjust straps for comfort and security.
Switch harness styles if problems continue.
