
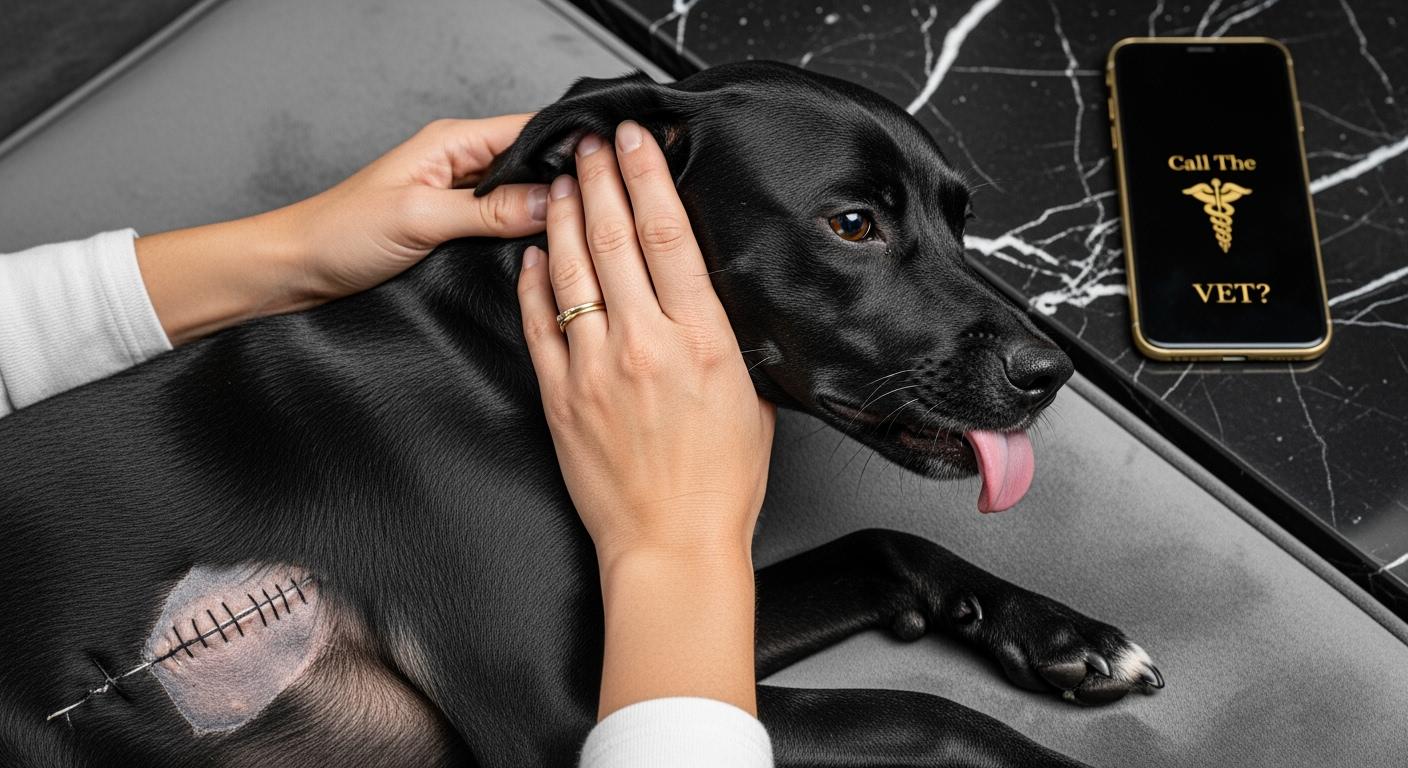
Dog spay incision care includes preventing licking, keeping the abdominal area dry, and following the discharge instructions provided by your veterinary team. If your dog licked the stitches, restore an effective barrier, look for any visible change without touching or cleaning the incision, and contact the clinic if the site has opened, is bleeding, has new discharge or odor, or looks increasingly swollen.
Important: A cone or recovery suit can block access to the incision, but it cannot diagnose or treat a complication. If your dog can still reach the site, the barrier has failed and needs to be refitted or replaced.
Key Takeaways
- Stop further licking immediately with a properly fitted E-collar, recovery suit, or another barrier approved for your dog’s incision location.
- Check the barrier while your dog stands, sits, turns, lies down, curls toward the abdomen, and uses the bathroom. Comfort alone does not prove that the incision is protected.
- Keep the recovery area quiet, dry, and free from jumping hazards. Follow the activity limits in the discharge instructions rather than applying one timetable to every dog.
- Look at the incision at the frequency recommended by the clinic and whenever the barrier shifts, becomes wet, or is removed. Do not press, squeeze, or apply products unless instructed.
- Call the veterinary team if the incision opens, bleeds, develops new discharge or odor, becomes increasingly swollen, or if your dog appears unwell.
Why Dogs Lick Incisions and Risks of Licking After Surgery
Causes: Itch, Discomfort, and Boredom
Dogs may lick a spay incision because the area feels unusual, itchy, or uncomfortable. Reduced activity after surgery can also make some dogs restless, and the abdomen may be easy to reach when the dog bends or curls up. The reason for the licking does not change the immediate goal: prevent contact with the surgical site and tell the clinic if the behavior is persistent or new.
Calm enrichment may help reduce restlessness, but distraction is not a substitute for a physical barrier. A dog that can reach the incision while wearing a cone or suit still has access, even if she only tries occasionally.
Licking After Surgery: Incision and Barrier Risks
Licking and chewing can irritate the site, disturb sutures, and contaminate the incision. Repeated contact may also keep the fabric around a recovery suit damp or pull a poorly fitted barrier out of position. The practical response is to stop access, check whether the incision or barrier has changed, and contact the veterinary team when you are uncertain.
| What can go wrong | What to check |
|---|---|
| Repeated licking or chewing | Whether the barrier allows access when the dog bends, sits, or curls toward the abdomen. |
| Barrier movement | Whether a cone slips at the neck or a recovery suit rolls, stretches, or shifts around the potty opening. |
| Moisture or contamination | Whether the suit or bedding is wet, soiled, or holding moisture against the incision area. |
| Skin pressure or rubbing | Whether straps, seams, elastic edges, or folded fabric leave pressure marks near the abdomen. |
| Visible incision change | Whether the edges have opened or there is new bleeding, discharge, odor, or increasing swelling. |
If your dog keeps trying to reach the site, see the more general guide on what to do when a dog keeps licking an incision. This spay-specific page focuses on abdominal coverage and barrier fit.
Dog Spay Incision Care: Stop Licking and Set Up Recovery
Calm Recovery Space and Activity Limits
Create a quiet recovery area with dry bedding and non-slip flooring. Reduce access to stairs, furniture, rough play, and other pets according to the discharge instructions. Place food, water, and bedding where your dog does not need to jump or twist sharply to reach them.
Step-by-step setup for a safer recovery environment:
- Choose a quiet area with clean, dry bedding.
- Block stairs and furniture if the veterinary team has restricted jumping.
- Place non-slip mats on smooth floors.
- Use a crate or playpen only when it matches the clinic’s activity plan and your dog can rest comfortably while wearing the barrier.
- Check that the cone or recovery suit remains effective in the confined space and does not catch on bedding, bowls, or crate edges.
Leash-Only Potty Breaks and Safe Handling
Follow the discharge instructions for potty breaks and activity. Controlled leash trips can reduce running and sudden turning, but the exact duration and frequency depend on the procedure and your veterinarian’s plan. After each trip, check whether a recovery suit has become wet, rolled upward, or shifted around the opening.
Avoid placing a lifting sling directly across the abdominal incision unless the veterinary team has approved the placement. Pressure across a fresh spay site can create a separate fit problem even when the sling is intended to improve stability.
Quick Reference Card
Use this reference card together with your dog’s discharge instructions:
| Key element | What to do |
|---|---|
| Incision observation | Check at the frequency listed by the clinic and whenever the barrier shifts, becomes wet, or is removed. |
| Clean and dry area | Follow the clinic’s bathing and cleaning instructions. Do not apply products or clean the incision unless directed. |
| Recheck or suture plan | Use the dates provided for your dog. External sutures, staples, and rechecks do not follow one universal schedule. |
| Barrier duration | Keep the barrier in place for the full period specified by the veterinary team and until they confirm it can be discontinued. |
| Activity limitation | Follow the procedure-specific limits for walking, stairs, jumping, and play. |
| Barrier testing | Repeat the reach and fit checks after potty trips, sleep, adjustment, washing, or any sign that the device moved. |
Daily Incision Care and Monitoring
Changes to Watch and When to Ask the Clinic
The expected appearance of a spay incision depends on the procedure, closure method, and discharge instructions. Instead of using one online photo or timeline as a diagnosis, compare the incision with the previous check and look at the direction of change. Use clear photos when the clinic accepts them.
| Observation | Response |
|---|---|
| Appearance is stable and matches the clinic’s instructions | Continue the prescribed care and barrier plan. |
| Redness, bruising, or swelling is increasing rather than settling | Contact the veterinary team and share a clear photo if requested. |
| New discharge, odor, persistent bleeding, or wetness at the incision | Contact the clinic promptly; do not apply a home treatment. |
| Edges have separated, a stitch or staple appears missing, or tissue is visible | Prevent further access and seek veterinary guidance promptly. |
| Your dog seems unusually weak, distressed, painful, or otherwise unwell | Contact the veterinary team rather than relying on the barrier alone. |
For a fuller explanation of incision warning signs, use the separate guide to normal versus warning changes after dog surgery.
Daily Incision Care Checklist
Incision and barrier checklist
- Observe the incision as directed by the veterinary team and whenever the barrier is removed or displaced.
- Compare the appearance with a previous photo instead of pressing or touching the site.
- Confirm that the incision edges remain closed and there is no new bleeding, discharge, or odor.
- Prevent licking and chewing at all times required by the discharge plan.
- Keep the area and any recovery garment dry.
- Do not use ointments, sprays, powders, disinfectants, or bandages unless instructed.
- Check cone attachment points and recovery-suit seams for rubbing, pressure, or hair pulling.
- Record meaningful changes in appetite, activity, comfort, and behavior to share with the clinic.
Household rules during the restricted-activity period
- Keep the dog in a calm area with dry bedding and non-slip footing.
- Follow the clinic’s limits for running, jumping, stairs, and play.
- Use controlled leash trips according to the discharge plan.
- Keep other animals from licking or disturbing the incision.
- Recheck the barrier whenever the dog changes position repeatedly or the device catches on furniture or bedding.
How to Keep Your Dog from Licking Stitches
After spay surgery, choose a barrier that blocks access to the abdominal incision in real positions—not just while the dog is standing still. E-collars, recovery suits, soft cones, and inflatable collars have different fit rules and failure modes. The correct option is the one that passes the reach test and remains dry, stable, and free from rubbing.
E-Collar Fit and Use to Prevent Licking
An E-collar is a common physical barrier, but its effectiveness depends on length, rigidity, neck attachment, and the dog’s body proportions. A comfortable cone that is too short or loose does not protect a low abdominal incision.
- As an initial size check, the cone rim should generally extend about 1–2 inches beyond the dog’s nose.
- Use the manufacturer’s fitting instructions. A common initial neck check allows about two fingers without leaving the attachment loose enough to slip over the head.
- Confirm normal breathing and swallowing.
- Complete a supervised reach test while the dog stands, sits, lies on each side, turns, and curls toward the abdomen.
- If the dog can still touch the incision, stop relying on that setup and use a longer, more rigid, or differently shaped barrier after checking with the clinic or product supplier.
Removal test: Only remove the barrier when the veterinary team permits it and continuous supervision is possible. Replace it immediately if the dog turns toward the incision.
Recovery Suits, Inflatable Collars, and Alternatives
Other barriers may be suitable when they fully prevent access. For a spay incision, the central question is whether the lower belly stays covered while the dog moves, rests, and toilets. Compare options by fit and failure mode rather than assuming that a softer device is automatically safer.
| Type of barrier | Useful features | Fit and failure checks |
|---|---|---|
| Hard E-collar | Rigid rim can block the dog from bending toward the abdomen. | Check 1–2 inch nose extension as a starting point, neck security, and the full reach test. |
| Recovery suit | Can cover a midline abdominal incision without a head barrier. | Check belly coverage, seam position, rolling, dampness, and whether the potty opening shifts. |
| Soft cone | More flexible around furniture and bedding. | Confirm the rim does not fold or collapse when the dog bends toward the incision. |
| Inflatable collar | Leaves the face less obstructed. | Long or flexible dogs may still reach a low abdominal incision; a supervised reach test is essential. |
Do not put deodorant, coconut oil, bitter household products, or improvised topical deterrents on or near the incision. A T-shirt or DIY collar should not be treated as adequate protection unless the veterinary team confirms that it covers the site, stays dry, and cannot shift.
Stop Licking Options Comparison Table
| Barrier | Best matched to | Primary test | Common failure |
|---|---|---|---|
| Hard E-collar | Dogs that cannot bend around a correctly sized rigid rim. | Nose extension, neck fit, and multi-position reach test. | Too short, loose, removed, or obstructed by bowls and furniture. |
| Recovery suit | Spay incisions fully contained within the belly panel. | Coverage during sitting, curling, walking, and toileting. | Rolling, wet fabric, opening displacement, or seam pressure. |
| Soft cone | Dogs for which the cone stays long and structured enough. | Reach test while the rim is under normal bending pressure. | Folding or collapsing. |
| Inflatable collar | Dogs whose proportions prevent abdominal reach. | Observe bending and curling in several positions. | Dog bends around the collar. |
For more detail on matching barriers to the wound site, see recovery suit vs E-collar by wound location.
What to Do if Your Dog Keeps Trying to Lick the Incision
If your dog still reaches the incision, treat that as a failed setup. Check whether the cone is too short or loose, whether the suit rolled or stretched away from the belly, and whether the dog can reach the site only in a seated or curled position. Refit or replace the barrier and contact the clinic if you cannot maintain protection or if the incision looks different after licking.
Preventing Licking Boredom: Calm Enrichment Ideas
When the veterinary team permits these activities, calm enrichment may reduce restlessness during restricted recovery. It should supplement—not replace—the physical barrier.
- Use a slow feeder or food puzzle that does not make the dog twist, jump, or push the barrier out of position.
- Offer quiet company, gentle petting, or brushing away from the incision.
- Use a snuffle mat only when the dog can reach it comfortably while wearing the barrier.
- Use chew toys only when approved for the recovery plan and continuously supervised.
When to Call the Vet: Red Flags and Monitoring
Do not use an online traffic-light chart or a universal temperature threshold to diagnose the incision. Contact the veterinary team when the incision changes in a concerning direction, the dog appears unwell, or you cannot prevent access to the site. Follow any urgent-care instructions included in the discharge paperwork.
| What you notice | What to do |
|---|---|
| The incision has opened, tissue is visible, or a stitch or staple appears disturbed. | Prevent further licking and contact the veterinary team promptly. |
| New or increasing bleeding, discharge, odor, wetness, redness, or swelling. | Contact the clinic and provide a clear photo if requested. |
| The dog appears weak, distressed, painful, unusually quiet, or otherwise unwell. | Contact the veterinary team rather than relying on the barrier or an online checklist. |
| The dog has licked the site and the appearance has changed. | Restore protection and ask the clinic how the incision should be assessed. |
| No available barrier can prevent access. | Supervise continuously and contact the clinic for an alternative protection plan. |
What Not to Put on the Incision
Do not apply an ointment, spray, powder, disinfectant, bitter product, oil, bandage, or household substance unless the veterinary team specifically instructed you to use it. If the incision or garment becomes wet or dirty, ask the clinic how it should be handled rather than improvising a cleaning routine.
Quick Reference Card
| Situation | Next step |
|---|---|
| Dog can reach the incision | Refit or replace the barrier and repeat the reach test. |
| Recovery suit is wet, rolled, or displaced | Remove or change it according to product and clinic instructions; do not leave damp fabric over the site. |
| Incision appearance has changed | Take a clear photo and contact the clinic. |
| Barrier causes rubbing or pressure | Stop relying on that fit and select another size or design. |
| Dog remains calm but keeps attempting to lick | Keep the physical barrier in place; distraction alone is insufficient. |
Once the veterinary team has confirmed that a recovery suit or other body barrier is appropriate, compare the coverage and fit options in GaitGuard’s dog anti-lick product range. Product selection should be based on incision location, reach, moisture control, and fit—not on a promise to treat or prevent a medical complication.
FAQ
How long should my dog wear the cone after spay surgery?
Use the cone or recovery suit for the full period listed in your dog’s discharge instructions and until the veterinary team says protection can stop. Some clinics may use a period around 10–14 days for certain uncomplicated procedures, but that common range should not replace the dates, recheck plan, or closure-specific instructions given for your dog.
Can I bathe my dog or let her swim after surgery?
Follow the bathing and swimming restriction in the discharge instructions. Many plans require the incision to remain dry for a defined period, but the exact timing depends on the procedure and veterinary guidance.
What if my dog keeps trying to lick the incision even with a cone?
Check that the rim extends about 1–2 inches beyond the nose as an initial size check, that the neck attachment is secure without being loose enough to slip off, and that your dog cannot bend around the rim in any normal position. If she still reaches the incision, the setup has failed; use a longer or differently structured barrier and contact the clinic if protection cannot be maintained.
Is it normal for the incision to look red or swollen?
The expected appearance depends on the procedure and closure method. Compare the incision with the clinic’s instructions and earlier photos. Contact the veterinary team if redness or swelling is increasing, the edges separate, or there is new bleeding, discharge, odor, or a change in your dog’s condition.
What should I do if I see discharge or a bad smell from the incision?
Prevent further licking and contact the veterinary team promptly. Do not clean the site or apply a product unless the clinic instructs you to do so.
