
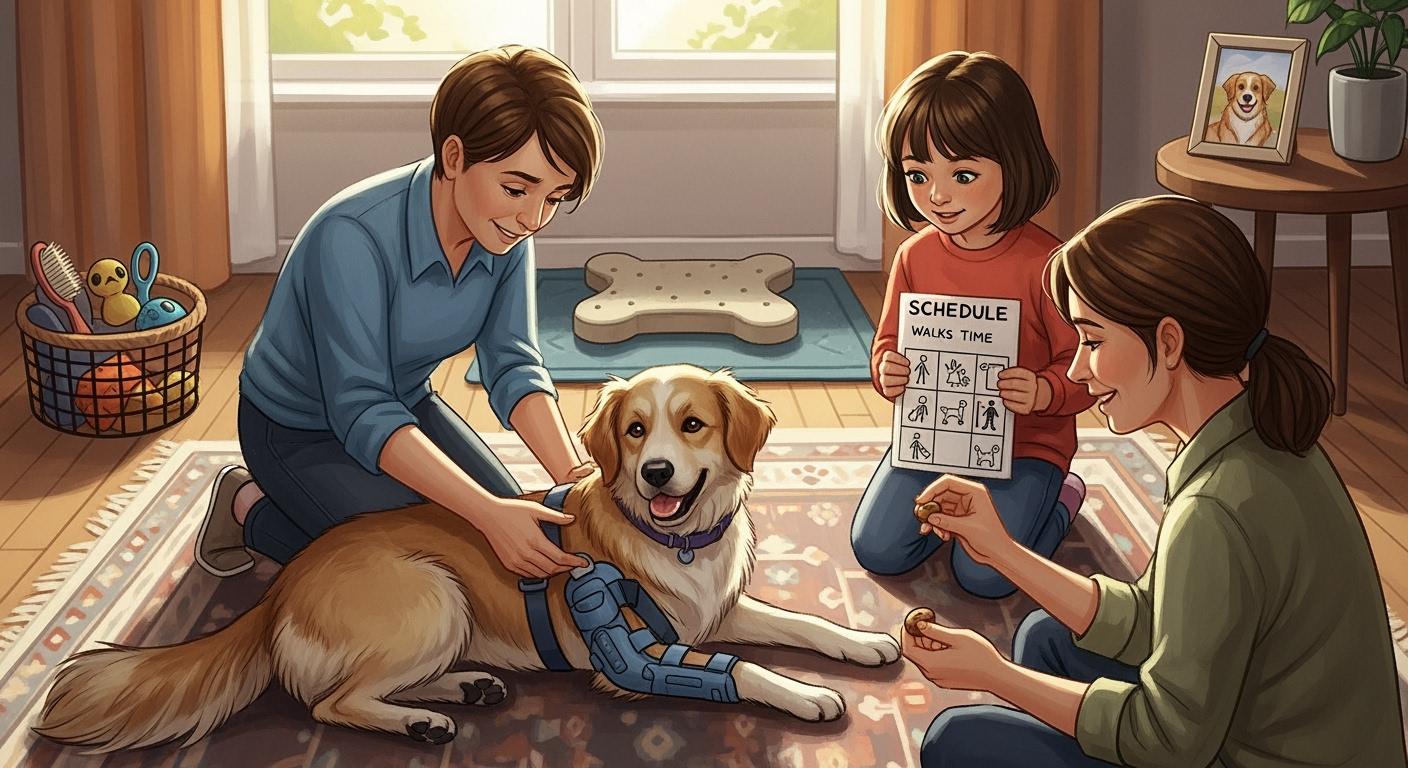
You see your dog limping after playtime and feel worried. You want to help your dog, but picking the right dog recovery brace is hard. The good news is you can help your dog heal at home with the right fit and schedule. Always talk to your veterinarian or a certified rehab professional before you start. They check the injury, pick the best brace, and show you how to watch your dog’s progress. Your vet may help fit the brace, suggest brands, and give tips for daily care.
Confirm diagnosis by checking your dog or using imaging
Give advice on the right brace type and brand
Work with orthotic specialists to make changes
Teach you how to watch and care for your dog
Key Takeaways
Always talk to your veterinarian before picking a dog recovery brace. They can find out what is wrong and suggest the best brace for your dog.
A good fit is very important for a recovery brace. Measure your dog’s leg carefully. Check the fit often to make sure your dog is comfortable and the brace works well.
Use a slow wear schedule when your dog starts wearing a brace. Begin with short times and make them longer as your dog gets used to it.
Watch your dog closely for any signs of pain or skin problems. Look for redness, swelling, or sores under the brace after each use.
Use the brace with gentle rehab exercises and short, controlled walks. This will help your dog get better and move more easily.
What a dog recovery brace can and cannot do
How dog recovery braces support joints and healing
A dog support brace helps your dog move better. It keeps joints steady and protects healing parts. You may see your dog walk with more confidence. Your dog might put weight on a sore leg again. Studies show these braces really help. Look at this table:
Study | Findings |
|---|---|
2020 Study in Veterinary Surgery | Dogs with hinged braces walked better in 12 weeks and often did not need surgery. |
University of Tennessee Clinical Trial (2018) | Using two braces helped dogs balance, feel less pain, and move more. |
Meta-Analysis (2021) | Braces, healthy weight, and therapy together lowered pain and made life better, especially for medium dogs. |
A dog support brace spreads your dog’s weight evenly. It helps lower pain and stops unsafe movement. This gives your dog a safer way to heal.
Why fit and rehab plan matter most
You want your dog to get better. The right fit is very important. If the brace fits well, your dog walks more naturally. A good fit also stops rubbing or slipping. Here are the key points:
Braces work best when they fit right and you use them as told.
Using the brace every day helps healing.
Following your vet’s advice gives the best results.
A dog support brace that fits well supports your dog’s leg. It lowers pain and keeps your dog from getting hurt again. Custom braces fit better and feel more comfortable. Always check your dog’s skin for any problems. Change the brace if needed. Talk to your veterinarian or a certified rehab professional before you start a new brace or rehab plan.
Not a substitute for a vet diagnosis
A dog support brace helps your dog heal, but it does not replace a vet’s care. If you skip the vet, you might pick the wrong brace or miss a big problem. Here are some risks:
Bad fit can make your dog uncomfortable.
Not knowing enough can mean poor support.
Wrong support can make the injury worse.
Your dog could get hurt again.
Waiting too long can harm your dog.
Not checking often means you might miss warning signs.
You should always talk to your veterinarian or a certified rehab professional before you pick a dog recovery brace. They help you choose the right one and keep your dog safe.
When to use a dog recovery brace in rehab
Post-surgery support and safe movement
After surgery, your dog needs help to move safely. You want to protect the joint while it heals. A dog recovery brace gives support and stops risky moves. You can use a brace to:
Keep the joint steady and stop twisting
Lower swelling with gentle pressure
Help your dog walk with less pain
Control how much your dog moves each day
Braces with hinges let you slowly increase movement as your dog heals. The brace also reminds you to keep things calm. If your dog has dog knee pain, a brace can make walks safer and easier.
Conservative care when surgery isn’t chosen
Sometimes, surgery is not the best choice for your dog. You might pick conservative care instead. A dog recovery brace can help your dog manage dog knee pain and move better. Here’s what you should know:
Braces work well for mild injuries or if surgery is not possible
They help your dog stand and walk with more confidence
You must watch for skin problems or brace slipping, especially at first
Veterinarians say surgery is best for full CCL tears, but a brace can help with comfort and lameness. Always talk to your veterinarian or a certified rehab professional before starting conservative care.
Chronic issues: arthritis, weakness, instability
Dogs with arthritis, weak muscles, or joint instability often have dog knee pain. A recovery brace can make daily life easier. You may see your dog stand straighter and walk better. Take a look at these findings:
Study/Source | Findings |
|---|---|
Rosen et al. (2022) | Dogs with custom knee braces put more weight on their legs and moved better over 12 months. |
Carr (2016) | Dogs using knee braces had better pressure spread and walked more evenly after 90 days. |
Muršec et al. (2025) | Two dogs walked more evenly and put weight on both legs after 32 days of bracing. |
If your dog has ongoing dog knee pain, a brace can help with stability and comfort. Always check with your veterinarian or a certified rehab professional to make sure you pick the right brace and plan.
When not to use a dog recovery brace: red flags
You want to help your dog heal, but sometimes a brace is not the right answer. You need to watch for warning signs that mean you should stop using the brace and call your veterinarian. Let’s look at the main red flags.
Open wounds, swelling, or pain changes
If you see an open wound under the brace, stop using it right away. Swelling that gets worse or pain that changes suddenly means something is wrong. Your dog might limp more or cry when you touch the area. These are not signs your dog needs a brace—they are signs your dog needs a vet. You should never put a brace over broken skin or a sore that smells bad. Always check for new swelling or pain before each session.
Tip: If you notice bleeding, pus, or a strong odor, remove the brace and call your veterinarian.
Sudden lameness or joint locking
Your dog might suddenly refuse to put weight on a leg or drag a paw. Sometimes the joint locks or gets stuck. These are serious problems. You should not use a brace if your dog cannot move the joint or if the leg feels cold. Sudden lameness is not one of the signs your dog needs a brace—it means you need a professional exam. A locked joint can cause more damage if you force movement.
Red Flag | What to Do |
|---|---|
Sudden limp | Stop activity, call your vet |
Joint stuck | Do not force movement, seek help |
Paw dragging | Remove brace, get a diagnosis |
Skin breakdown or circulation problems
Check your dog’s skin every time you use the brace. If you see blisters, sores, or hair loss, stop using the brace. Cold toes or swelling below the brace mean poor blood flow. These problems can get worse fast. You want to keep your dog safe, so never ignore skin changes. If redness does not fade in 15 minutes, or if you see sores, take off the brace and talk to your veterinarian or a certified rehab professional.
Note: Safety comes first. When in doubt, ask your vet before using the brace again.
Matching braces to injuries: types and examples
Choosing the right brace for your dog starts with understanding the injury and knowing how each brace works. You want to match the brace to your dog’s needs, making sure you get the best fit and support. Let’s break down how you can do this for common injuries.
Dog knee braces: CCL tears, arthritis, instability
Dog knee braces help dogs with knee problems move better and feel less pain. You might notice your dog limping, holding a leg up, or avoiding stairs. These signs often point to knee injuries like a torn acl, luxating patella, or arthritis. Dog knee braces give support and help your dog walk with more confidence.
Here are the most common injuries treated with dog knee braces:
Partial torn acl or CCL tears
Mild knee pain from overuse or aging
Chronic knee pain that keeps coming back
Luxating patella, where the kneecap slips out of place
Dog knee braces work well for these problems. About 63% of dogs treated without surgery do well after a year. Most owners—around 85%—see their dogs walk better after using a brace. If your dog has a torn acl or luxating patella, a hinged knee brace or dynamic brace can help keep the joint steady. You want to check the fit every time you put the brace on. A good fit means the brace stays in place and does not rub or slip.
Here’s a quick table to help you spot the right brace for your dog’s symptoms:
Symptom | Visual Cue | Likely Injury | Recommended Brace Type |
|---|---|---|---|
Limping | Holds leg up, avoids weight | Knee (torn acl, luxating patella) | Hinged knee brace, dynamic brace |
Stiff Movement | Slow to rise, stiff gait | Arthritis, knee pain | Knee brace |
Swollen Joint | Puffiness, heat | Knee sprain | Knee wrap |
If you see these signs, talk to your veterinarian or a certified rehab professional before you start using dog knee braces. They will help you measure your dog’s leg and make sure you get the right fit.
Hip, spine, and hock braces: when to choose each
Not all injuries happen at the knee. Sometimes your dog needs support for the hip, spine, or hock (ankle). Each area needs a different kind of brace and a careful fit.
Hip braces help dogs with hip dysplasia, arthritis, or weakness in the back legs. If your dog bunny hops or has trouble getting up, a hip brace can help steady the hips and make walking easier.
Spine or back braces are for dogs with spinal injuries, IVDD, or back pain. If your dog drags its feet or scuffs its toes, a spinal brace can help protect the back and improve movement.
Hock braces support the ankle joint. Use a hock brace if your dog has a hock dislocation, sprained hock, or osteoarthritis in the ankle. Hock braces keep the joint stable and help with healing.
Here’s a table to help you match the right brace to your dog’s symptoms:
Symptom | Visual Cue | Likely Injury | Recommended Brace Type |
|---|---|---|---|
Bunny Hopping | Hops with both back legs | Hip dysplasia | Hip brace, back brace |
Dragging Feet | Knuckling, scuffs toes | Spinal injury, IVDD | Spinal brace, back brace |
Swollen Joint | Puffiness, heat | Hock sprain or dislocation | Hock wrap, hock brace |
Stiff Movement | Slow to rise, stiff gait | Arthritis, hip/back pain | Hip brace, spinal brace |
When you pick a hip, spine, or hock brace, focus on these points:
Proper fit is key. Measure above and below the joint and check the height of the brace area.
Look for adjustable straps and breathable materials. These features help you get a snug fit and keep your dog comfortable.
Make sure the brace supports the joint but still lets your dog move a little. Too tight or too loose can cause problems.
A hock brace, for example, keeps the ankle steady and helps your dog walk without pain. It also lets the joint move just enough for healing. Always check the fit and watch for any rubbing or slipping.
Custom vs standard fit: pros and cons
You can choose between custom and standard fit braces. Each type has its own benefits and drawbacks. The right choice depends on your dog’s injury, size, and how long your dog will need the brace.
Here’s a table to help you compare:
Type of Brace | Advantages | Disadvantages |
|---|---|---|
Custom Fit | Best support with perfect fit | Higher cost |
Tailored to your dog’s needs | Longer creation time | |
Reduces risk of rubbing or chafing | ||
Enhanced comfort for long-term use | ||
Standard Fit | Quick solution | Risk of slipping |
Lower cost | Less effective support | |
Easy to buy and use | Potential for skin issues |
Custom braces give you the best fit. They lower the chance of skin sores and slipping. They also give targeted support for problems like a torn acl or luxating patella. If your dog has a unique shape or a severe injury, a custom brace may work better. Standard fit braces are faster to get and cost less, but they may not fit as well. You might see more slipping or rubbing, especially if your dog moves a lot.
No matter which type you choose, always check the fit every day. Watch for signs of discomfort, slipping, or skin changes. If you see any problems, stop using the brace and talk to your veterinarian or a certified rehab professional. They can help you adjust the fit or pick a different brace.
Tip: The right fit makes all the difference. Take your time with measurements and ask for help if you need it.
Matching braces to injuries takes careful planning. You want to look at your dog’s symptoms, measure for the best fit, and pick a brace that matches the injury. Always work with your veterinarian or a certified rehab professional to keep your dog safe and comfortable.
How to measure and fit a dog recovery brace
Getting the right fit for your dog’s recovery brace makes all the difference. You want your dog to feel comfortable, move safely, and heal well. Let’s walk through the steps together so you can help your dog every day.
Key measurements and re-checks
You need to measure your dog carefully before you choose a brace. Accurate measurements help you get the best fit and avoid problems like slipping or rubbing. Here’s a simple step-by-step guide:
Measure your dog’s thigh circumference about one inch above the knee joint.
Measure directly over the knee cap for knee circumference.
Measure the lower leg just below the knee.
Measure the leg length from the top of the thigh down to the ankle or hock joint.
Measure the distance between your dog’s inner thighs while standing.
Write down each number. Double-check your measurements to make sure you get a snug fit. If your dog’s muscles change or swelling goes down, re-measure and adjust the brace. You want to keep the fit just right as your dog heals.
Tip: Always talk to your veterinarian or a certified rehab professional before you start. They can help you with measurements and make sure the fit matches your dog’s needs.
Strap tension, alignment, and comfort
Once you have the right measurements, focus on how the brace sits on your dog. The fit should be snug but not tight. You should be able to slide two fingers between the brace and your dog’s groin area. This space helps if swelling happens during recovery.
Check that the brace lines up with your dog’s joints. The anatomical cutouts should match the hock bone, and the hinge should sit right at the knee. Adjust the straps slowly so your dog feels comfortable. Watch for signs that the fit is off, like limping, skin irritation, or the brace moving out of place. If you see these, stop and fix the fit.
Look for redness or swelling under the brace.
Make sure the brace does not twist or slip when your dog walks.
Adjust the straps if your dog’s leg shape changes during healing.
A good fit means your dog can walk naturally and the brace stays in place. If you notice any problems, take off the brace and talk to your veterinarian or a certified rehab professional.
First fitting: calm setup and short sessions
The first time you put the brace on your dog, keep things calm. You want your dog to feel safe and relaxed. Here’s how you can make the first fitting go smoothly:
Start with a vet check to confirm the diagnosis and get advice on the right brace.
Choose a brace that matches your dog’s measurements for the best fit.
Bend your dog’s knee to about a 90° angle and line up the brace hinge with the joint.
Begin with short wear sessions—about 30 to 60 minutes—three to five times a day.
Watch your dog closely for any signs of discomfort or skin changes.
Use the brace during activity, not as a permanent cast. Remove it for unsupervised sleep.
Combine the brace with gentle rehab exercises and keep your dog at a healthy weight.
Check the skin under the brace every time you put it on or take it off.
🐾 Note: Go slow and increase wear time only if your dog feels comfortable. If you see redness that does not fade in 15 minutes, or if your dog limps more, stop and check the fit.
Keep a log of any changes in your dog’s movement or behavior. If you notice slipping, new rubbing, or muscle changes, refit the brace and talk to your veterinarian or a certified rehab professional. Safety comes first, and a good fit helps your dog heal faster.
Break-in and wear schedule for safety
Helping your dog adjust to a new brace takes patience and a careful plan. You want the best fit, comfort, and safety from day one. Let’s walk through how you can set up a smooth break-in and wear schedule for your dog’s recovery brace.
Day 1–3: short sessions, frequent skin checks
Start slow to help your dog’s skin and muscles get used to the brace. The right fit means less risk of rubbing or slipping. Here’s a simple break-in schedule you can follow:
Day 1: Wear for 30 minutes, 2–3 times a day.
Day 2: Wear for 1 hour, 2–3 times a day.
Day 3: Wear for 2 hours, 2–3 times a day.
Day 4: Wear for 3 hours, 2–3 times a day.
Day 5: Wear for 4 hours, 2 times a day.
Day 6: Wear for 6 hours.
Day 7: Wear for 8 hours.
Keep the fit snug but not tight. Always check your dog’s skin every time you put on or take off the brace. If you see redness that does not fade in 15 minutes, stop and check the fit.
🩺 Skin-check routine:
Look for redness, swelling, or sores under the brace.
Make sure the fit does not cause pinching or slipping.
If you notice any problems, remove the brace and talk to your veterinarian or a certified rehab professional.
Increasing wear time safely
After the first week, you can slowly increase how long your dog wears the brace. The fit may need small changes as your dog gets used to it. Here’s how you can do it safely:
Start with a few hours a day during activity.
Add about 25% more wear time every 3–4 days.
Example: If your dog wears the brace for 4 hours, increase to 5 hours after 3–4 days (4 hours x 1.25 = 5 hours).Watch your dog’s response. If the fit seems off or your dog acts uncomfortable, pause and check.
Use the brace only during short leashed walks for the first 1–2 weeks. This helps your dog adjust and keeps the fit comfortable.
Always talk to your veterinarian or a certified rehab professional for advice on the best fit and schedule for your dog.
Nighttime, stairs, and supervision
Safety matters most when your dog wears a brace. The right fit helps, but you still need to watch your dog closely.
Take the brace off at night while your dog sleeps.
Block off stairs with a baby or pet gate. This keeps your dog from falling if the fit changes or your dog feels unsteady.
Keep your dog off furniture to prevent slips or jumps.
Supervise your dog during activity, especially on slippery floors.
If you notice any changes in how the brace fits or how your dog moves, stop and check right away. The best fit keeps your dog safe and helps healing.
Remember, a good fit and careful schedule make recovery smoother. When in doubt, talk to your veterinarian or a certified rehab professional.
Rehab plan with a dog recovery brace
Controlled leash walks and activity
You want your dog to move, but you also want to protect healing joints. Start with short, slow leash walks. For the first week, try 5-minute walks, 3–5 times a day. Use a sling for extra support if your dog feels wobbly. After two weeks, you can increase each walk to 10–15 minutes. By the end of the first month, aim for 15–20 minutes per walk. In the third month, many dogs can handle 30-minute walks twice a day if cleared by your vet.
Sample walking progression for a 50 lb dog:
Week 1: 5 min x 4 walks/day = 20 min/day
Week 4: 15 min x 3 walks/day = 45 min/day
Week 8: 30 min x 2 walks/day = 60 min/day
Keep your dog on a leash. Avoid running, jumping, or rough play. Controlled walks help muscles grow stronger and keep joints stable.
Home exercises and safe environment
You can help your dog heal with simple home exercises. Try sit-to-stand drills, gentle range-of-motion stretches, and slow step-overs. Use balance pads or a rolled towel for easy balance work. These activities build muscle and improve joint control.
Make your home safe for recovery:
Place non-slip rugs or mats on slippery floors.
Use ramps or pet stairs to help your dog get on furniture or into the car.
Set up a cozy orthopedic bed for joint comfort.
Raise food and water bowls to reduce bending.
A safe space helps your dog avoid slips and sudden moves. Always supervise exercise and check the brace fit after each session.
Weight management and flooring tips
Extra weight puts stress on healing joints. Keep your dog at a healthy weight by measuring meals and choosing low-calorie treats. Ask your vet about joint supplements if needed.
Non-slip flooring is a must. Rugs, mats, and carpet runners help prevent falls. Block off stairs and use gates to limit risky areas.
🐾 Tip: Talk to your veterinarian or a certified rehab professional before starting new exercises or changing your dog’s routine.
Troubleshooting and smart gear choices
Slipping, chewing, hotspots, and gait changes
Sometimes your dog’s brace slips or your dog chews it. Hotspots or changes in walking can also happen. Here’s a table to help you fix these problems:
Strategy | Description |
|---|---|
Proper Fit | Make sure the brace sits right at the tibial bump. |
Re-tighten After Walks | Tighten the middle shell after 5–10 minutes of walking. |
Check Lower Shell | The pad should stay above the hock joint. |
Adjust Tension | If the brace slips, gently tighten the straps. |
Soft Barrier | Use soft liners to stop rubbing and hotspots. |
Rotate Contact Points | Move straps so pressure is spread out. |
Keep Skin Clean | Wash and dry your dog’s skin every day. |
Moisturize | Put a little lotion on after taking off the brace. |
If your dog chews the brace or starts limping, stop and check the fit. If the problem keeps happening, talk to your veterinarian or a certified rehab professional.
Skin irritation: quick decisions
Skin problems can show up fast. If you see redness, swelling, or sores, take off the brace right away. Let your dog’s skin get air. If redness stays for more than 15 minutes or you see blisters, call your vet. Never ignore cold toes or swelling under the brace.
When to pause and call the vet:
Redness that does not go away
Blisters or open sores
Swelling or cold toes
Sudden pain or limping
Tracking changes: photos and notes
Keep a simple record. Take pictures of your dog’s skin and how your dog walks every few days. Write down any changes in movement, comfort, or how the brace fits. This helps you find problems early and share them with your vet.
Dog recovery brace vs harness, e-collar, or rest
Here’s a table to help you pick the best gear:
Gear Type | Best Use | Limits Movement | Protects Injury | Needs Vet Input |
|---|---|---|---|---|
Dog recovery brace | Joint support, rehab | Yes | Yes | Yes |
Harness | Walking, mild support | No | No | Sometimes |
E-collar | Stop licking or chewing | No | No | Sometimes |
Rest | Healing, after surgery | Yes | Yes | Yes |
Quick Reference Card: printable checklist
Quick “fit + use” checklist:
Know your goal and get vet or rehab okay
Measure your dog, line up the brace, and secure straps
First session on leash, check how your dog walks
Wear the brace for 30–60 minutes, 3–5 times a day
Check skin every time; redness should fade in 15 minutes
Use non-slip floors and control activity
Refit if muscles change, brace slips, new rubbing, or behavior changes
Top mistakes to avoid (8+ common errors)
Not taking time to break in the brace
Forgetting to check skin after each use
Ignoring when the brace slips or twists
Using the brace on open wounds
Not measuring again as your dog heals
Leaving the brace on all night
Missing signs of pain or limping
Not cleaning the brace and skin often
Not asking your veterinarian or a certified rehab professional for help
Decision table: is a brace right now?
Criteria | Green Light (Go) | Yellow Light (Pause) | Red Light (Stop) |
|---|---|---|---|
Injury Type | Stable, diagnosed | Mild swelling, not sure | Open wound, severe pain |
Skin Condition | Healthy, no redness | Mild redness, fading | Blisters, cold toes |
Comfort | Walking well | Sometimes limps | Sudden lameness |
Vet Input | Cleared for brace | Waiting for advice | No vet contact |
Comparison table: brace vs harness vs e-collar vs rest
Feature | Brace | Harness | E-collar | Rest |
|---|---|---|---|---|
Joint Support | ✅ | 🚫 | 🚫 | ✅ |
Prevent Chewing | 🚫 | 🚫 | ✅ | ✅ |
Needs Vet Input | ✅ | 🚫 | 🚫 | ✅ |
Limits Movement | ✅ | 🚫 | 🚫 | ✅ |
Always talk to your veterinarian or a certified rehab professional before you change your dog’s recovery plan.
You want your dog to heal well and feel safe. Here are the key steps for a smooth recovery:
Get a clear diagnosis from your veterinarian.
Match the brace to your dog’s injury and make sure it fits right.
Use the brace as directed and follow a safe wear schedule.
Support your dog with home rehab and gentle activity.
Check your dog’s comfort and progress every day.
Use the Quick Reference Card and checklist to stay on track. Always talk to your veterinarian or a certified rehab professional if you have questions. You and your dog make a great team on the road to recovery! 🐾
FAQ
How do I know if the brace fits my dog correctly?
Check that the brace stays in place and does not twist or slip. You should fit two fingers under the straps. Watch for redness or swelling. If you see any problems, talk to your veterinarian or a certified rehab professional.
Can my dog wear the brace all day?
No, your dog should not wear the brace all day. Start with short sessions and slowly increase time. Always remove the brace at night. Check your dog’s skin every time you take it off.
What should I do if my dog chews or tries to remove the brace?
Try distracting your dog with a treat or toy. Make sure the brace fits well and does not cause discomfort. If chewing continues, stop using the brace and ask your veterinarian or a certified rehab professional for advice.
Is a brace enough for my dog’s injury?
A brace helps support healing, but it does not replace a vet’s care. Always get a diagnosis first. Follow your veterinarian or a certified rehab professional’s plan for the best results.
