
You help your dog climb stairs safely with a dog support harness for stairs. This gear gives your dog stability. A dog support harness for stairs improves control. You select a dog support harness for stairs based on fit and comfort. Always set up a safe stair environment. Your veterinarian’s plan overrides general tips, especially after surgery or spine injury. A dog support harness for stairs helps most dogs gain confidence. You keep your dog secure with a dog support harness for stairs.
Key Takeaways
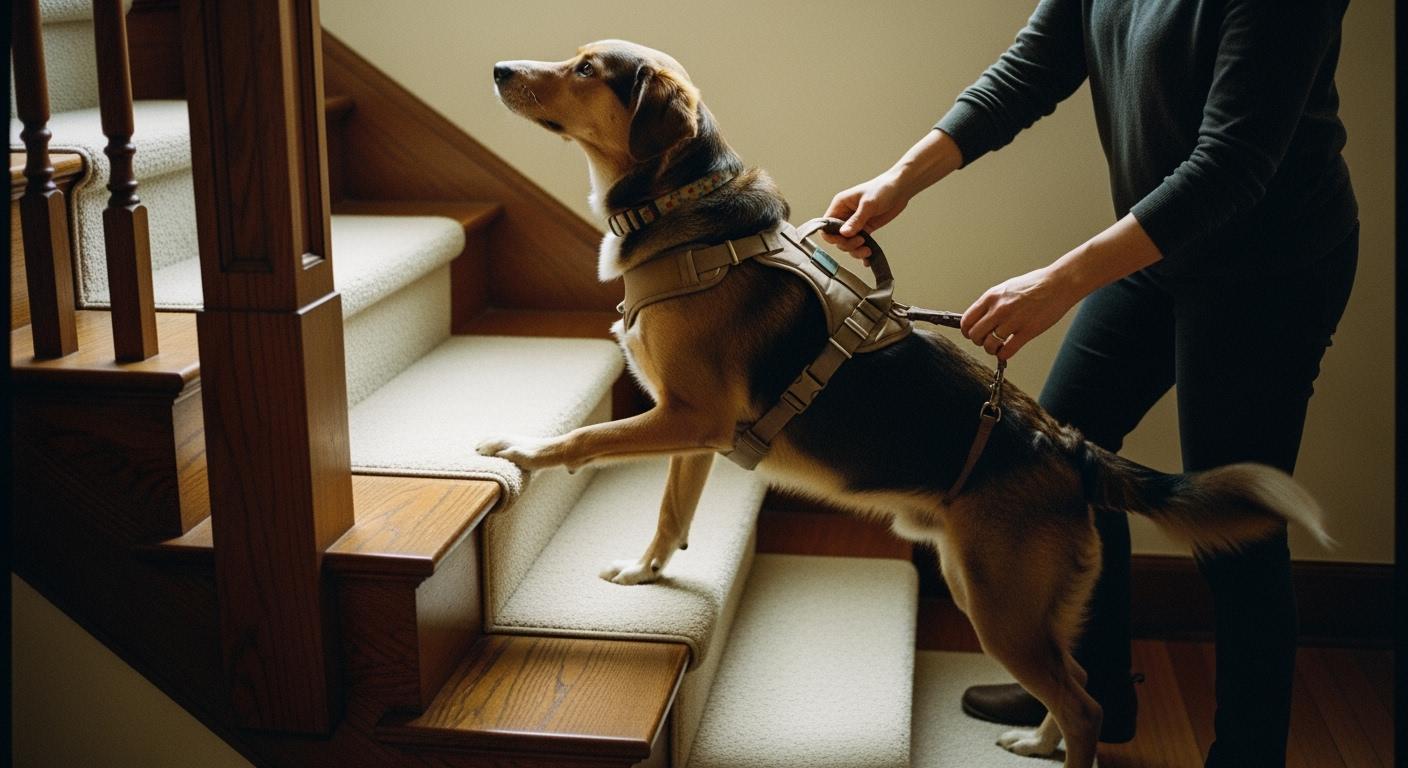
Use a dog support harness to help your dog go up and down stairs safely. This harness gives your dog balance and control. You do not have to lift your dog. Your dog can use their own muscles.
Always check if your dog feels okay and steady before using stairs. Watch for signs that your dog is scared or not comfortable. Talk to your veterinarian if your dog has health problems.
Make the stairs safe by putting down non-slip mats and making sure the area is bright. This setup helps stop your dog from slipping. It also helps your dog feel more confident.
Dog support harness for stairs: control, not lifting
Support, don’t suspend
You help your dog move safely by supporting—not lifting—when using a dog support harness on stairs. Supporting means you guide your dog’s movement and keep them balanced. Lifting can put too much force on your dog’s shoulders and neck, which may cause discomfort or injury. Dr. Christine Zink explains that harnesses with front attachments spread force across the ribcage. This design helps your dog use natural movement and reduces stress on sensitive areas. When you support your dog, you let them use their own muscles and joints. You avoid concentrating pressure in one spot, which can happen if you lift instead of support. Your veterinarian’s plan overrides general tips, especially after surgery or spine injury.
Why stairs increase risk
Stairs can be dangerous for dogs with mobility problems. You may notice your dog struggles with joint pain or stiffness. Stairs increase the chance of slipping or falling, especially if your dog cannot grip the surface. Climbing stairs can make pain worse and lead to more discomfort. Older dogs or those with injuries often need help to avoid stair-related accidents.
Dogs with arthritis feel pain in their joints.
Slippery stairs make falls more likely.
Climbing stairs can worsen existing health issues.
Many dogs find stairs harder as they age.
When to avoid stairs
You should avoid stairs if your dog shows fear, hesitation, or discomfort. Dogs with joint pain, injuries, or stiffness may find stairs too hard. Changes in your home, such as new furniture or people, can also make your dog less willing to use stairs. Always watch for signs that your dog is struggling. Your veterinarian’s plan overrides general tips, especially after surgery or spine injury.
Tip: Use [2 weeks] as the minimum ‘extra cautious’ stair window, and follow your surgeon’s exact plan if it says [2–8 weeks].
Signs to Avoid Stairs | What You Should Do |
|---|---|
Hesitation | Reroute or carry your dog |
Fear | Use a ramp or block stairs |
Discomfort | Consult your veterinarian |
Decision: climb the stairs, ramp, or carry?
You need to pick the safest way for your dog. Think about your dog’s health, your house, and your own safety. You want your dog to move safely and avoid accidents. Each morning, check if your dog is ready using the table below.
Checkpoint | Green (Go) | Yellow (Caution) | Red (Stop) |
|---|---|---|---|
Slipping | No slips | Occasional slips | Frequent slips |
Ability to Stand | Strong, steady | Wobbly, slow | Cannot stand alone |
Pain/Distress | Comfortable | Mild discomfort | Obvious pain |
Hesitation | Confident | Pauses, unsure | Refuses, fearful |
Weakness (Front/Rear) | No weakness | Mild, one end | Severe, both ends |
Caregiver Control | Full control | Needs help | Unsafe for handler |
Your veterinarian’s plan is most important, especially after surgery or spine injury.
Post-op and neuro caution
After surgery or with nerve problems, be extra careful. Most dogs need at least two weeks of rest. Some dogs need more time. If your dog cannot walk well or is weak, use a ramp or carry them. Ramps are easier on joints and help dogs with arthritis or back pain.
Slipping risk and confidence
Look for slippery floors or surfaces. If your dog slips, use mats or socks for grip. Ramps take up more space but help your dog hold on better. Stairs make your dog lift their legs, which can keep muscles strong. Not every dog can handle stairs. Always watch for fear or hesitation.
Caregiver safety check
You must feel safe when helping your dog. If you cannot control your dog or feel unsafe, use a ramp or get help. Your veterinarian’s plan is always the top rule, especially after surgery or spine injury.
Factor | Description |
|---|---|
Dog’s Physical Ability | Check how well your dog can use ramps or stairs. |
Functionality | Think about how ramps or stairs fit in your home. |
Safety | Pick the safest choice for your dog and yourself. |
Stair traction setup and safety gear
Traction lane setup
You create a traction lane to help your dog move safely. Place non-slip stair treads or runners along the main path. These materials reduce slips and give your dog confidence. ClearGrip Treads work well on wood, tile, or laminate. You clean them easily with soap and water. Dogs with injuries or older dogs often struggle on slick surfaces. Improved traction helps your dog stay active and less fearful. Your veterinarian’s plan overrides general tips, especially after surgery or spine injury.
Best mat placement
You place mats at the top and bottom of the stairs. Rubber or vinyl stair mats provide grip where your dog starts and finishes. Make sure mats do not bunch up or slide. Remove clutter near the stair entry and exit. Bright lighting helps your dog see each step. Dogs that hesitate or slip may become less active. You help prevent falls by setting up mats in key spots.
Tip: If your dog is slipping indoors, treat traction as a [first-line] safety upgrade.
Reducing slips and turns
You reduce slips by using anti-slip coatings, tread tape, or grit paint. Place gates to block unsupervised access. Plan your route so your dog walks straight and avoids sharp turns. Dogs that rush or twist may lose balance. You keep your dog safe by guiding them slowly and using a short leash. Your veterinarian’s plan overrides general tips, especially after surgery or spine injury.
Stair Setup Checklist
Step | Action |
|---|---|
1 | Lay runners or treads along the stairs |
2 | Place non-slip pads at top and bottom |
3 | Turn on bright lighting |
4 | Remove clutter from stair area |
5 | Gate off unsupervised stair access |
Choosing a dog lift harness or sling
Selecting the right dog lift harness helps you support your dog on stairs. You want to match the harness to your dog’s needs and your stair setup. Each type of dog lift harness offers unique benefits and fits different situations.
Rear sling uses
A rear sling works well for dogs who can bear weight but need help with balance. You use a rear sling to support your dog’s back legs during stair climbs. This dog lift harness avoids pressure on healing wounds and helps dogs recovering from surgery or injury. You can put it on while your dog is lying down. Rear slings reduce strain on weak legs and make standing easier.
Handle harness uses
A handle harness supports dogs with weak front legs. You lift under the chest and abdomen using the handle. This dog lift harness gives you control and helps your dog walk up or down stairs. Handle harnesses work best for dogs who need extra help with their front end. You guide your dog’s movement and keep them steady.
Full-body lift harness uses
A full-body lift harness supports both front and rear legs. You use this dog lift harness for dogs with widespread weakness or progressive conditions. Full-body harnesses let you fully lift your dog if needed. You can adapt this harness for different mobility challenges. Your veterinarian’s plan overrides general tips, especially after surgery or spine injury.
Your veterinarian’s plan overrides general tips, especially after surgery or spine injury.
Tool | Best for | Limits | Fit risks | Stair tips |
|---|---|---|---|---|
Rear sling | Rear leg weakness, post-surgery | Not for front leg weakness | May slip off | Use on short flights, avoid jumps |
Handle harness | Front leg weakness, walking support | Not for rear-only weakness | May rub chest | Keep leash short, steady pace |
Full-body lift harness | Widespread weakness, full support | Bulky, takes time to fit | May restrict movement | Use for full lift, check fit often |
Ramp | Severe weakness, non-stair access | Needs space, not portable | None | Use for dogs who cannot do stairs |
You may also see a dog lifting harness for temporary mobility loss. Always check fit and comfort before each stair trip.
Measuring and harness fit checks
Key measuring points
You need accurate measurements to choose the right harness for your dog. Start by measuring your dog’s girth. Wrap a tape around the widest part of the chest, just behind the front legs. Make sure the tape is snug but not tight. Measure your dog’s neck a few inches below the head. This helps you pick a harness that fits over the head without choking. Weigh your dog at home or at the vet. Weight helps you select a harness that supports your dog’s size. These steps help you find a dog mobility harness that fits well and keeps your dog safe on stairs.
Girth: Measure around the chest, behind the front legs.
Neck: Measure below the head for a comfortable fit.
Weight: Record your dog’s weight for harness selection.
Your veterinarian’s plan overrides general tips, especially after surgery or spine injury.
Fit-check script
You must check the harness fit before each stair trip. Adjust the straps so the harness sits flat against your dog’s body. Use the two-finger test. Slide two fingers under the straps to make sure they are not too tight or loose. Look for twisting or ride-up when your dog moves. Make sure the harness does not rub against the skin or cause hotspots. Center the harness and check for rotation. Harnesses that fit well without a leash may twist when you attach the leash. Always check for comfort and security.
Harness Fit-Check Script:
Adjust straps for a snug fit.
Use the two-finger test.
Check for twisting or ride-up.
Look for rubbing or hotspots.
Center the harness and check rotation.
Confirm leash attachment does not twist the harness.
Your veterinarian’s plan overrides general tips, especially after surgery or spine injury.
Bathroom and male-dog fit
You need to check harness placement for bathroom breaks. Make sure the harness does not block access for urination or defecation. For male dogs, check that the harness does not cover the penis or restrict movement. Some harnesses have cutouts or adjustable straps for this purpose. Always check after fitting to avoid accidents or discomfort.
Fit Issue | What to Check | Solution |
|---|---|---|
Bathroom access | Harness blocks rear area | Adjust or reposition |
Male-dog fit | Straps cover penis | Use harness with cutout |
Rubbing/chafing | Red marks or hotspots | Loosen or pad straps |
Step-by-step: climb the stairs with support harness

Helping your dog climb the stairs with a support harness requires patience, planning, and careful technique. You keep your dog safe by following a structured process. You use a short leash, about three feet long, to maintain control and prevent sudden movements. For the first two weeks after surgery, you focus on short, slow leash walks. You limit stair sessions to brief, supervised trips.
Handler position and pace
You stand close to your dog, keeping your body beside or slightly behind them. You hold the support harness handles firmly, making sure your grip is steady but gentle. You keep your dog’s spine straight as they move. You avoid pulling or twisting the harness. You set a slow pace, allowing your dog to place each paw securely before moving to the next step. You watch for signs of fatigue or hesitation. You stop immediately if your dog scrambles or loses balance.
Tip: Use a short leash for control and keep sessions brief. Your veterinarian’s plan overrides general tips, especially after surgery or spine injury.
SOP A: Up Stairs
Position yourself beside your dog, hands on the support harness handles.
Keep your dog’s spine straight and encourage them to take one step at a time.
Move slowly, allowing your dog to pause and regain balance after each step.
Stop if your dog begins to scramble or shows signs of distress.
Reward your dog with praise or treats for each successful step.
One step at a time
You help your dog climb the stairs by focusing on one step at a time. You start at the bottom step, encouraging your dog to move up and down with gentle guidance. You use treats and praise to build confidence. Once your dog feels comfortable, you move to the second step, repeating the process. You gradually increase the number of steps as your dog gains strength and trust in the support harness. You monitor for fatigue and take breaks as needed.
Start with the lowest step and use positive reinforcement.
Increase the number of steps slowly.
Watch for signs of tiredness and stop if needed.
Use textured surfaces or traction mats for better grip.
SOP B: Down Stairs
Stand beside your dog, holding the support harness handles and short leash.
Move slower than when going up, prioritizing control and stability.
Guide your dog to place each paw securely before descending to the next step.
Prevent lunging by keeping the leash short and using the traction lane.
Pause if your dog hesitates or loses balance, then continue when ready.
Note: Your veterinarian’s plan overrides general tips, especially after surgery or spine injury.
Two-person assist
You may need a second person to help your dog climb the stairs with a support harness, especially if your dog is large or has significant weakness. One person stands at the dog’s head, offering reassurance and treats. The other person positions themselves at the dog’s middle or at the end needing the most help. Both people use the support harness handles to guide and stabilize the dog. You make sure the harness fits snugly but allows natural movement. You practice on short flights of stairs before attempting longer ones. You reward your dog for each successful trip.
Task | Person 1 (Lead) | Person 2 (Support) |
|---|---|---|
Harness fitting | Reassure, offer treats | Adjust harness, check fit |
Climbing/Descending | Guide with leash | Support with handles |
Monitoring | Watch for hesitation | Prevent falls, steady |
You keep safety as your top priority. You bend at the knees when lifting to protect your back. You carry your dog close to your body if needed for stability. You always stop if your dog struggles or shows discomfort.
Safety Reminder: Always use a support harness for control, not lifting. Consult with a professional if your dog struggles to climb the stairs.
Step-by-step: going down stairs safely
Helping your dog go down stairs with a support harness takes patience and careful technique. You want to keep your dog safe and calm. You use a harness and leash to guide your dog, not to pull or rush them. You watch your dog’s body language and adjust your pace to match their comfort.
Slow descent and leash
You guide your dog down stairs by moving slowly and keeping the leash short. You hold the harness handles and stay close to your dog’s side. You let your dog place each paw securely before moving to the next step. You avoid pulling on the leash, which can increase fear and stress. You use gentle encouragement if your dog hesitates. You pay attention to your dog’s signals, such as stopping or looking anxious.
Common mistakes to avoid when assisting your dog down stairs:
Forcing your dog onto the stairs can worsen their fear.
Pulling them with a leash or carrying them abruptly increases stress.
Skipping steps in training can overwhelm your dog.
Long, exhausting sessions can lead to frustration.
Instead, you create short, positive experiences and remain calm. You use treats and praise to build confidence. You stop and take breaks if your dog seems tired or anxious.
Tip: Using a leash and harness gives your dog a sense of security. You guide with gentle encouragement, not force. You can use a sling under the belly or chest for extra support, making sure your dog’s feet stay on the ground.
Your veterinarian’s plan overrides general tips, especially after surgery or spine injury.
When not to use rear-only support
You must choose the right harness for going down stairs. Rear-only support is not safe for every dog. Dogs with elbow, wrist, shoulder, or neck problems need extra care. Walking downstairs puts more force on the front legs. Dogs with arthritis in these areas may struggle or feel pain.
Walking downstairs can be more problematic, particularly for dogs with elbow and wrist (carpal) arthritis, or shoulder or neck problems. Walking downstairs increases the force on the front limbs, as it takes a lot of control to go down slowly. We recommend that your dog wears a harness with a handle so that you can assist them in slowly walking down stairs and take some of the weight off of their limbs.
You use a harness with handles to help your dog move slowly and safely. You take some weight off their front limbs. You avoid rear-only support if your dog has front limb weakness or pain. You check with your veterinarian before using any harness after surgery or injury.
Your veterinarian’s plan overrides general tips, especially after surgery or spine injury.
Alternatives: ramp or reroute
You may need to find alternatives if stairs are too hard for your dog. Ramps help dogs with severe arthritis or mobility problems. Ramps provide a gentle incline and avoid the painful up-and-down motion of stairs. Investing in a ramp can prevent joint injuries caused by jumping. This can save you from long-term veterinary costs.
Ramps work best for dogs who cannot manage stairs, especially large dogs or those with advanced joint disease. You use ramps for entryways, porches, or getting into vehicles. You choose ramps with non-slip surfaces for safety.
Dog stairs for furniture can also help. These stairs turn a high jump into easy steps. You protect your dog’s joints and keep them comfortable.
You reroute your dog’s path if possible. You block off stairways and create safe routes on one level. You use gates to prevent unsupervised stair access.
Note: Always choose the safest option for your dog’s condition and your home setup. Ramps and rerouting can make daily life easier for dogs with mobility challenges.
You keep your dog’s safety and comfort as your top priority. You consult your veterinarian or rehab professional if you are unsure about the best method.
Common mistakes and troubleshooting
Harness twisting and chafing
You may notice the harness twists or rubs against your dog’s skin. Twisting often happens if the harness is too loose or not centered. Chafing can cause red marks or discomfort. You should check the fit before each stair trip. Use the two-finger test to make sure the straps are snug but not tight. If you see twisting or rubbing, adjust the harness or add padding. Stop using stairs if your dog shows signs of pain, limping, or stiffness. Your veterinarian’s plan overrides general tips, especially after surgery or spine injury.
Slippery floors
Slippery floors increase the risk of falls. You can place non-slip mats at the top and bottom of the stairs. Traction socks or booties help your dog grip the surface. If slipping repeats, switch to a ramp or carry your dog. Watch for hesitation, stopping midway, or avoiding stairs. These signs mean your dog may struggle with mobility. Your veterinarian’s plan overrides general tips, especially after surgery or spine injury.
Rushing or jumping steps
Dogs sometimes rush or jump steps when excited or nervous. You can prevent this by keeping sessions short and calm. Use a short leash and reward your dog for slow, steady movement. Barriers like baby gates help control access. Ask guests not to interact with your dog if they jump. Separate your dog from guests until they settle down. Always reward your dog for keeping their paws on the ground.
Tip: If your dog refuses stairs, shows pain, or struggles with routine activities, stop and contact your clinic for guidance.
Troubleshooting Table
Problem | Likely Cause | Gear Fix | When to Stop and Call Vet |
|---|---|---|---|
Slipping at steps | Poor traction | Add mats/booties | Slipping repeats |
Twisting sideways | Loose harness | Adjust fit | Harness twists or rubs |
Harness ride-up | Wrong size/fit | Refit or pad straps | Ride-up causes discomfort |
Refusal/fear | Pain or anxiety | Switch to ramp/carry | Sudden refusal, whining |
Chafing | Strap friction | Add padding | Red marks, hotspots |
Bathroom accidents | Poor harness placement | Adjust harness | Inability to move as usual |
Stop and Switch Rule: If slipping, rushing, or harness twisting repeats, stop stairs and switch to ramp, carry, or reroute. Contact your clinic for guidance.
FAQs and quick recap
FAQs
Q1: How do I know if my dog needs a support harness for stairs?
You notice your dog hesitates, slips, or struggles with balance. Dogs recovering from surgery or with joint pain benefit from extra support.
Q2: Can I use a regular leash instead of a support harness?
You should use a harness designed for stair support. Regular leashes do not provide enough stability or control.
Q3: How often should I check the harness fit?
You check the fit before every stair trip. Look for twisting, ride-up, or rubbing.
Q4: What traction gear helps most with slippery stairs?
You use traction socks, booties, or stair runners. These items improve grip and reduce falls.
Q5: When should I switch to a ramp or carry my dog?
You switch if your dog shows pain, fear, or cannot stand steadily. Ramps help dogs with severe weakness.
Q6: Can two people help a large dog on stairs?
You and another person can assist using harness handles. One person guides, the other supports.
Q7: How do I keep my dog calm during stair training?
You use treats, praise, and short sessions. You avoid rushing or forcing your dog.
Your veterinarian’s plan overrides general tips, especially after surgery or spine injury.
Quick recap checklist
Safest stair trip in under 60 seconds:
Check your dog’s mood and stability.
Fit-check harness: straps snug, no twisting.
Lay traction mats or runners.
Use a short leash for control.
Guide one step at a time.
Reward calm, steady movement.
B2B micro-script: Run a 30-second fit-check, then use the recommended bundle—traction socks/booties, runner pathway, rear sling or full-body harness, gate, and ramp for height changes.
Your veterinarian’s plan overrides general tips, especially after surgery or spine injury.
When to call your vet
You notice sudden pain, limping, or refusal to use stairs.
You see harness rubbing, chafing, or bathroom problems.
You feel unsure about your dog’s safety or recovery.
You observe repeated slipping or fear.
Always contact your clinic if you have concerns about your dog’s mobility or stair safety.
You make sure you and your dog stay safe and comfortable. Look over the steps before every stair trip. Be patient and give praise to help your dog feel confident.
Talk to your veterinarian or rehab expert before using stairs after surgery.
Support harnesses help stop falls and keep your dog steady.
Your veterinarian’s plan is more important than general advice, especially after surgery or spine injury.
