

You know how tough it can be when your dog struggles to move, especially during transfers or potty breaks. Picking the right full body lift harness for disabled dogs gives you and your dog steady support. This harness helps you avoid slips and keeps both you and your dog safer. If your dog needs help getting up or walking, you want a harness that fits well and feels comfortable. Support matters every time you lift, guide, or offer additional support during rehabilitation. Helping your dog get around with a full body lift harness for disabled dogs can really improve their quality of life.
Choose a harness that matches your dog’s needs.
Make sure the harness gives support in the right spots.
Check comfort and fit each time you use the harness.
Use a harness for safer transfers and potty breaks.
Key Takeaways
Choose a harness that fits your dog’s specific needs for support and comfort.
Always check the harness fit and comfort before each use to prevent injuries.
Use the ‘support, don’t suspend’ rule to keep your dog’s paws on the ground during transfers.
Look for signs of skin irritation after each use and adjust the harness as needed.
Consider using a full body lift harness for safer transfers and potty breaks, especially for paralyzed or weak dogs.
When to use a full body lift harness for disabled dogs
Safer transfers and potty breaks
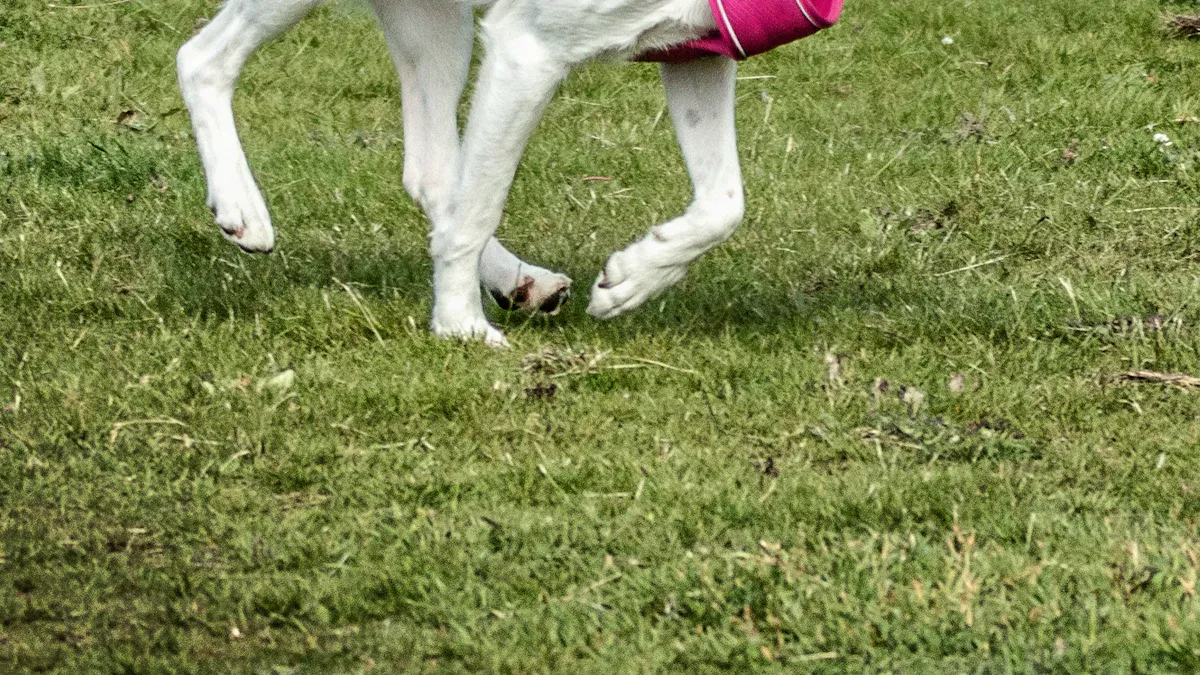
You want your paralyzed dog to move safely, especially during transfers and quick bathroom trips. A full body lift harness gives you steady support when your dog struggles with mobility issues. You can use the harness for emergency bathroom breaks, getting your dog in and out of the car, or helping your senior dog stand up. The harness also helps you guide your dog through tight spaces and up stairs. If your dog uses a wheelchair, the harness adds comfort and extra support.
Checklist: When to choose a full body lift harness
Your dog has overall weakness or paralysis.
You need to lift your dog for transfers or bathroom breaks.
Your dog cannot balance or stand without help.
You care for senior dogs with multi-joint arthritis.
You need to support both front and rear legs at the same time.
Your dog has frequent mobility issues indoors.
Paralyzed and weak dogs: who benefits most
Paralyzed pets and injured dogs with severe mobility problems benefit most from a full body lift harness. If your dog cannot use its back legs or has trouble with both front and rear legs, you need balanced support. Senior dogs with arthritis or dogs recovering from surgery also need extra lift and stability. You want to keep your dog’s paws on the ground and avoid suspending them in the air. This helps your dog feel safe and reduces strain on your back.
When a rear sling or towel is enough
Sometimes, a rear sling or towel works well for dogs with strong front legs but weak hindquarters. If your dog only needs help with the back legs, you can use a rear sling for short potty breaks. Make sure your dog can bear weight on the front legs. Always check for comfort and adjust the sling for a secure lift. For paralyzed pets with only rear weakness, a rear sling is easier to use.
Tip: Use a team lift for dogs over 40 pounds to protect your back and keep your dog safe.
Decision Table: Choosing the right gear for dog mobility
Mobility Pattern | Best Gear Choice | Why It Helps | Common Mistakes |
|---|---|---|---|
Full body weakness | Full body lift harness | Balanced support for all limbs | Suspending dog off ground |
Rear leg weakness | Rear sling | Supports hindquarters during lift | Using sling for front-leg issues |
Mild front-leg weakness | Everyday vest harness | Gentle support for daily walks | Not enough lift for paralysis |
Severe paralysis | Full body lift harness | Total lift and control | Wrong size or poor fit |
Slick floors | Traction socks/booties | Prevents slipping during transfers | Skipping traction gear |
Stairs or car entry | Full body lift harness | Safe lift and stability | Lifting without support |
You want to match your dog’s mobility needs with the right gear. Always check fit, comfort, and safety before each lift.
Full body harness vs dog lifting harness vs brace
Balanced support vs spot support
When you look at dog mobility gear, you want to know how each harness helps your dog. A full-body lifting harness gives balanced support for paralyzed dogs or those with weakness in both front and back legs. You can lift your dog safely, help them stand, and guide them up stairs. This harness spreads pressure across the body, so your dog feels steady and you protect your back. A dog lift harness targets one area, like the hips or chest. You use it for injured pets who need help with just their rear or front legs. Braces offer spot support for joints but do not help with lifting or transfers.
Safety tip: Always use the “support, don’t suspend” rule. Let your dog keep their paws on the ground during assisted walking.
Comparison Table: Support Types and Use Cases
Gear Type | Support Level | Best For | Dog Lifting Harness Uses |
|---|---|---|---|
Full-body harness | Total body | Paralyzed dogs, severe weakness | Transfers, stairs, walking |
Rear sling | Rear only | Hind leg weakness | Potty breaks, short walks |
Brace | Spot/joint | Mild injury, arthritis | Joint stabilization |
Paralyzed pets: matching gear to needs
If your dog is paralyzed or has trouble standing, you need a total body harness. This gear helps you move your dog for bathroom breaks, transfers, and short walks. For dogs with only rear weakness, a rear sling works well. You want to match the harness to your dog’s needs. Always check comfort and fit before each use.
What braces can and cannot do
Braces help stabilize joints for dogs with mild injuries or arthritis. They do not lift your dog or help with transfers. You use braces for spot support, not for moving paralyzed pets. If your dog needs more help, choose a harness that gives full support.
Quick Comparison Table: Full-body Harness vs Rear Sling
Feature | Full-body Harness | Rear Sling |
|---|---|---|
Comfort | High | Moderate |
Control | Full body | Rear only |
Bathroom Access | Easy (with design) | Easy |
Caregiver Ergonomics | Safer for heavy dogs | Easier for light dogs |
Best Use Cases | Paralyzed, multi-joint weakness | Rear leg weakness, short walks |
You want to keep your dog safe and comfortable. Always use the right harness for your dog’s needs and check for signs of poor fit or discomfort.
Choosing the right harness design and fit
Handle placement and control
When you pick a dog lifting harness, handle placement matters a lot. You want handles that let you lift your dog’s body safely and keep control during transfers. Handles should sit above the shoulders and hips, so you can guide your dog without twisting or straining your back. If your dog is heavy, look for a harness with two sturdy handles. This lets you team up with another person for a safer lift. Handles should feel comfortable in your hand and not dig into your dog’s body. You want to keep your dog steady, especially on stairs or slick floors.
Tip: Always use the “support, don’t suspend” rule. Let your dog’s paws touch the ground during assisted walking. This keeps your dog’s body stable and helps you avoid injury.
Chest, belly, and hip support zones
A good dog lifting harness spreads weight across the chest, belly, and hips. This helps your dog feel secure and keeps pressure off sensitive spots. You want a harness that fits snugly but does not squeeze or twist. The best support harness designs use wide straps and padded zones. These features protect your dog’s body and prevent rubbing or sores. Harnesses like the Help ‘Em Up Harness and EEZWalker Harness have thick padding and adjustable straps. They let your dog move freely and keep the harness in place.
“The study by Peham et al. found that harness design affects pressure distribution. The highest pressure sits in the right sternal region, while the back shows little load. Lafuente et al. showed that Y-harnesses restrict shoulder extension more than Norwegian harnesses. This means harness design changes how your dog moves and feels.”
You want to check the harness after each use. Look for red spots or signs of discomfort. If you see twisting or shifting, adjust the straps or try a different support harness. Your dog’s body shape and weight affect how the harness fits. Always measure your dog before buying a lifting harness.
Options for male dogs during potty breaks
Potty breaks can get tricky, especially for male dogs. You want a dog lifting harness that gives easy access for bathroom needs. Some support harnesses have removable belly straps or cutouts. These features help you keep your dog clean and make potty breaks less stressful. If your dog wears a harness all day, look for designs that let you unclip or fold back the belly section. This keeps your dog’s body dry and avoids messes.
Note: Always check harness fit before and after potty breaks. Make sure straps do not pinch or rub sensitive areas.
Checklist: What to look for in a dog lifting harness
Durable material (easy to clean, machine washable)
Adjustable straps for a custom fit
Wide, padded support zones for chest, belly, and hips
Sturdy handles for safe lifting and control
Easy to put on and take off (no need to lift legs)
Removable or flexible belly section for potty breaks
Snug fit without twisting or shifting
Designed for your dog’s body shape and weight
Quick reference for measuring and fitting
Measuring Point | How to Measure | Why It Matters |
|---|---|---|
Chest | Wrap tape around widest part | Ensures harness fits snugly |
Belly | Measure just behind front legs | Prevents slipping and twisting |
Hips | Measure around rear, above legs | Keeps harness stable during lifts |
Weight | Use a scale | Helps pick right size and plan for team lifts |
Always measure your dog’s body before buying a support harness. Try the harness on and check for comfort. Straps should sit flat and not dig into the skin. Let your dog walk a few steps. Watch for twisting or shifting. If you see problems, adjust the straps or try a different harness.
Bundle recommendation: Full-body harness + traction gear + protective clothing
You can make your dog’s daily routine safer by bundling gear. Use a full-body lifting harness for transfers and walks. Add traction socks or booties if your floors are slick or your dog drags paws. Protective clothing, like a recovery suit, helps if your dog has wounds or surgery sites. This bundle keeps your dog’s body supported, reduces slips, and protects sensitive skin. Use this combo for dogs with paralysis, arthritis, or after surgery. Always follow safety-first rules and check fit often.
A dog lifting harness supports your dog’s mobility. It does not treat the cause of weakness or paralysis. You want to work with your vet and use the harness as part of a safe care plan. Always lift with your knees, not your back. Use a team lift for dogs over 40 pounds. Check your dog’s body and skin after each session. If you see new pain or sores, call your vet.
Measuring and fitting a dog lifting harness at home
Key measuring points: chest, waist, weight
Getting the right fit for your dog’s harness starts with good measurements. You want your harness to give steady support without causing discomfort. Here’s how you can measure your dog at home:
Gather a flexible measuring tape, paper, and a pen. Keep treats nearby to help your dog stay calm.
Measure your dog’s neck where the collar sits. Slip two fingers under the tape for comfort.
Wrap the tape around the widest part of your dog’s chest. Write down the number.
Measure just behind the front legs for the belly or waist.
Check your dog’s weight on a scale. Don’t guess—accurate weight helps you pick the right harness size.
Double-check all numbers. Measure twice to be sure.
Tip: Always leave room for two fingers under the harness. Don’t rely only on weight—use all measurements.
Fit-check script for owners and clinics
You want your harness to give full support but not squeeze or twist. Try this quick script for fit and skin checks:
Place the harness on your dog and adjust all straps.
Run your hands along the chest, belly, and hips. Make sure the harness feels snug but not tight.
Ask your dog to walk a few steps. Watch for twisting or slipping.
Check for red spots or rubbing, especially near armpits and groin.
Look for symmetry—straps should look even on both sides.
Clinic/retailer handout script: “Check fit every time you use the harness. Look for red spots, pinching, or shifting. If you see problems, adjust the straps or try a different size. Always check your dog’s skin after each session.”
Signs of poor fit or twisting
Watch for these signs that your dog’s harness needs adjustment:
The harness slips, rotates, or gaps appear.
Straps dig into the skin or rub near the armpits.
Your dog resists walking or tries to escape the harness.
The harness restricts breathing or movement.
You see twisted straps or uneven buckles.
A well-fitted harness gives your dog safe support and helps you move your dog with confidence. Always check fit and comfort before every use.
Using a full body lift harness for potty breaks
“Support, don’t suspend” walking
You want your dog to feel safe and steady during potty breaks. When you use a harness, remember the “support, don’t suspend” rule. Keep your dog’s paws on the ground. Let your dog bear some weight if possible. This helps your dog stay balanced and reduces strain on your back. If your dog is heavy, ask for help. Use a team lift for dogs over 40 pounds. Safely lifting your pet means you protect your own body, too.
Step-by-step potty break routine:
Put the harness on your dog and check all straps.
Guide your dog to the potty area using a short leash (about 3 feet).
Hold the harness handles and give gentle support as your dog walks.
Stop in a safe spot with good traction.
Allow your dog to sniff and find the right place.
Keep your dog steady while they go potty.
Help your dog walk back inside, still using the harness for support.
Remove the harness and check your dog’s skin for any red spots.
Controlled routes and timing
Choose a simple route for potty breaks. Avoid stairs and clutter. Pick a spot close to the door. Use the same path each time so your dog feels confident. Keep each trip short—about 3 to 5 minutes. Most dogs need 3 to 5 potty breaks per day. For example, if you take your dog out 4 times a day for 5 minutes each, that’s 20 minutes of controlled outdoor time.
Potty Breaks/Day | Minutes/Trip | Total Daily Time |
|---|---|---|
4 | 5 | 20 |
Slippery ground and traction tips
Slippery floors can make potty breaks risky for your dog. Tile and hardwood increase the chance of slips and falls. Dogs with mobility issues need extra support on these surfaces. You can add non-slip rugs or traction socks to help your dog stay upright. Traction booties also work well for outdoor walks. Always check the ground before you start. If you see water or ice, choose a different route.
Home safety checklist for potty breaks:
Place non-slip rugs near doors and in potty areas.
Use ramps for steps instead of lifting heavy dogs.
Check for clutter or obstacles along the route.
Make sure the harness fits snugly before each trip.
Keep traction socks or booties handy for slick floors.
Watch your dog’s paws for signs of slipping or dragging.
Your harness gives your dog the support they need, but you control the environment. Stay alert and make each potty break safe and stress-free.
Safer transfers and stairs with a harness
Helping your dog move from the bed to the floor or get into the car can feel tricky. You want every transfer to be safe and smooth. A harness gives you the control and support you need, especially if your dog feels weak or unsteady.
Bed to floor and car entry
Let’s break down a safe transfer:
Place the harness on your dog and check all straps for a snug fit.
Stand close to your dog’s body for better support.
Grip the harness handles above the shoulders and hips.
Use your legs to lift, not your back. Ask for help if your dog weighs over 40 pounds.
Guide your dog slowly to the floor or car, keeping their paws on the ground as much as possible.
Let your dog pause if they seem tired or nervous.
Once your dog is settled, check for any signs of discomfort or twisting.
Tip: Always use the “support, don’t suspend” rule. Your dog should feel the ground under their paws during every move.
Ramps vs lifting for paralyzed pets
Ramps can make life easier for you and your dog. If your dog cannot climb stairs or jump into the car, a ramp gives steady support. You can guide your dog up the ramp using the harness. This helps your dog trust you and feel safe. If a ramp is not an option, use a team lift for heavy dogs. Never rush a transfer. Go slow and watch your dog’s body language.
Traction socks and booties
Slippery floors and stairs can cause falls. Traction socks or booties give your dog extra grip. Put them on before transfers or walks. These tools work well with a harness and add another layer of support. Always check the fit of socks and booties to prevent twisting or slipping.
Troubleshooting Table: Common Transfer Problems
Problem | Likely Cause | Quick Fix | When to Call the Vet |
|---|---|---|---|
Harness twists | Loose straps | Adjust for snug fit | If twisting continues |
Dog slips | Slick floors, no grip | Add traction socks | If falls or limping occurs |
Chafing | Strap rubbing | Add padding, check fit | If skin breaks or bleeds |
Refusal to move | Pain, fear, poor fit | Recheck harness, go slow | If pain or weakness worsens |
You want your dog to feel safe and supported every time you use the harness. Regular checks and small adjustments make a big difference.
Skin safety and chafing prevention
High-friction zones to check
When you use a harness to help your dog, you want to keep their skin safe. Some spots on your dog’s body rub more than others. You should check these high-friction zones every time you use the harness:
Armpits and groin
Belly and chest
Around the hips
Under the harness straps
If you see redness or your dog scratches a lot, the harness might be rubbing too much. Matted fur can also show that the harness is too tight or not sized right.
Preventing sores and irritation
You can prevent skin problems by picking a harness made with soft, breathable materials. Many harnesses use durable polypropylene, which is non-allergenic and has extra padding for comfort. Take a look at this table to see which harness types use skin-friendly materials:
Harness Type | Material Used | Key Features |
|---|---|---|
Sled Pro Harness | Durable Polypropylene | Non-allergenic, extra padding |
Running Harness | Durable Polypropylene | Breathable, hypoallergenic |
Sport Harness | Durable Polypropylene | Breathable, non-allergenic |
Always make sure the harness fits snug but not tight. Adjust the straps so they don’t dig into your dog’s skin. Let your dog walk a few steps and watch for signs of discomfort, like reluctance to move or visible irritation.
When to pause or switch support
Sometimes you need to pause or switch the type of support you use. If you notice sores, hair loss, or your dog refuses to walk, take off the harness and check their skin. Give your dog a break and try a different harness or add padding. If you see swelling, bleeding, or open sores, call your vet right away.
Skin check checklist:
Inspect high-friction zones after each support session.
Look for redness, swelling, or hair loss.
Check for matted fur under the harness.
Watch for scratching or reluctance to walk.
Adjust or switch harness if you see any problems.
🚩 Red-flag triggers for vet contact:
Sudden skin swelling or bleeding
Open sores or severe irritation
Refusal to bear weight or new pain
Your harness helps your dog move, but you need to protect their skin. Regular checks and quick action keep your dog comfortable and safe.
Daily routine for paralyzed pets with a harness
Morning, midday, evening support
You want your paralyzed dog to feel safe all day. Each morning, check your dog’s skin for any problems. Adjust the harness so it fits snugly. Help your dog go outside for a short walk or potty break. Hold the harness handles to give steady support. At midday, check your dog’s skin again and take them out for another bathroom break. You can do gentle rehab exercises to help keep muscles strong. In the evening, help your dog get ready to rest. Take off the harness and look for redness or swelling.
Tip: Most dogs do best with 3 to 5 short outdoor trips each day. For example, four trips at five minutes each adds up to 20 minutes of controlled outdoor time.
Sample daily routine template for paralyzed dogs:
Time | Activity | Harness Use | Support Focus |
|---|---|---|---|
Morning | Potty break, skin check | Full body harness | Safe lift, comfort |
Midday | Rehab, walk, skin check | Harness + booties | Mobility, traction |
Afternoon | Potty break | Harness | Gentle support |
Evening | Rest, skin check | Remove harness | Comfort, recovery |
Adjusting for fatigue and progress
Your dog might get tired quickly or start to improve. Watch for changes in energy or movement. If your dog seems tired, make walks shorter or add more rest. If your dog gets stronger, you can try longer walks or new exercises. Always use the harness for support, especially when moving your dog or going outside. Handles and straps help you lift safely and keep your dog balanced.
Tracking stability and comfort
Check your dog’s comfort and stability every day. Look for redness, swelling, or if your dog does not want to move. Check the harness fit after each session. If your dog refuses to walk or looks uncomfortable, adjust the harness or call your vet. Watching these details helps you find problems early and keeps your dog safe.
Regular care means bladder management, skin checks, and gentle rehab.
Use the harness for support during walks, transfers, and bathroom breaks.
Handles and straps spread weight and make daily care easier.
You can feel calm knowing your dog is supported and comfortable.
When to call the vet about harness use
Red flags and urgent signs
You want your dog to stay safe and comfortable every time you use a harness. Sometimes, you might notice changes that mean you should call your vet. Watch for these red flags:
Your dog suddenly cannot stand or walk, even with support.
You see new swelling, bleeding, or open sores under the harness.
Your dog cries out in pain when you lift or move them.
The harness leaves deep marks or causes skin to break.
Your dog refuses to use the harness or seems much weaker than before.
🚩 Tip: If you see any of these signs, stop using the harness and contact your vet right away. Quick action can prevent bigger problems.
Questions for your vet
You may have questions about using a harness for your dog. Bring these up with your vet to make sure you give the best support:
Is this harness the right type for my dog’s needs?
How long should my dog wear the harness each day?
What signs mean I should adjust or stop using the harness?
Can I use other support gear, like traction socks or a rear sling, with this harness?
How do I check my dog’s skin for problems under the harness?
A table can help you remember what to ask:
Question | Why It Matters |
|---|---|
Is this harness right for my dog? | Ensures proper support |
How long can my dog wear it? | Prevents skin issues |
What warning signs should I watch for? | Keeps your dog safe |
Can I use other gear together? | Improves overall support |
How do I check for skin problems? | Stops issues before they grow |
Bringing the harness to appointments
Always bring your dog’s harness to vet visits. Your vet can check the fit and show you the best way to use it. You can ask for tips on lifting and support. If your dog uses other gear, like a rear sling or traction booties, bring those too. This helps your vet see the full picture and give you the best advice for your dog’s safety and comfort.
Note: A harness gives your dog support, but it does not fix the cause of weakness. Always follow your vet’s plan and use the harness as part of your dog’s care routine.
You want your dog to feel safe and comfortable every day. Picking the right harness means you give your dog steady support for transfers, walks, and potty breaks. Always check fit and comfort before each use. Veterinary experts say a harness should match your dog’s mobility needs and adapt as conditions change. Use the checklists and tables to guide your choices. Watch your dog’s skin and comfort, and ask your vet if you notice any problems. Here’s a quick checklist for harness selection and daily use:
Checklist Item | Description |
|---|---|
Material Quality | Choose a harness that lasts and feels good for your dog. |
Adjustability | Make sure the harness fits your dog’s body shape. |
Ease of Cleaning | Pick a harness you can clean easily. |
Mobility Device Friendly | Use a harness that works with other support gear. |
Comfort and Fit | Check your dog’s comfort and harness fit every time. |
FAQ
How do I know if my dog needs a full-body lift harness?
You should look for signs like trouble standing, walking, or frequent falls. If your dog cannot balance or needs help with both front and rear legs, a harness gives steady support. Always check with your vet before choosing new gear.
Can I use a harness for potty breaks and daily walks?
Yes, you can use a harness for both potty breaks and short walks. The harness helps you guide your dog and gives extra support. Make sure your dog’s paws stay on the ground. This keeps your dog safe and helps you avoid injury.
What is the “support, don’t suspend” rule?
You should always let your dog bear some weight during assisted walking. The harness gives support but does not lift your dog off the ground. This rule protects your dog’s joints and keeps you safe while moving or transferring your dog.
How do I prevent skin problems when using a harness?
Check your dog’s skin after each use. Adjust the harness for a snug fit. Look for redness or rubbing under the straps. You can add padding or switch harnesses if you see irritation. Clean the harness often to keep your dog comfortable.
When should I ask for help lifting my dog?
If your dog weighs over 40 pounds, use a team lift. This keeps you and your dog safe. Always grip the harness handles and lift with your legs. Ask a friend or family member to help with transfers or stairs for extra support.
