

You want to help your dog get better after an accident. Post-accident dog rehab at home is essential for protecting tissues and preventing further injury. Braces or harnesses play a crucial role in helping your dog move safely and heal effectively. Look at this table to see the main goals from vet guidelines:
Goal | Description |
|---|---|
Restore normal function | Help your dog get back to normal activity. |
Improve mobility | Help your dog get stronger and move better. |
Reduce pain | Make your dog feel less pain and heal faster. |
Increase strength | Help your dog build up strength and flexibility. |
Reduce future injury risk | Lower the chance of another injury with good support. |
Always watch for warning signs and call your vet if needed. This article does not take the place of a vet. If you see more pain, sudden trouble moving, or changes in wounds, stop using the brace or harness and call your vet. Do not change medicine without your vet’s help. Keeping your pet in a safe space can help them stay calm while they heal at home.
Key Takeaways
Pick the correct brace or harness for your dog’s healing. This equipment keeps injuries safe and helps your dog move safely.
Watch your dog carefully for warning signs like more pain or quick trouble moving. If you see these, stop using the equipment and call your vet right away.
Make a daily plan that checks the fit of the brace or harness, sets up short walks, and gives your dog things to do to stay happy while getting better.
Red Flag Signs in Post-Accident Dog Rehab at Home
When you help your dog heal at home, watch for red flag signals. These signs mean your dog needs a vet quickly. Always use the brace or harness as your vet says. Stop using it if you see any of these problems.
Worsening Pain or Distress
If your dog cries, pants, or does not want to move, the injury may be worse. You may see changes in eating or sleeping. Do not change medicine or force your dog to move. Call your vet right away.
Sudden Loss of Mobility
If your dog cannot stand, walk, or use a limb, there may be a new injury. Limping or falling can mean a fracture or shock. Take off the brace and get help. For safe movement tips, see how to help dog walk after surgery.
Wound Issues or Swelling
Look under the brace or harness for swelling, redness, or discharge. Gums that look blue, pale, yellow, or bright red can mean bleeding inside. If you see these signs, stop using the gear and call your vet. Learn more about pressure sore prevention.
Neurological Symptoms After Injury
Confusion, sudden collapse, or trouble breathing are emergencies. Breathing problems or trouble peeing also need fast care. Do not wait.
Red Flag Signals Checklist:
Worsening pain or distress
Sudden loss of mobility
Swelling, redness, or discharge under brace/harness
Abnormal gum color
Persistent vomiting or diarrhea
Difficulty urinating
Eye redness or discharge
Loss of appetite
Limping or collapse
Confusion or trouble breathing
This article does not replace your vet’s care. If you see any red flag signals, get help fast. Never change medicine without your vet’s advice.
Understanding Rest and Exercise Restriction
Why Rest Is Essential for Healing
Giving your dog rest helps them heal after an accident. Rest keeps hurt tissues safe and lets the body fix itself. Experts say knowing how healing works is important. You need to balance rest with gentle movement. Not moving enough can make muscles and joints weak. The right brace or harness helps your dog move safely. Always check if the brace fits before and after use. If you see swelling, redness, or pain, stop using the brace and call your vet. This article does not replace your vet’s care. If you see red flag signals, get help fast. Never change medicine without your vet’s advice.
What Is Exercise Restriction?
Exercise restriction means you control how much your dog moves. You use a brace or harness for every walk, even short ones. Keep your dog on a leash and do not let them use stairs or jump. Do not let your dog play rough. Put your dog in a crate or small room when you cannot watch them. Start with short, gentle walks using the brace. Only make walks longer if your dog feels fine. Safe movement is part of physical rehabilitation. Always watch your dog for pain and check the brace fits well.
Exercise Restriction Guidelines:
Leash walks only with a brace or harness
Short walks, several times a day
No stairs or jumping
No rough play
Use crate or pen for supervision
Managing Bathroom Breaks and Feeding
Watch your dog closely during bathroom breaks. Use the brace or harness to help your dog stand and not slip. Take your dog to the same potty spot each time. Wait quietly and give a treat after they finish. For feeding, use puzzle toys or scatter food to keep your dog busy. Always check the brace fits before and after outings.
Support Walking for Outings/Toileting Checklist:
Fit the brace or harness snugly before going outside
Use a leash for control
Support your dog’s rear or front as needed
Watch for signs of fatigue or pain
Stop and call your vet if you see red flag signals
Mental Stimulation During Rest
You can help your dog stay happy while resting. Try calm games that reward relaxing. Use food puzzles or scent games for fun. Do not give too many toys at once. Short sniff walks indoors with a harness can help your dog feel busy. Always watch these activities and check the brace for comfort.
Cage Rest and Safe Confinement
When to Use Cage Rest
Cage rest is needed for dogs with spinal injuries. It is also used for intervertebral disc disease. Most vets say cage rest should last 4 to 6 weeks. This keeps your dog from moving too much and getting hurt again. Your dog must stay in the crate except for bathroom breaks or short, watched walks. Always use the right brace or harness when you take your dog out. Do not let your dog run, jump, or play rough. Finish the whole cage rest time even if your dog looks better. Watch for pain or changes in how your dog moves. If you see red flag signals, stop using the brace and call your vet.
Guideline | Description |
|---|---|
Duration of Cage Rest | Keep your dog in the crate for 4 weeks after a spinal injury. |
Supervision | Only let your dog out for bathroom breaks or short, watched walks. |
Leash Walks | Take slow, 5-minute walks with a brace or harness, 3-4 times a day. |
Activity Restrictions | No running, jumping, or rough play at all. |
Setting Up a Recovery Space
Pick a room on the ground floor for your dog’s recovery. Make sure your dog can get outside easily. Put down mats or non-slip rugs so your dog does not fall. Take away furniture so your dog cannot jump up. Keep the room between 62.5°F and 71°F. Put your dog’s favorite toys or a blanket that smells like you in the crate. Wash the bedding often with pet-safe soap. Use a heating pad if it is cold or light bedding if it is warm. Always check the brace or harness fits before moving your dog.
Keeping Your Dog Calm in the Crate
You can help your dog feel calm in the crate. Give your dog a favorite toy or soft blanket. Talk to your dog in a gentle voice and praise them. Use food puzzles to keep your dog busy. Try to keep the room quiet and limit visitors. Check the brace or harness every day for comfort and skin problems. If your dog seems upset or will not move, stop using the brace and call your vet.
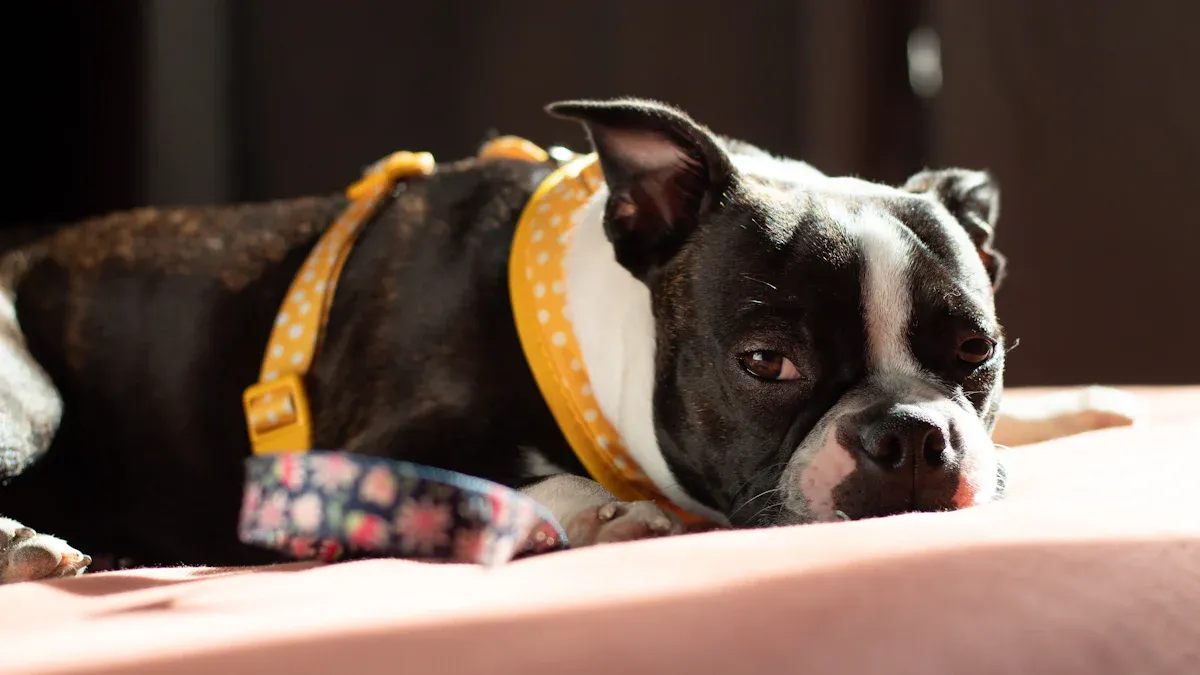
Choosing Braces by Body Part
Choosing Braces by Body Part:
Rear lift sling
Full body harness
Knee brace
Ankle brace
Wrist brace
Hip support
Anti-slip booties
Pick the brace or harness that matches your dog’s injury. Always listen to your vet’s advice. This article does not replace your vet. If you see red flag signals, get help right away. Never change medicine without your vet’s help.
Braces and Harnesses for Safer Steps Indoors
Helping dogs heal inside starts with picking the right brace or harness. You need to protect hurt tissues and stop more injury. The gear should help your dog move safely. Each step must be supported by gear that fits well and matches the injury. Always listen to your veterinarian’s advice. Stop using any brace or harness if you see red flag signals. This article does not replace your vet’s care. Get help fast for emergencies. Never change medicine without a vet’s help.
Matching Gear to Injury Type
Different injuries need different support. You must pick the brace or harness for your dog’s condition. Here are common injuries and the gear that helps:
Carpal injuries: Carpal splints keep the wrist steady and help dogs walk with less pain.
Tarsal injuries: Hock splints support the lower back leg and help stop joint problems.
Knee injuries (ACL/CCL): Dog knee braces keep the leg steady and control movement.
Severe or chronic injuries: Custom orthotic braces give special support for older dogs or those with joint problems.
Weak rear limbs: Rear lift slings help you hold up your dog’s back end during walks or bathroom breaks.
Full body weakness: Full body harnesses spread out weight and make it easier to help your dog indoors.
You can read more in our dog support harness and rear lift sling guides. For slippery floors, see our tips to help prevent falls.
Choosing the Right Brace or Harness
Picking the best brace or harness means looking at safety, fit, and how it works. You want gear that keeps your dog safe and comfy. Follow these steps:
Find the injury. Each problem needs a special brace.
Measure your dog’s leg or body the right way. Use our brace sizing guide for help.
Pick a brace with straps you can adjust for a snug fit.
Look for hinged designs in dog knee braces so your dog can move naturally.
Make sure the brace covers enough of the leg for support but does not block joints like the elbow.
Check that the harness or brace does not rub or slip.
Ask your veterinarian or a rehab expert for advice on the best gear.
A good brace gives support but does not cause muscle loss. It should keep your dog steady and let them move as they heal. For front leg injuries, pick a brace that covers half to three-quarters of the leg so the elbow can move. Always use the brace or harness for safe movement and exercise restriction. If your dog seems uncomfortable, stop using the gear and call your vet.
Tip: Check the fit of your dog’s brace or harness often. Adjust straps so the gear does not slip or rub. For more help, visit our prevent chafing and pressure sore prevention pages.
Fitting and Adjusting for Comfort
Getting the right fit is important for safety and healing. You must check the brace or harness every day, especially after walks or bathroom breaks. Here is how you can keep your dog comfy and safe:
Make sure the harness is not too tight. Tight gear can cause skin problems or make it hard to breathe.
Do not use loose harnesses. Loose gear may let your dog get out or not help the injury.
Look for red marks, swelling, or signs of pressure sores under the brace.
Clean and dry the brace or harness often to stop skin problems.
Watch for changes in how your dog moves or acts. If your dog will not walk or seems scared, stop using the gear and call your vet.
You can find more fitting tips in our brace sizing guide. For dogs with sensitive skin, use soft padding and check for sore spots often. Always help your dog with the right gear during rest and exercise restriction.
Fit and Skin Safety SOP
Fit and Skin Safety SOP
Fit the brace or harness by the manufacturer’s instructions.
Check the position and tightness every 2–4 hours, especially after movement.
Look for red marks, swelling, or hair loss under the gear.
Take off the brace if you see any pressure sores.
Clean and dry the brace every day.
Use soft padding for sensitive spots.
Stop using the brace and call your vet if you see skin problems.
For more information, visit our dog knee brace, brace sizing guide, and pressure sore prevention resources.
Note: This article does not replace your vet’s care. If you see red flag signals, get help fast. Never change medicine without your vet’s advice.
Special Considerations for Spinal Cord Injury
Supportive Gear for Spinal Injuries
If your dog has a spinal cord injury, you need to use special gear to keep them safe. Wiggleless back braces help support and stabilize the spinal area. These braces encourage your dog to move in the right way and protect healing tissues. You can also use harnesses to help your dog stand, walk, or go outside for bathroom breaks. Harnesses work well for dogs who feel weak or wobbly after spinal surgery. Always check that the brace or harness fits snugly but does not squeeze. Watch for any signs of pain or discomfort. If you see red flag signals, stop using the gear and call your vet. This article does not replace your vet’s care. Never change medicine without your vet’s advice.
Tip: Use the brace or harness every time your dog moves indoors. This helps prevent falls and keeps the spinal area safe.
Preventing Pressure Sores and Chafing
Dogs with spinal injuries often wear braces or harnesses for long periods. You must protect your dog’s skin from pressure sores and chafing. Follow these steps:
Make sure the brace fits well and does not press too hard.
Check your dog’s skin often for redness or sore spots.
Add soft padding, like neoprene or memory foam, under straps and along edges.
Clean and dry your dog’s skin and the brace before each use.
Visit your vet for regular check-ups, especially after spinal surgery.
If you see swelling, hair loss, or open sores, remove the brace and call your vet. Only use the brace or harness as your vet recommends. Safe movement with the right gear helps your dog heal after spinal cord injury.
Daily Home Rehab Routine
Morning and Evening Checks
You should start and end each day with a careful check of your dog’s brace or harness. This routine helps you spot problems early and keeps your dog safe during recovery. Always use the brace or harness recommended for your dog’s injury, such as a knee brace for joint support or a rear lift harness for weak back legs. Check that the gear fits snugly but does not rub or cause swelling.
Daily Skin and Brace Check Checklist:
Inspect the skin under and around the brace for redness, swelling, or sores.
Make sure the brace or harness is clean and dry.
Adjust straps so the gear stays in place but does not pinch.
Watch your dog’s walking and standing for signs of pain or limping.
Remove the brace if you see any red flag signals and contact your vet.
This article does not replace veterinary care. If you notice red flag signals, seek immediate help. Never change medication without your vet’s advice.
Activity Scheduling and Record Keeping
Plan your dog’s daily activity with short, controlled walks using the brace or harness. Passive joint movement and slow lead walking help maintain muscle health. Use food puzzles or scent games for mental stimulation while your dog rests. Track your dog’s progress and setbacks in a journal or table. This helps you notice changes and share updates with your vet.
Behavior Change | Date | Notes on Diet | Notes on Exercise | Interaction with Others |
|---|---|---|---|---|
Example Change | YYYY-MM-DD | Ate less | Walked slower | Seemed withdrawn |
Stay patient during plateaus. If your dog regresses, return to the last successful activity level and build up again. Always use the correct brace or harness for every activity and check fit before and after each session.
Troubleshooting Common Problems
Gear Slipping or Causing Discomfort
You may notice your dog’s brace or harness slips out of place or causes discomfort. This can happen if the gear does not fit well or if straps loosen during movement. Braces that do not fit can lead to pain, instability, or even improper healing. Harnesses that are too tight or loose may restrict movement or rub the skin. Always check the fit before and after each use. Adjust straps so the brace or harness stays snug but does not pinch. Add soft padding under straps if you see redness or hair loss. If you cannot get a good fit, stop using the gear and contact your vet. Never ignore swelling, sores, or signs of pain.
Tip: Clean and dry the brace or harness daily to prevent skin problems.
Dog Refuses to Move or Seems Afraid
Sometimes, your dog may not want to move with a new brace or harness. This can happen if the gear feels strange or uncomfortable. Encourage gentle movement by speaking softly and offering favorite treats. Use a rear lift harness or full body harness to support your dog during short, slow walks. Give your dog time to adjust. Show love and patience. If your dog still refuses to move or seems scared, check the fit again. Remove the gear if you see pain or distress and call your vet for advice.
Signs of Overexertion or Setbacks
Watch for warning signs that your dog is doing too much. These include fatigue, limping, or trouble getting up. You may also see redness or swelling near the brace, pain after short walks, or a down tail. If your dog pants a lot, stops eating, or seems restless, these are signs to slow down. Always use the correct brace or harness for support during movement. Stop activity and remove the gear if you see any of these signs. Contact your vet right away. This article does not replace veterinary care. Seek immediate help for red flag signals and never change medication without your vet’s advice.
Sizing and Fitting Braces and Harnesses
Measuring for the Right Fit
Getting the right size brace or harness helps your dog heal safely. You need to measure your dog while they stand. Use a soft tape measure and follow these steps:
Chest: Wrap the tape around the widest part of your dog’s chest, just behind the front legs. The tape should be snug, but you should fit one finger under it.
Height: Measure from the base of the rear paw up to the top of the hip. Keep the tape straight.
Thigh: Measure around the thigh, halfway between the knee and groin. Again, leave room for one finger.
Front: Measure from the breastbone to the middle of the back.
Girth: Measure the middle of the back for harnesses that need this number.
Tip: Always measure your dog when they are standing. This gives the most accurate fit.
Quick Fitting and Adjustment Tips
A well-fitted brace or harness should feel snug but never tight. You should check the fit before every use. Here are some quick tips:
Adjust all straps. Even a small change can make your dog more comfortable.
You should fit two fingers between each strap and your dog’s body.
Make sure nothing twists, sags, or pinches.
The harness should sit around the neck without pressing on the throat.
Recheck the fit every few weeks, especially if your dog is growing or healing.
No harness or brace fits every dog the same way. Your dog should move naturally and feel comfortable. If you see rubbing, slipping, or your dog seems upset, stop using the gear and call your vet.
Troubleshooting Sizing & Fit | What to Do |
|---|---|
Straps too loose or tight | Recheck and adjust straps; measure again if needed |
Gear rubs or pinches | Add padding or try a different design |
Dog outgrew the brace | Measure again and check the sizing chart |
Brace slips during movement | Adjust fit or try a model for your dog’s build |
This article does not replace veterinary care. If you see red flag signals, contact your vet right away. Never change medication without professional advice.
Enhancing Indoor Safety During Recovery
Preventing Slips and Falls
You want your dog to move safely indoors while wearing a brace or harness. Slippery floors can cause falls and new injuries. You can make your home safer with a few simple changes:
Place non-slip mats or rugs in areas where your dog walks with a brace or harness.
Trim fur between paw pads and keep nails short to help your dog grip the floor.
Use nonslip tape on steps or ramps if your dog needs to walk up or down with a harness.
Block off rooms with slick surfaces and guide your dog to safe, carpeted areas.
Always check that the brace or harness fits snugly before each walk. Adjust straps if you see slipping or rubbing.
Tip: Dogs with braces or harnesses may need extra help on smooth floors. Support your dog’s movement with a rear lift harness or full body harness for better control.
If you notice limping, pain, or your dog refuses to walk, stop using the gear and contact your vet. This article does not replace veterinary care. Seek help for red flag signals and never change medication without professional advice.
Managing Stairs and Obstacles
Stairs and obstacles can be dangerous for dogs recovering with braces or harnesses. You can keep your dog safe by:
Using pet gates to block access to stairs during recovery.
Confine your dog to stair-free areas until they regain strength.
Assist your dog with a harness when going up or down stairs. Hold the harness securely and move slowly.
Add traction to stairs with carpet runners or nonslip strips.
Remove clutter and keep pathways clear so your dog does not trip.
Always supervise your dog when they move near obstacles. Check the brace or harness for fit before and after stair use. If your dog struggles or shows distress, stop and call your vet.
When to Contact Your Veterinarian
Monitoring Progress and Warning Signs
You help your dog get better at home. Watch your dog every day, especially when they wear a brace or harness. Look for changes that mean your dog may need a veterinarian’s help. These signs include:
Your dog hides or acts restless.
Your dog walks with their head down in a brace.
Your dog does not want to move or play, even with support gear.
Your dog limps sometimes or for no clear reason.
Your dog walks or stands differently in a harness.
Your dog falls or gets hurt while moving in a brace.
Your dog feels stiff after resting in a harness or crate.
Your dog has trouble getting in or out of the car, even with a lift harness.
Your dog’s nails are long and make walking in a brace hard.
Your dog pulls on the leash or plays rough, which can hurt the injury.
If you see any of these signs, stop using the brace or harness. Call your veterinarian right away. This article does not replace your vet’s care. Red flag signals need quick help. Never change medicine without your vet’s advice.
Communicating with Your Vet
You help your veterinarian by sharing clear updates. Write down your dog’s injury history and any changes while using braces or harnesses. Note what upsets your dog, like certain moves or noises during brace fitting. Share details about your dog’s home and who cares for them. Try to avoid stress during check-ups so your dog stays calm and safe. Good communication helps your vet pick the best care and change the rehab plan if needed.
Tip: Bring your daily checklist and notes to each vet visit. This helps your vet see your dog’s progress and any problems with the brace or harness.
You help your dog get better by doing these things: First, make sure your dog rests and does not do too much exercise. Use the right brace or harness every time. Next, check how the brace fits and look at your dog’s skin each day. Watch for any red spots or swelling. Cheer for small improvements to keep you and your dog happy. > Measure your dog before you buy a brace. Pick braces that match your dog’s problem and situation. This guide is not the same as seeing a vet. Call your vet if you see warning signs.
FAQ
How do you know if your dog’s brace or harness fits correctly?
Check that you can fit two fingers under each strap. The brace should not slip or pinch. Watch for red marks or swelling.
What should you do if your dog refuses to walk with a new brace or harness?
Encourage slow movement with treats. Check the fit again. Remove the gear if your dog shows pain. Call your veterinarian for advice.
When should you stop using a brace or harness and contact your vet?
Stop using the brace or harness if you see swelling, sores, limping, or sudden pain.
Call your veterinarian right away.
This article does not replace veterinary care.
