
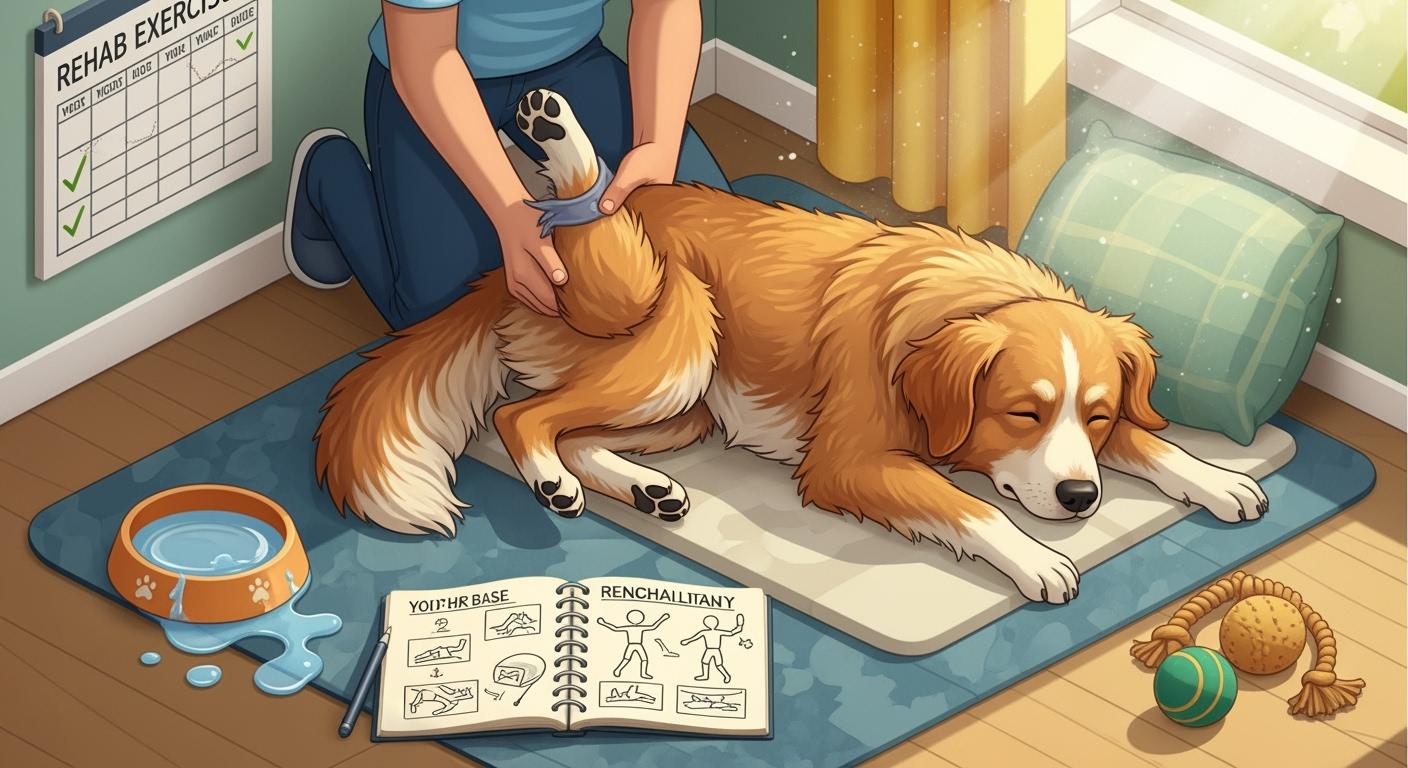
Dog CCL tear recovery is a slow process. It is more than just waiting for the cut to heal. You help your dog get strong bones and muscles again. You also help scar tissue heal the right way. The implant must stay in place. Recovery needs you to follow each step carefully. Be patient and follow the plan. Listen to your vet. Use the Quick Reference Card to check progress.
- Taking care of your dog at home helps them get better.
- The first 8 to 12 weeks are very important for healing.
- If you let your dog do too much, they can get hurt again.
Be patient and keep doing the right things. Your help keeps your dog safe as they heal.
Key Takeaways
- Recovery from a dog CCL tear takes time. Follow the vet’s plan and be patient to ensure proper healing.
- Home care is crucial. Keep your dog calm and limit movement during the first two weeks to prevent further injury.
- Gentle rehab exercises help rebuild strength. Start with short walks and follow your vet’s guidance for safe activities.
- Monitor your dog’s progress closely. Watch for signs of pain or swelling and contact your vet if you notice any issues.
- Maintain a healthy weight for your dog. A balanced diet reduces stress on the joints and lowers the risk of arthritis.
For a broader path across knee support, controlled movement, lift assistance, incision protection, and fit checks, use the Dog Recovery Support Guide.
What a dog CCL tear changes and why recovery takes time
Instability, pain, and arthritis risk
When your dog tears the cranial cruciate ligament (CCL), the knee joint loses its main stabilizer. You will notice your dog struggles to walk or stand. The CCL keeps the shin bone from sliding forward and stops the knee from bending too far. It also prevents the shin from twisting inward. Without this support, the knee becomes loose and painful.
- The knee joint slides in ways it should not.
- Your dog feels pain and may limp or avoid using the leg.
- Swelling and inflammation often develop in the joint.
This instability leads to more than just pain. The joint reacts by building up fluid and swelling. Over time, the lining of the joint becomes inflamed. This process is called synovitis. You should know that arthritis almost always follows a CCL tear. Dogs with this injury have a much higher risk of arthritis than healthy dogs. Early pain management and following your vet’s advice can help slow down these changes.
Tip: Watch for signs of pain or swelling. Call your vet if your dog stops using the leg or seems very uncomfortable.
Muscle loss during rest
After a CCL tear, your dog will rest more to protect the knee. This rest is important, but it also causes muscle loss. You may see the muscles in the injured leg shrink. This is called muscle atrophy. It can start soon after the injury, even if you do not notice it right away.
- Muscle atrophy happens because your dog uses the leg less.
- The affected leg gets weaker, making recovery harder.
- Rehab exercises or physical therapy can help reduce muscle loss.
You play a key role in your dog’s recovery. Safe movement and gentle exercises, as guided by your vet, help rebuild strength. Always follow the plan and watch for any setbacks.
Recovery plan decisions for CCL tears
Surgery vs conservative care
You face important choices when building a recovery plan for your dog’s CCL tear. Surgery, such as TPLO or lateral suture surgery, often gives the best results for large or active dogs. Surgery repairs the knee and helps restore stability. Most dogs over 15 kg do better with surgery. Small dogs under 10 kg may improve with conservative care, which means rest, pain control, and gentle rehab. Conservative care does not heal the ligament. Instead, scar tissue forms around the knee to give some support. Both surgery and conservative care can help your dog feel better, but the long-term outlook depends on your dog’s size, age, and activity level.
Talk with your vet about your dog’s needs, your goals, and your ability to follow the recovery plan.
- Surgery often leads to better function for big or young dogs.
- Conservative care may work for small, older, or less active dogs.
- Both options need your daily commitment.
Knee brace role and limits
A knee brace can support your dog’s knee during recovery. Braces do not fix the ligament. They give comfort and help limit movement. Braces work best for mild to moderate injuries or for dogs who cannot have surgery. You must check the fit every day. Look for skin rubbing, slipping, or redness. If you see these problems, stop using the brace and call your vet. Braces may not help with severe tears. Some dogs need time to get used to wearing a brace.
Mini fit-and-skin-check routine:
- Check the brace fit each morning and night.
- Look for skin redness or sores.
- Make sure the brace does not slip or twist.
- Remove the brace if you see any problems.
If redness lasts after the brace is removed, straps keep migrating, or the brace creates new pressure points, review the brace fit and skin-check guide before continuing use. To compare support styles rather than a single model, review the dog knee brace category.
If the brace slips, causes sores, or your dog still limps badly, the brace may not be enough.
Decision table: surgery, conservative, brace
Here is a quick guide to help you compare your options. Always follow your vet’s advice when choosing a recovery plan.
| Option | Best For | Cost Estimate | Owner Commitment | Limits and Risks |
|---|---|---|---|---|
| Surgery (TPLO, lateral suture surgery) | Large, young, or active dogs | $3,000–$7,000+ | High (strict rest, rehab, vet visits) | Surgery risks, long recovery |
| Conservative Care | Small, older, or low-activity dogs | $500–$2,000 | High (rest, rehab, close monitoring) | May not restore full function |
| Knee Brace | Mild/moderate tears, surgery not possible | $200–$700 | Medium (fit checks, skin checks, rehab) | Does not repair ligament, brace issues |
Your recovery plan should match your dog’s needs and your ability to follow through. Ask your vet for help at every step.
Dog CCL tear recovery timeline: week-by-week phases
Knowing the dog CCL tear recovery timeline helps you plan. It also helps you avoid problems. Each phase has different goals and activities. There are risks in each phase too. This guide shows you how to help your dog at home, week by week.
Phase 1: Protect and calm down (0–2 weeks)
In the first two weeks, your job is to keep your dog safe. You need to protect the knee and keep your dog calm. This starts right after surgery, no matter which type. You must stop your dog from moving too much.
- Put your dog in a crate or small room. This stops running, jumping, or climbing.
- Only take your dog out for bathroom breaks. Use a short leash every time.
- Keep walks short. Do this 3 to 5 times a day. Each walk should last 3 to 5 minutes.
- Give medicine for pain if your vet says so. This may be anti-inflammatory pills or a pain patch.
- Watch for swelling, redness, or pain signs.
Tip: Use baby gates to block stairs and furniture. Always watch your dog during this time.
Math Example:
If you walk your dog 4 times a day for 14 days, you will have 56 leash-potty trips. This helps you plan and keeps your dog from doing too much.
Phase 2: Controlled rebuild (2–8 weeks)
Weeks 3 to 8 are for gentle rehab. You want to help your dog get stronger but not hurt the knee. Start easy exercises, but ask your vet before trying new things.
- Help your dog stand on all four legs. This is called weight shifting.
- Walk your dog in a figure-8 shape on a leash. This helps balance.
- Use low poles for slow, careful steps.
- If your vet says yes, try underwater treadmill walks.
- Use a rear support harness for walking.
- Some dogs use a dog wheelchair for less strain.
Note: Do not let your dog run, jump, or play with other pets. Go slow and follow the plan.
Phase 3: Wean back to normal (8–16 weeks)
From week 8 to week 16, your dog can do more. You want to build stamina and help your dog walk better. You still need to protect the knee.
- Make leash walks longer, up to 20–30 minutes.
- Walk on grass and gentle hills to help balance.
- With your vet’s okay, start slow jogging or short play.
- Keep doing rehab exercises for strength.
Caution: Look for limping or tiredness. If you see problems, do less and call your vet.
Phase 4: Higher-impact return (up to 6 months)
The last stage lasts up to 6 months. Your dog may do harder activities if your vet says it is safe. This is the end of the week-by-week plan, but you still need to watch for problems.
- Most dogs use their leg well and enjoy old activities.
- Life gets better, but there is still some risk for arthritis or hurting the other knee.
- Problems with surgery implants can happen, so keep checking your dog.
Safety Reminder: Always ask your vet before letting your dog run, play off-leash, or do sports.
Recovery Timeline Table
Here is a table that shows each phase, what your dog can do, rehab focus, and mistakes to avoid.
| Phase & Weeks | Allowed Activity | Rehab Focus | Common Mistake to Avoid |
|---|---|---|---|
| Phase 1 (0–2 weeks) | Leash potty only, 3–5 times/day, 3–5 min | Incision care, pain control, crate rest | Letting dog roam or jump |
| Phase 2 (2–8 weeks) | Short leash walks, gentle exercises | Weight shifting, figure-8s, low poles | Advancing too quickly |
| Phase 3 (8–16 weeks) | Gradual increase, 20–30 min walks, varied terrain | Stamina, gait quality, proprioception | Skipping rehab or overexertion |
| Phase 4 (up to 6 months) | Return to normal, vet-guided higher-impact | Full function, joint protection | Allowing high-impact too soon |
Owner Tip: Follow the timeline. Rushing is the main reason for setbacks in dog ccl tear recovery.
Sample Owner Schedule Calculation:
If you walk your dog 4 times a day for 2 weeks, you will have 56 leash-potty trips. This helps you stay on track and keeps your dog safe during strict recovery.
Summary:
The dog ccl tear recovery timeline gives you steps from surgery to full recovery. Each phase builds on the last one. Be patient and follow the plan each week. Always ask your vet before changing what your dog does. This helps your dog heal well and lowers the chance of problems.
Home setup to prevent setbacks
Flooring, stairs, and car transfers
You can make your home safer for your dog during recovery. Start by covering slippery floors with non-slip rugs or yoga mats. Place these in high-traffic areas and near your dog’s bed. Use non-slip paw treads or socks to help your dog grip smooth surfaces. Block access to stairs and furniture with baby gates. Ramps or pet stairs make it easier for your dog to get in and out of the car. Always supervise car transfers and support your dog with a harness. Keep walks short and controlled. Do not allow zoomies or rough play.
Tip: Supervise your dog during outdoor time. Stop any running or jumping right away.
Lick prevention and incision care
Protecting the incision is a top priority. Use an Elizabethan collar for at least 7 to 10 days after surgery. If your dog does not tolerate the E-collar, try a soft collar or a recovery sleeve. You can also use socks or sweatpants as a barrier. Apply a bitter-tasting spray around (not on) the incision to discourage licking. Check the incision every day for swelling, redness, or discharge. Keep the area clean and dry. Do not let your dog swim or bathe until your vet says it is safe. Always wash your hands before touching the incision.
Alert: Call your vet if you see swelling, drainage, or if your dog keeps licking the incision.
Owner compliance checklist
Poor compliance is a common reason for setbacks. Use this checklist to stay on track each day:
| Item | Description |
|---|---|
| Leash-only potty breaks | Take your dog out on a leash for bathroom trips only. |
| No running or jumping | Block stairs and furniture. Use gates and supervision. |
| Traction on floors | Place non-slip rugs or use paw grips for better footing. |
| Calm-down strategies | Use crate rest, toys, or chews to keep your dog relaxed. |
| Incision protection | Use an E-collar, Lick Sleeve, or barrier. Check the incision daily. |
| Support for car transfers | Use a support harness or ramp for safe entry and exit. |
Stay consistent with these steps. Your attention to detail helps your dog heal safely.
Rehab basics for safe recovery
Helping your dog after a CCL tear means using safe rehab. You want to help healing, get movement back, and build strength. Always listen to your vet and change your plan as your dog gets better.
Range of motion and comfort
Start rehab with gentle physical therapy. Passive range of motion (PROM) exercises help your dog’s knee move through a comfortable range. You slowly bend and straighten the leg while your dog stays calm. This keeps the joint flexible and stops scar tissue from forming. Massaging the muscles can lower swelling and help your dog feel better.
| Exercise Type | Benefit |
|---|---|
| Passive Range of Motion (PROM) | Keeps joint moving and flexible |
| Gentle Massage | Lowers swelling and helps comfort |
| Controlled Stretching | Stops stiffness and helps tissue heal |
Tip: Stop if your dog seems hurt or does not want to move. Always ask your vet before starting new physical therapy.
Controlled leash walks
Controlled leash walks are important for rehab. Begin with short walks, about 3–5 minutes, three or four times each day in the first weeks. Make walks longer slowly as your dog gets stronger. Walk on flat, non-slip floors. Do not use stairs, rough ground, or sharp turns.
| Weeks | Activity Description |
|---|---|
| 3–6 | Short, slow leash walks (3–5 minutes, 3–4 times daily) |
| 7–10 | Slowly make walks longer, up to 10–15 minutes, always on leash |
| 11–16 | Longer walks (up to 20–30 minutes), add gentle hills if your vet says it is okay |
If you see limping, swelling, or your dog gets tired fast, do less and call your care team.
Strength-building exercises
Add strength-building physical therapy as your dog gets better. Easy weight-shifting exercises help your dog use the hurt leg. Stand your dog and gently move weight from side to side. Figure-8 walking helps balance. Swimming or hydrotherapy gives a full workout without hurting the joint. If you do not have a pool, gentle moves in shallow water, like a bathtub, can help.
- Weight-shifting on all four legs
- Figure-8 leash walking
- Swimming or hydrotherapy sessions
- Sit-to-stand repetitions
Always watch your dog during physical therapy. Stop if your dog seems hurt or does not want to do the exercises.
Rehab exercise menu
Here are safe, vet-approved rehab choices:
- Passive range of motion (PROM)
- Gentle massage
- Controlled leash walking
- Basic weight-shifting
- Figure-8 walking
- Sit-to-stand exercises
- Swimming or hydrotherapy (if you can)
Stop Rules: If your dog’s pain gets worse, limping gets worse, or swelling shows up, stop all rehab and physical therapy. Call your vet right away.
Set clear goals for each part of rehab. Change your plan as your dog heals. Safe, steady rehab and physical therapy help your dog feel better and move well. Always pick rehab options like physical therapy that fit your dog’s needs and stage of recovery.
What to expect after surgery: normal vs red flags
Normal swelling, tiredness, and progress
After knee surgery, mild swelling, bruising, tiredness, and temporary limping may occur, but the expected pattern depends on the procedure, the dog, and the surgeon’s discharge plan. The most useful signal is the trend: swelling, comfort, appetite, and weight-bearing should not suddenly worsen. Keep the incision clean and dry, follow the prescribed medication schedule, and do not increase walk time or rehabilitation exercises from a generic online timeline. Advance activity only when the veterinary team has cleared the next stage.
Watch your dog every day to see how they are doing. Do not let your dog do too much too soon. Slow and steady steps help keep your dog safe.
Track pain and swelling trends at home
A single observation is less useful than a daily trend. Check your dog at roughly the same times each day and compare what you see with the discharge instructions from the clinic. Record changes rather than relying on memory, especially after medication, a leash walk, a slip, or a rehabilitation session.
| Daily Check | What to Record | Contact the Clinic If |
|---|---|---|
| Swelling | Improving, unchanged, or increasing | It becomes larger, hotter, firmer, or returns after improving |
| Weight-bearing | Using the leg more, the same, or less | Your dog suddenly stops using the leg or cries when moving |
| Incision | Dryness, redness, odor, heat, or discharge | The incision opens, drains, smells, bleeds, or becomes hot |
| Comfort | Resting, panting, guarding, trembling, or yelping | Pain appears worse despite the prescribed plan |
| Appetite and energy | Eating, drinking, alertness, and sleep | Your dog stops eating, becomes unusually weak, or is difficult to settle |
| Medication | Time given and any vomiting, diarrhea, or unusual behavior | You suspect a missed dose, double dose, or adverse reaction |
If the veterinary team recommends cold or warm therapy, follow its timing and placement instructions. Keep a fabric barrier between the pack and the skin, avoid placing it directly over an incision, and check the skin during and after use. Do not switch from cold to heat simply because a fixed number of days has passed; stop and contact the clinic if swelling, redness, skin sensitivity, or pain worsens.
For a broader comparison of postoperative limping patterns, see dog limping after surgery: soreness vs complication.
Red flags: worsening, drainage, non-weight-bearing
You need to look for signs that something is wrong. If your dog starts limping more or stops using the leg, this is a red flag. Swelling that gets worse is also a warning sign. If the incision opens up, drains, or smells bad, call your vet. If your dog has a fever, seems very tired, or keeps licking or chewing the incision, get help. Sudden changes like falling or yelping mean you should act fast. These problems can happen after any CCL surgery, even lateral suture surgery.
If you see any of these warning signs, stop all activity and call your vet right away.
Red Flags vs Normal Healing Table
Use this table to know what is normal after surgery and when to call your vet:
| Criteria | Green: Expected (Monitor) | Yellow: Call Clinic Soon | Red: Urgent Vet Call |
|---|---|---|---|
| Swelling Trend | Mild, stable, or getting better | Mild but not getting better | Big, hot, or getting worse |
| Incision Changes | Dry, calm, no redness | A little red or a scab | Open, draining, hot, or smelly |
| Sudden Lameness | None or slowly getting better | A little, not getting worse | Sudden or much worse |
| Refusal to Bear Weight | Using leg every step | Unsure, uses leg a little | Will not use leg at all |
| Fever/Lethargy Signals | Normal energy, eating well | A little tired | Very tired, fever, not eating |
| Licking/Chewing | Leaves incision alone | Looks sometimes | Keeps licking or chewing |
If you see anything in the red column, call your vet right away. If you are not sure, it is safer to call.
Long-term recovery and joint health
Weight management and arthritis
You help your dog’s joints stay healthy by keeping their weight in a safe range. Extra pounds put more stress on the knees and make arthritis worse. Dogs who stay lean have a much lower risk of joint problems. Obesity can quadruple the chance of CCL failure and leads to more inflammation. This inflammation damages joint tissues and raises the risk of arthritis, especially after a CCL injury. Lean dogs show a five-fold lower risk of hip dysplasia and much less arthritis overall.
You can support your dog’s recovery by following these steps:
- Feed your dog a balanced diet and measure portions carefully.
- Reduce treats and table scraps.
- Ask your vet about the best weight for your dog.
- Weigh your dog every month to track progress.
Keeping your dog lean is one of the most effective ways to protect their joints and reduce pain management needs.
Other knee risk and prevention
After a CCL tear, the other knee faces a higher risk of injury. You can lower this risk with a structured plan. Start with a step-by-step rehab program to restore normal walking and rebuild muscle balance. Losing even 10% of extra weight can take pressure off both knees. Strengthening and proprioception drills help your dog control their joints and walk better. You may want to ask your vet about joint supplements to manage inflammation. Change your dog’s environment to avoid high-impact activities and make playtime safer.
Here are ways to protect your dog’s knees:
- Follow a structured rehab plan after injury.
- Control your dog’s weight with diet and exercise.
- Practice strengthening and balance exercises.
- Use joint supplements with vet guidance.
- Modify play areas to prevent jumping and rough play.
- Schedule regular check-ups to catch problems early.
You play a key role in your dog’s long-term joint health. Stay alert for changes and work with your vet to adjust your plan as needed.
B2B sourcing note: Pet brands, distributors, and rehabilitation-product sourcing teams evaluating canine knee-support programs can review GaitGuard’s custom dog brace manufacturing support.
FAQ
How long does dog CCL tear recovery take?
Most dogs need about 16 weeks to return to normal family life after a CCL tear. Some dogs need up to 6 months before they can do high-impact activities. Each dog heals at a different pace. You should follow your vet’s timeline and check for progress at each phase.
What are safe home rehab exercises?
You can use gentle exercises like passive range of motion, controlled leash walks, and sit-to-stand movements. Figure-8 walking and weight-shifting also help. Always ask your vet before starting new exercises. Stop if your dog shows pain or swelling.
When can my dog start leash walks?
You can begin short leash walks for bathroom breaks right after surgery. These walks should last 3 to 5 minutes, three to four times a day. Longer walks start after your vet checks the incision and gives approval.
Is limping normal after surgery?
Mild limping is common in the first few weeks. Your dog should use the leg more each day. If limping gets worse or your dog stops using the leg, call your vet. Watch for swelling or pain.
Should I use a knee brace?
A knee brace can help some dogs who cannot have surgery. Braces support the knee and limit movement. You must check the fit every day. Talk to your vet before using a brace.
How do I prevent licking the incision?
Use an E-collar or a soft collar to stop licking. You can also try a Lick Sleeve or cover the area with a T-shirt. Check the incision every day. Call your vet if you see redness or drainage.
What signs mean I should call my vet?
Call your vet if you see these signs:
- Swelling that gets worse
- Incision opens or drains
- Your dog will not use the leg
- Fever or extreme tiredness
- Licking or chewing the incision
When in doubt, call your vet for advice.
When can my dog return to play?
You can let your dog play gently after your vet says it is safe. Most dogs start light play after 3 to 4 months. High-impact play or sports should wait until your vet checks the knee and gives approval.
You help your dog recover by being patient and caring. Celebrate each small step your dog makes. Stay in touch with your vet often. Every dog heals at their own speed, so watch for steady progress. This table shows the main steps to follow:
| Milestone/Takeaway | Timeframe |
|---|---|
| Strict rest | Weeks 1–2 |
| Guided exercises | Weeks 3–10 |
| Return to normal activity | Weeks 11–16 |
| Weight management | During restricted activity phase |
| Use of recovery aids | Throughout recovery |
What you do at home really helps your dog get better.
