
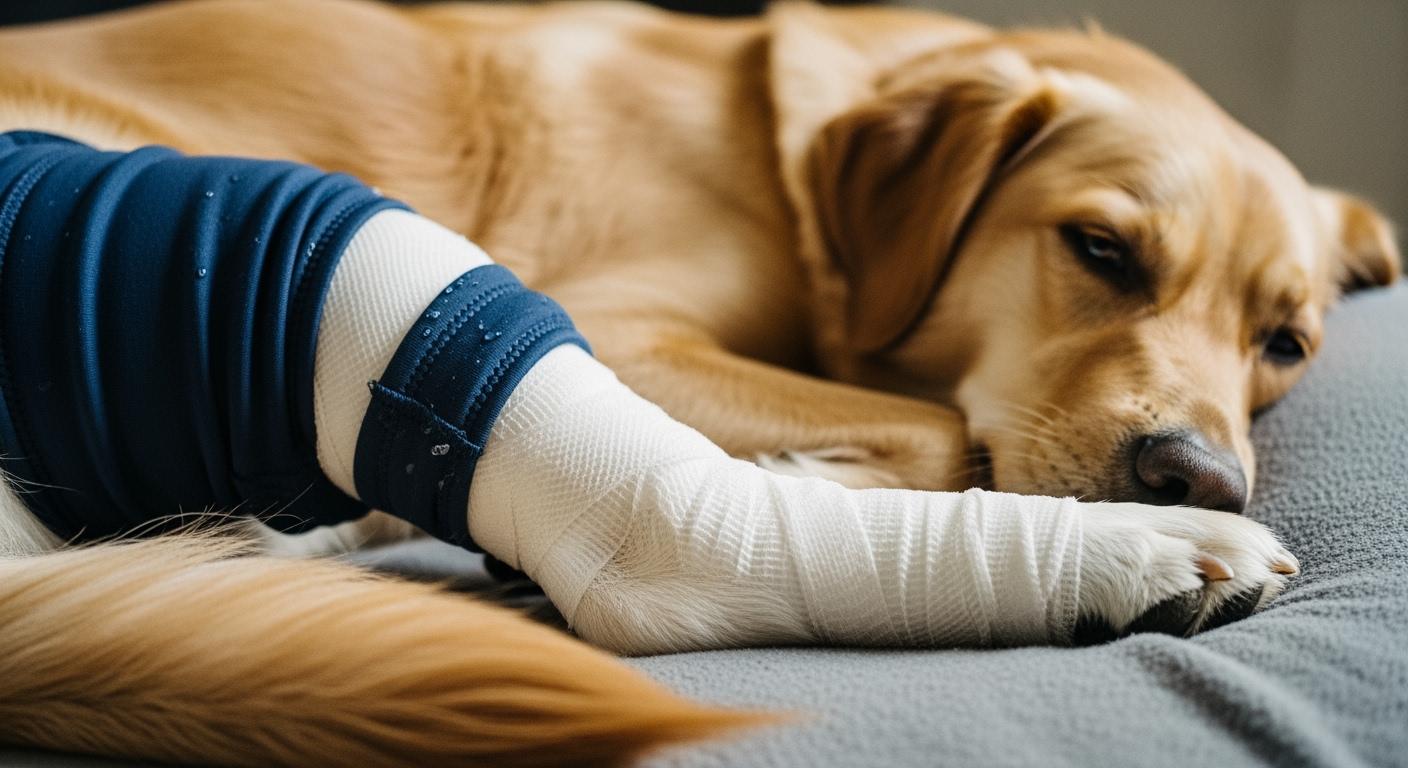
A dog hind leg recovery sleeve over bandage creates a problem most sizing charts ignore: the bandage reshapes the leg. It adds circumference. It changes surface friction. It turns a sleeve that fit bare skin into one that slides, bunches at the knee, and squeezes at the cuff edges. The instinct is to go tighter. That instinct is wrong — and it is the fastest route to pressure sores, hidden swelling, and a dog that chews through the sleeve within hours.
Tighter does not solve the geometry mismatch. It amplifies it.
How Bandage Bulk Changes Sleeve Behavior
The geometry problem no sizing chart addresses
A bare hind leg tapers predictably. Measure circumference at mid-thigh and mid-calf, pick the corresponding size, and the sleeve tracks that taper. Add a bandage and both numbers change — but more importantly, the taper changes. A bandage wrapped over a wound site creates a bulge mid-leg. The leg is now wider in the middle than at the anchor points above and below.
This bulge does two things. It stretches the sleeve fabric unevenly — tighter over the bandage, looser at the edges. And it creates a downhill slope. The sleeve sits on a cone that narrows toward the paw. Gravity and movement pull it down that slope. Without a mechanical anchor above the bandage bulge, the sleeve migrates. It is not a grip problem. It is a geometry problem.
Why friction loss makes anchoring fail
Bandage material is smoother than fur and skin. Where a sleeve gripping bare coat might hold position through friction alone, the same sleeve over a bandage contacts a lower-friction surface. The bandage also compresses slightly under the sleeve tension — micro-movements that release whatever grip existed. Over 20 minutes of walking, these micro-slips accumulate into visible displacement.
This is why sleeves built for hind leg wound coverage need anchoring that works independently of surface friction. A sleeve that relies on elastic compression alone will fail over a bandage. The physics does not care about the size on the label.
| Fit factor | Bare hind leg sleeve | Sleeve over bandage |
|---|---|---|
| Leg circumference | Smaller, predictable taper | Larger, mid-leg bulge |
| Surface friction | Higher (fur/skin grip) | Lower (smooth bandage) |
| Bend-zone stress | Less (fabric follows leg) | More (fabric bridges bulge) |
| Edge pressure | Even distribution | Concentrated at bandage borders |
| Toe visibility | Usually clear | Often blocked by extra material |
| Moisture risk | Lower | Higher (bandage traps humidity) |
The Failure Points Most Owners Miss
Bunching at the knee crease
When a dog sits, the hind leg shortens. The knee crease closes. Any sleeve fabric spanning that crease must go somewhere — and in a straight-tube sleeve with no bend relief, it folds into the crease itself. That fold becomes a pressure point.
Here is the causal chain that turns a fold into a problem: the fabric bunches at the knee crease → the bunch concentrates pressure on a narrow strip of skin behind the knee → that pressure strip rubs with every sit-to-stand cycle → friction irritation develops within hours → the dog licks or chews the site → the sleeve gets wet, the bandage underneath gets compromised, and the recovery stalls. The failure starts not with the dog behavior but with a fabric fold that the sleeve pattern never anticipated.
Check this yourself: after the dog has been lying down for 15 minutes, run a finger behind the knee. Feel for gathered fabric. If you can pinch more than a quarter-inch of fold, the bend zone is not working.
Cuff squeeze at bandage edges
A sleeve cuff that rests gently on bare skin can become a tourniquet when stretched over a bandage. The bandage adds diameter. The same cuff circumference now sits under higher tension. Where the cuff crosses the bandage edge, pressure concentrates at a sharp transition — soft tissue on one side, rigid bandage edge on the other.
After 30 minutes of wear, remove the sleeve and look at the skin just above and below the bandage borders. A red line or indentation that does not fade within 60 seconds signals cuff pressure exceeding what the tissue tolerates. This is not a fit that “needs breaking in.” It is a cuff diameter that was never sized for the combined bulk of leg plus bandage.
Wide, soft-edged openings spread that pressure across more surface area. The difference is not comfort — it is whether blood flow stays unrestricted beneath the cuff.
Blocked toe visibility — the monitoring blind spot
The most dangerous sleeve-over-bandage failure is the one that hides instead of hurts. A sleeve that extends too far down the leg covers the toes. Swelling, color change, and temperature shifts — the three earliest signals that something is wrong under the bandage — become invisible.
Toes that stay visible let you run a simple check twice daily: compare warmth between the bandaged leg toes and the opposite leg toes. Cold toes on the bandaged side mean circulation is compromised. Toes that feel notably warmer than the opposite side can signal developing infection. Neither check works if the sleeve blocks access.
A sleeve designed for use over bandages leaves the toes exposed — or at minimum has an opening that lets you palpate each toe without removing the sleeve. If you have to disassemble the whole setup to check, the monitoring cadence will slip, and early warning signs will be missed.
| Real-use failure | Why it happens over a bandage | Better sleeve design | Pass signal |
|---|---|---|---|
| Sleeve slides down | Bulge creates downhill slope, friction drops | Stable upper anchoring above the bandage | Sleeve stays within half-inch of original position after 10-min walk |
| Sleeve bunches behind knee | Straight tube pattern has no bend relief | Flexible bend zones at knee and hock | No pinchable fabric fold behind knee after sitting |
| Sleeve squeezes bandage edge | Cuff diameter sized for bare leg, not leg+bandage | Wide, soft-edged openings | No red line or indentation at bandage borders after 30 min |
| Moisture builds under sleeve | Bandage traps humidity, sealed sleeve blocks evaporation | Breathable, washable fabric | Inner fabric feels dry to touch; no condensation on removal |
| Dog chews the cuff | Pressure or friction irritation at contact points | Softer edge material, tapered pattern | Dog ignores sleeve after initial acclimation |
| Toes or warning signs hidden | Sleeve extends too far, blocks visual and tactile access | Toe-check opening or shorter distal coverage | All toes visible and palpable without sleeve removal |
Design Features That Separate Working Sleeves from Failures
Roomier cut and flexible bend zones
A roomier over-bandage pattern accommodates the mid-leg bulge without stretching fabric to its limit. Fabric near its stretch limit transmits tension directly to the bandage — and through it, to the wound site. A cut with enough ease over the bandage zone lets the sleeve sit on the bandage without compressing it. This is the difference between covering a bandage and pressing on it.
Flexible bend zones at the knee and hock solve the bunching problem at its source. Instead of a straight tube that resists bending, the sleeve incorporates panels or seams that flex with the joint. When the dog sits, the fabric behind the knee compresses along the seam line rather than folding inward. The sleeve shortens with the leg rather than collapsing into the crease. A recovery sleeve fitted for back-leg use without these bend accommodations will fail at the knee first — not because the material is wrong, but because the pattern never accounted for the sitting position.
Soft wide openings, breathable fabric, and upper anchoring
Wide soft openings replace narrow elastic cuffs. The difference in pressure distribution is mechanical: a half-inch elastic band concentrates force on a half-inch strip of tissue. A two-inch soft panel distributes the same anchoring force across four times the surface area. Peak pressure drops proportionally. Less peak pressure means fewer pressure marks and a lower likelihood the dog fixates on the cuff.
Breathable fabric matters more over a bandage than over bare skin because the bandage itself is a moisture barrier. A sleeve with low airflow creates a microclimate — humidity from skin and residual moisture from the bandage get trapped, softening the skin and making it vulnerable to friction damage. A fabric that lets vapor escape keeps the skin under the sleeve closer to ambient humidity. To check: after wearing for an hour, run a dry finger along the inner surface of the sleeve. If it feels damp, airflow is insufficient.
Upper anchoring is the most underrated feature in a hind leg sleeve that stays put. A thigh strap or silicone grip strip above the bandage zone creates a mechanical stop — the sleeve cannot slide past that anchor even as the bandage bulge tries to push it downward. This works independently of how smooth the bandage surface is. Anchoring above the problem zone is a different strategy than trying to grip the problem zone itself.
When a Recovery Sleeve Over Bandage Is Not the Right Call
A sleeve is not a bandage replacement. It protects a bandage. That distinction defines every situation where the sleeve should come off.
If the bandage underneath is wet, soiled, or has shifted position, the sleeve is now covering a failing primary layer. Remove both. A damp bandage under a sleeve creates a sealed humid environment — bacterial growth accelerates, skin maceration sets in. Smell is the late signal. Dampness felt through the sleeve fabric is the early one.
Swelling above or below the bandage, toes that feel cold relative to the opposite leg, or any discharge seeping through the bandage material are stop signals. The sleeve hides these from view — and the act of removing the sleeve to check should happen at least twice daily regardless of how well the setup appears to be working.
Disclaimer: The fit checks and wear observations described here assume a veterinary-placed bandage on a dog with typical hind-leg conformation. Dogs with angular limb deformities, very deep chests that alter hind-leg stance, or double coats where rub marks are harder to spot by sight alone may need hand-checking rather than visual inspection for pressure points. If the dog leg shape falls well outside breed norms — particularly in chondrodystrophic breeds where limb proportions differ significantly — the pressure-point patterns described above may not map the same way, and more frequent manual checks are warranted.
When a cone or bandage change is the safer path
A sleeve cannot protect what it does not cover — and a dog determined to lick will find the gap. If the dog can reach the bandaged area by contorting around the sleeve, or if the wound extends beyond the limb onto the body, a recovery sleeve versus a cone becomes a question of coverage geometry, not product quality. A cone blocks oral access to the entire body. A sleeve blocks access to the covered segment only.
Persistent licking or chewing at the sleeve itself is a different signal: it usually means the sleeve is causing irritation at a contact point. Remove it, check for pressure marks, and reassess fit before reapplying. Switching to a cone temporarily while the irritation subsides is often safer than trying to adjust a sleeve that is already causing a reaction.
For wound protection that stacks a sleeve over a bandage, the decision tree is simple: clean dry bandage underneath → sleeve can add a protective outer layer. Wet, displaced, or odorous bandage underneath → sleeve is contraindicated until the bandage itself is changed. The primary layer must be sound before the secondary layer adds any value.
| Scenario | Safer choice | Why |
|---|---|---|
| Wound limited to hind leg, dog ignores sleeve | Sleeve over bandage | Localized coverage sufficient; monitoring access intact |
| Dog persistently licks or chews near sleeve edge | Cone or veterinary reassessment | Oral access not blocked; irritation may signal fit problem |
| Multiple wound sites, only one on leg | Cone for full coverage | One local sleeve cannot protect multiple areas |
| Bandage wet, loose, or malodorous | Bandage change first; no sleeve | Covering a failing bandage accelerates skin breakdown |
| Toes cold, swollen, or discolored | Remove sleeve; urgent vet check | Circulatory compromise requires immediate attention |
FAQ
How often should the sleeve and bandage be checked?
Twice daily at minimum. After the first application, check at 30 minutes and again at 60 minutes. Recheck after any period of activity — a 10-minute walk changes sleeve position more than an hour of rest. If the schedule slips, the risk is not that the sleeve fails suddenly; it is that a slow-developing pressure mark or moisture buildup goes unnoticed.
Can a tighter sleeve fix sliding?
No. Tighter elastic increases pressure on the bandage edges and the tissue beneath — it does not improve anchoring. Sliding is a geometry and friction problem, not a tension problem. The fix is mechanical anchoring above the bandage zone, not stronger elastic at the same failing contact surface.
What design features actually reduce bunching and squeeze?
Flexible bend zones that let the sleeve shorten when the dog sits. Wide soft-edged openings instead of narrow cuffs. A roomier pattern over the bandage zone that does not stretch fabric to its limit. Breathable material that stays dry against the skin. Upper anchoring — a strap or grip strip above the bandage — that stops migration before it starts. Each of these corresponds to a specific failure mechanism; none is decorative.
Is a recovery sleeve a substitute for a bandage?
No. A recovery sleeve is an outer protective layer. It shields a properly placed veterinary bandage from dirt, licking, and mechanical disturbance. It provides no compression, no wound closure, and no absorption. If the bandage underneath is compromised, the sleeve cannot compensate — and covering a failing bandage makes the situation worse by delaying detection. The sleeve works only in combination with sound primary bandaging, and anti-lick protection is one part of a broader recovery setup — not the whole strategy.
