
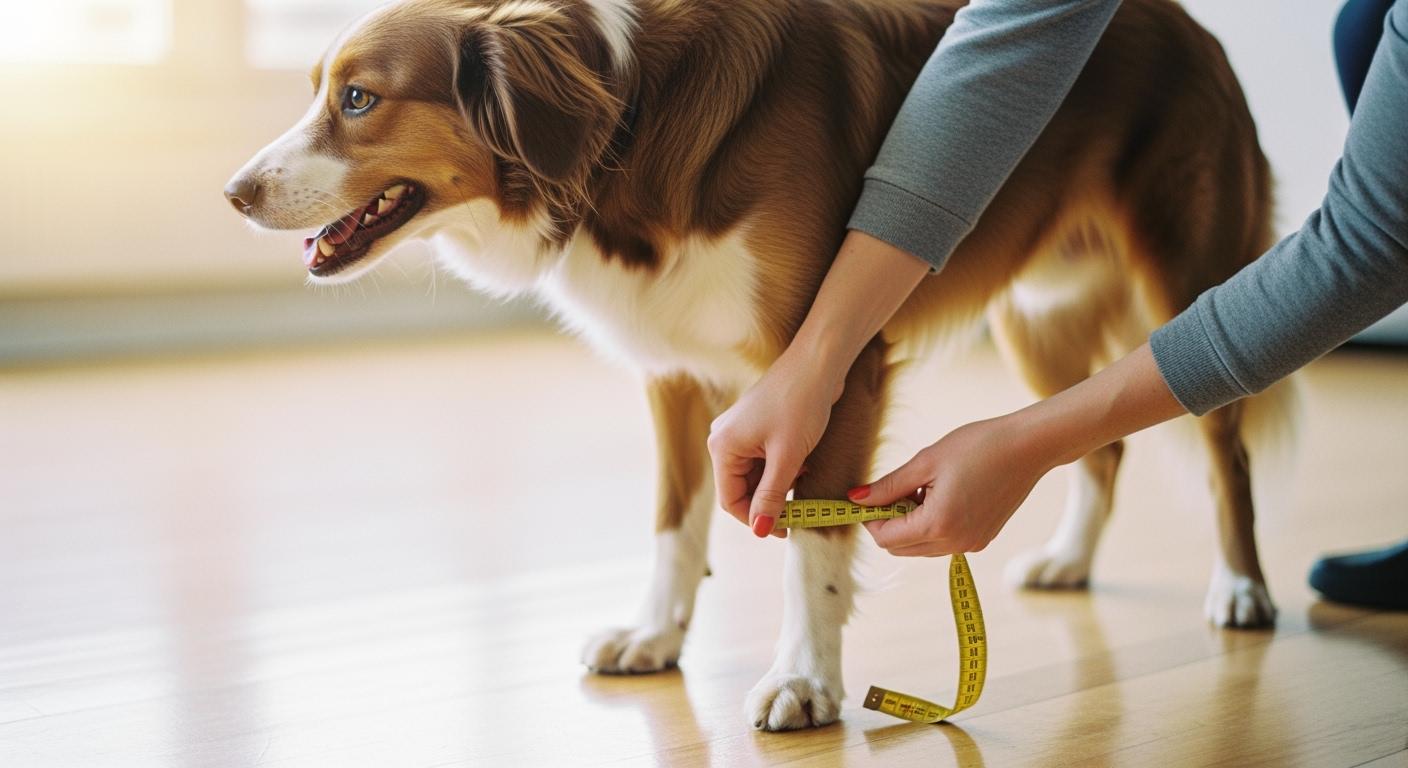
A brand adding a dog leg brace to its product line needs more than a generic size chart. It needs a measurement protocol that produces repeatable data across different dogs, different handlers, and different channels. When a sizing system applies the same landmarks to every brace category, it can hide alignment and grading problems that become more visible at the edges of the size range.
How to measure dog for leg brace, from a product-development standpoint, is fundamentally a question about which anatomical landmarks each brace structure depends on, how those measurements translate into a grade rule, and what a supplier should be able to explain about both. Treating measurement as a product specification rather than only a customer instruction gives brands a clearer basis for sizing across DTC, wholesale, and veterinary channels.
What a Measurement Protocol Needs to Capture for a Product Line
Most leg brace sizing begins with three core measurements: thigh circumference, knee circumference, and hock-to-knee length. Thigh circumference determines the upper anchor and suspension of the brace. Knee circumference centers the support structure over the joint. Hock-to-knee length sets vertical coverage and determines whether the brace interferes with the paw during movement.
Each measurement point is tied to a specific anatomical landmark. If the tape drifts away from that landmark—angled instead of level, too loose or too tight—the circumference value shifts, and the dog may be assigned to a different size than its anatomy would indicate. For a single order, that can create one fit mismatch. Across a size range, repeated measurement drift can make it difficult to distinguish customer measuring error from a weak sizing rule.
The measurement protocol also needs to account for which leg is measured, whether the dog is standing with even weight, and whether muscle loss or swelling is present. A measurement taken while limb circumference is changing may not represent the same fit later in recovery. Recording these variables on the measurement form gives the brand and the supplier a shared reference when a fit issue is reviewed.
Why each brace category needs its own measurement form
A soft knee brace may function with thigh and knee circumference alone. A hinged knee brace introduces a joint-center alignment requirement—if the hinge axis does not match the stifle, the brace creates leverage instead of support. A hock brace uses different landmarks above and below the tarsus. A carpal brace measures the forelimb, not the hind limb. Custom rigid orthoses require a cast, mold, or 3D scan; tape measurements cannot substitute.
In production: A single measurement form applied across brace categories forces different joint architectures into the same sizing logic. Middle sizes may appear acceptable while grading errors become more visible at the small and large ends of the range.
The design of each brace drives which measurements are load-bearing. Wraparound braces with adjustable straps may tolerate some circumference variation. Hinged braces are less tolerant of alignment error because joint-axis offset can concentrate pressure or restrict the intended range of motion. Brands evaluating a supplier’s measurement forms should look for evidence that the supplier distinguishes between these categories rather than reusing one template.
| Brace Category | Required Measurement Type | Key Anatomical Landmark | Supplier Input Needed | Main Sizing Risk |
|---|---|---|---|---|
| Soft knee brace | Tape measurements | Thigh, knee | Circumference, length | Slippage, poor suspension |
| Hinged size-graded knee | Tape + hinge alignment | Joint center | Alignment photos, notes | Hinge misalignment, pressure |
| Hock brace | Tape measurements | Hock, lower leg | Length, circumference | Interference with paw, slippage |
| Carpal or wrist brace | Tape measurements | Carpus, forelimb | Length, circumference | Restriction, poor fit |
| Custom rigid orthosis | Cast, mold, or scan | Full limb | Professional fitting | Inaccurate mold, discomfort |
Translating Measurements Into a Commercial Size System
Individual measurements become a commercial size system only when the brand defines breakpoints, overlap zones, and a grade rule that holds across the full range. Linear scaling—applying the same multiplier to every dimension—may appear workable in mid-range sizes while creating alignment or proportion problems at the extremes. A small dog’s limb proportions differ from a large dog’s in ways that a single multiplier may not capture. The supplier should be able to identify where non-linear adjustments enter the grading and explain why.
Brands typically need two versions of the sizing chart. The customer-facing version uses simplified diagrams, step-by-step landmarks, and a clear size-selection path. The factory-facing version adds tolerances, measurement-point definitions, and batch reference instructions. When these two charts diverge—when the customer sees one size logic and production uses another—fit disputes become difficult to resolve, because the brand and the supplier are working from different specifications.
Dogs that fall between two sizes are not an edge case; they are a predictable outcome of any fixed size range. The measurement protocol should define a tiebreaker: whether to prioritize circumference, length, or joint alignment, and under what conditions to recommend moving up or down. If a supplier cannot articulate this decision logic, the brand is left without a consistent rule for handling overlap cases.
Sourcing note: The post-surgical dog leg brace structure and sizing guide shows how joint target and brace construction change the measurements a buyer needs to validate. If the supplier cannot explain the grade rule, treat that as a sizing-validation gap to resolve before production.
What to Verify Before Approving Samples
Sample validation should confirm more than appearance alone. Three areas can reveal whether the measurement protocol and sizing logic are sound before a brand commits to production.
Joint alignment and suspension. Fit the sample to a limb model or dog matching the target measurement range. Check whether the brace centers over the intended joint during standing, walking, and turning. A brace that shifts position during movement suggests the suspension design, the circumference grading, or both need adjustment. Measure the distance from the hinge axis or support center to the anatomical landmark across multiple sizes—if this offset changes significantly between sizes, the grade rule needs revision.
Size grading across the range. Validate samples at both the small and large ends of the size range, not only the middle. Checking only a middle size can hide grading errors that become visible toward the extremes. A supplier should be able to explain where and why non-linear adjustments enter the grading and how those adjustments are reflected in the approved size specifications.
Strap, seam, and pressure-point checks. Run a hand along the inside of the brace to feel for rough edges, bulky seams, or uneven padding. Strap routing should maintain even tension without twisting. After a supervised fit trial, check for concentrated pressure over bony landmarks. These observations should be documented and shared with the supplier as part of the leg brace product-development feedback loop.
| Measurement Error | Product Consequence | Corrective Step | Supplier Responsibility |
|---|---|---|---|
| Tape angled instead of level | Inaccurate circumference | Re-measure with level tape | Provide clear diagrams |
| Measuring too tightly or loosely | Poor fit, discomfort, slippage | Use snug, not tight, tension | Specify tape tension in guide |
| Using weight alone | Wrong size, poor support | Always use limb measurements | Reject weight-only sizing |
| Measuring the wrong leg | Misfit, wrong alignment | Confirm affected limb | Require side identification |
| Missing joint-center alignment | Hinge misplacement, pressure, or discomfort | Mark joint center visually | Request photos for validation |
| Ignoring muscle loss or swelling | Poor fit, pressure points | Note muscle condition | Add muscle-loss field to form |
| Reusing one chart for all braces | Inconsistent fit, returns | Use brace-specific charts | Supply separate forms per brace |
Disclaimer: Standard size grading may not accommodate dogs with angular limb deformities or body proportions that fall outside the pattern range. Brands should define these limits in customer-facing sizing materials and confirm whether the supplier’s grade rule accounts for non-standard proportions before approving production.
Brands evaluating a dog leg brace product range should confirm that the measurement protocol, size grading logic, and sample checks are documented and repeatable. A supplier should be able to explain why a particular landmark matters, where non-linear grading enters the size range, and what must be inspected on a pre-production sample. For projects that require custom sizing logic, structure adaptation, and sample review, GaitGuard’s OEM/ODM pet orthotics workflow is the most relevant next step. A measurement system built as a product specification gives the brand a repeatable basis for size-chart design, sample approval, and later batch comparison.
