
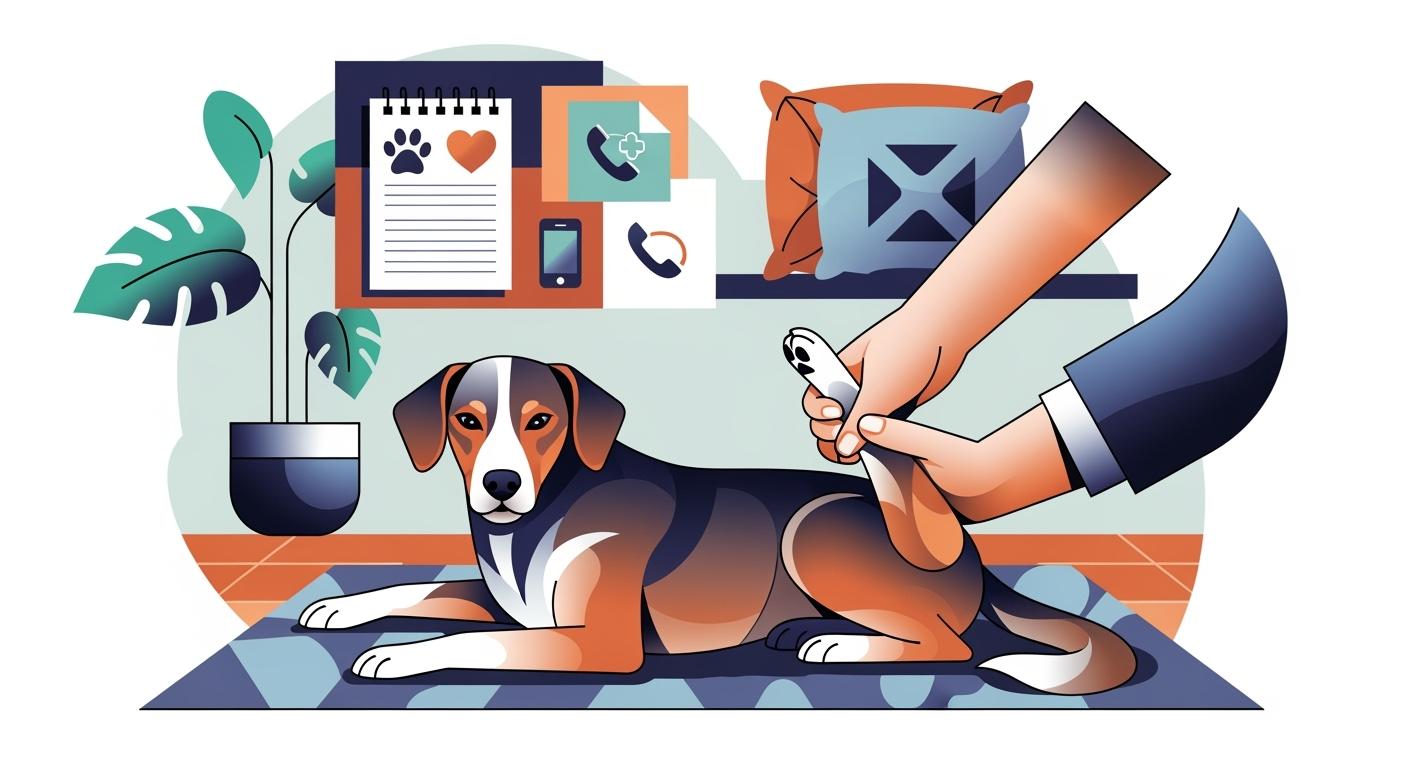
You want your dog to heal safely at home after a tendon injury. Early protection matters most. Start with short, controlled at-home exercises. These include gentle range-of-motion moves and leash walks. Tendon healing takes time—strains can heal in weeks or months, but every home step counts. Follow your vet’s plan for at-home exercises. Monitor your dog at home for progress and setbacks. Skipping your vet’s advice at home may cause setbacks or re-injury. Watch for sudden changes at home. Call your vet if you see swelling, limping, or bandage issues. Dog tendon injury rehab works best with daily home care, patience, and teamwork with your vet. For extra support at home, see our guides on hock/Achilles support, rear-lift assistance, paw protection, recovery wear, and anti-lick tools.
Key Takeaways
Begin rehab with gentle range-of-motion exercises when your vet says it is okay. These exercises help joints stay flexible and stop stiffness.
Watch your dog’s recovery every day. Look for swelling, limping, or pain. Call your vet if you see anything worrying.
Make your home safe by putting down non-slip rugs. Block off stairs so your dog does not fall. This helps your dog move safely while healing.
Listen to your vet about immobilization and support care. Take care of splints or casts the right way. This stops problems from happening.
Write down your dog’s symptoms and progress each day. This helps your vet change the rehab plan if needed.
Understanding tendon injuries in dogs
Types of tendon injuries
Your dog may limp or move slowly after a tendon injury. Tendons join muscles to bones. They help your dog walk, run, and jump. Injuries can happen from accidents or too much activity. Slipping on smooth floors can also cause injury. Some tendon injuries are seen more often in dogs. Here are some examples:
Biceps tendonitis: This makes the front leg hurt and hard to use.
Bicipital tenosynovitis: The area around the biceps tendon gets swollen.
Supraspinatus tendonitis: This hurts the shoulder and makes moving hard.
Achilles tendon injuries: These can be small strains or big tears in the back leg.
Medial shoulder instability: This affects both ligaments and tendons in the shoulder.
Patellar tendon injuries: Tears near the knee may need surgery.
Your veterinarian will figure out which injury your dog has. Each injury needs its own rehab plan. Always listen to your vet for safe healing.
Why early protection matters
Early protection is the first step in helping your dog heal. You need to keep the hurt area safe so the tendon can heal. Casts, splints, or braces help protect the tendon and lower stress for a few weeks. Most dogs need this help for at least three weeks or more. If you stop using support too soon, the tendon can get hurt again.
But keeping a joint still for too long can cause problems. Joints can get stiff or muscles can get weak if you wait over four weeks. Gentle movement early on helps the tendon get stronger. Your vet will tell you when to start easy exercises. Watch for swelling, pain, or changes in how your dog moves. Tell your vet right away if you see these signs.
Tip: Protecting the injury early and moving slowly helps your dog heal best.
For more help during recovery, look at our guides on hock/Achilles support, rear-lift help, paw protection, recovery wear, and anti-lick tools.
Diagnosis and immediate protection
Vet assessment and imaging
Your veterinarian will start with a careful exam of your dog’s injury. They may watch your dog walk, check for swelling, and gently move the leg. To see the tendon clearly, your vet will often use imaging tools. These help find out how serious the injury is and guide the best care plan.
Common imaging techniques for tendon injuries in dogs:
Ultrasonography: This is the main tool vets use. It gives a clear picture of the tendon, works well for most injuries, and does not need anesthesia. Vets can use it to check healing over time.
MRI: This tool gives very detailed images. It helps when the injury is hard to see or if a tear is suspected.
CT scans: Vets use these less often. They help in complex cases or when other tests do not give enough information.
Imaging Technique | Effectiveness | Notes |
|---|---|---|
Ultrasonography | High diagnostic accuracy for tendinopathies | Good for monitoring healing; cannot show injury age |
MRI | High resolution, multiplanar images | Best for detailed views, especially with suspected ruptures |
CT | Used for complex cases | Not a first choice for most tendon injuries |
Your vet will choose the best test for your dog’s needs.
Home rest rules
After diagnosis, you must protect your dog’s tendon right away. The first three weeks are the highest risk for re-injury or tendon gapping. Your vet may recommend a splint, cast, or brace to keep the joint still. Most dogs need strict immobilization for about six weeks. Activity should stay very limited for six to twelve weeks.
Follow these steps for safe home rest:
Keep your dog on leash for all walks—no running or jumping.
Use a crate or small room to limit movement.
Change bandages or dressings as your vet directs, usually every three to seven days.
Watch for swelling, limping, or changes in how your dog stands.
Safety Tip: Always follow your vet’s instructions for home care. Early movement can help healing, but only start gentle exercises when your vet says it is safe.
For more comfort and safety during recovery, see our guides on hock/Achilles support, rear-lift assistance, paw protection, recovery wear, and anti-lick tools.
Home setup for safe recovery
Traction and pathways
You can help your dog recover by making your home safer. Dogs with tendon injuries often slip on smooth floors. Place non-slip rugs or mats in areas where your dog walks. Traction aids, like ToeGrips, can help your dog move with more confidence. These tools give extra grip and reduce the risk of falls. Clear pathways of clutter so your dog does not trip. Keep toys and bowls in easy-to-reach spots. This setup helps your dog move safely and rest when needed.
Stairs and car transfers
Stairs and car rides can be risky during recovery. Block off stairs with a baby gate or a sturdy barrier. If your dog must use stairs, support them with a rear-lift harness. Move slowly and keep your dog on a short leash. For car transfers, use a pet ramp or a step. This prevents jumping, which can strain healing tendons. Always guide your dog gently in and out of the car. Stay close to prevent slips or sudden moves.
Home setup checklist
Use this checklist to create a safe recovery space for your dog:
Modification | Benefit |
|---|---|
Use non-slip rugs or carpets | Prevents slipping on hardwood floors |
Install pet ramps | Helps dogs get onto furniture or in the car |
Elevate food & water bowls | Reduces awkward joint positions |
Provide an orthopedic dog bed | Reduces joint stress during sleep |
Limit slippery floors with rugs or mats.
Block stairs and furniture to stop jumping.
Create a quiet rest area with a soft bed.
Keep food, water, and toys close by.
Tip: Small changes in your home can make a big difference in your dog’s safety.
For more comfort and safety ideas, see our guides on hock/Achilles support, rear-lift assistance, paw protection, recovery wear, and anti-lick tools.
Immobilization and support care
Splint and cast management
You play a key role in your dog’s recovery by managing splints and casts at home. Keep the support clean and dry at all times. Limit your dog’s activity to prevent slips or falls. Check the fit of the splint or cast daily. If you notice any changes, act quickly to avoid complications.
Complications | Description |
|---|---|
Delayed healing | The tendon may heal slowly if the support is loose. |
Pressure sores | Rubbing or tight spots can cause painful sores. |
Leg swelling | Swelling may signal poor fit or circulation issues. |
Dermatitis | Skin irritation can develop under the support. |
Joint stiffness | Joints may become stiff if not managed properly. |
Cast breakage | A broken cast cannot protect the tendon. |
Refracture | Poor management increases the risk of new injury. |
Alert: Infection, loss of circulation, or dead tissue can occur if you do not care for the splint or cast correctly. These problems delay healing.
Skin and pressure checks
Check your dog’s skin and toes every day. Look for redness, swelling, or sores. Smell the area for any foul odor. Feel for moisture or dampness under the support. Watch for signs of licking or chewing. These signs may mean your dog feels pain or discomfort.
Support & skin check mini checklist
Check toes for swelling or coldness
Look for any foul smell or discharge
Feel for moisture or dampness
Watch for slipping or shifting of the support
Notice any licking or chewing at the bandage
Ask: Does your dog seem comfortable?
Stop and call your vet if you see: Sudden swelling, cold toes, foul odor, wet bandage, persistent chewing, or if the support slips out of place.
Splint/cast vs brace comparison
You may use splints, casts, or braces during different stages of recovery. Each has pros and cons.
Custom braces fit better and last longer than off-the-shelf options.
Off-the-shelf braces cost less and work well for short-term needs.
Braces often help dogs return to normal movement with less limping.
Your vet may suggest a cast or splint first, then switch to a brace as healing progresses.
Many families find that investing in a quality brace saves money over time and helps their dog recover safely.
For more comfort and safety aids, explore our guides on hock/Achilles support, rear-lift assistance, paw protection, recovery wear, and anti-lick tools.
Dog tendon injury rehab: gentle exercises
Range-of-motion basics
You help your dog recover by starting with gentle range-of-motion work. Begin only when your veterinarian says it is safe. Early in dog tendon injury rehab, you want to keep joints moving without causing pain. Passive range of motion means you move your dog’s limb for them. Hold the leg and gently bend and straighten the joint. Stretching at the end of the range helps keep muscles and tendons flexible. Hold each stretch for 15 to 30 seconds. This reduces scar tissue and keeps the joint healthy.
Prolonged mechanical stretching works well for stiff joints. You hold the limb in a stretched position for a longer time. This helps restore movement and comfort. Active range of motion comes later, when your dog can move the limb on their own. You guide your dog to use the leg in a slow, controlled way. Always watch for signs of pain, swelling, or lameness. If you see any of these, stop and call your vet.
Tip: Gentle range-of-motion exercises keep joints flexible and help prevent stiffness. Do not force movement. If your dog resists, try again later or ask your vet for help.
Hindlimb exercises for recovery
Hindlimb exercises play a big role in dog tendon injury rehab. These exercises build strength and improve balance. Strong hind legs help your dog walk, stand, and recover stability. Start with simple activities like sit-to-stand. Ask your dog to sit, then stand up slowly. Repeat this seven times per session. This move targets muscle strengthening and joint health.
Weight shifting is another key exercise. Stand your dog on all four legs. Gently nudge their side so they shift weight from one hind leg to the other. Repeat this ten times. This improves balance and stability. Slow leash walking helps your dog use the injured leg. Begin with five-minute walks, three times a day. Increase the time only if your dog walks without limping or swelling.
Cavaletti and cavaletti rails are excellent for dog tendon injury rehab. Set up low rails or poles spaced evenly apart. Lead your dog over the cavaletti rails at a slow pace. This encourages careful walking, balance, and muscle control. Use nine cavaletti rails in a row for best results. Walking over cavaletti rails helps your dog lift each paw and build stability. Repeat this exercise daily as your dog improves.
Safety Note: Always supervise your dog during hindlimb exercises. If you see new limping, swelling, or pain the next day, stop the exercises and contact your clinic.
Step-by-step rehab roadmap
Dog tendon injury rehab works best with a clear plan. Follow these steps for safe, effective recovery:
Start with rest and protection. Use splints, casts, or braces as your vet directs. Limit activity for the first three weeks.
Begin passive range-of-motion. Move the limb gently, holding stretches for 15–30 seconds. Repeat three times a day.
Add weight shifting and sit-to-stand. Practice weight shifting ten times per session. Do sit-to-stand seven times per session.
Introduce leash walking. Walk your dog on a leash for five minutes, three times a day. Increase time only if your dog stays comfortable.
Use cavaletti rails. Set up nine cavaletti rails in a row. Walk your dog over the rails slowly, focusing on balance and stability.
Try side-stepping and controlled dancing. Guide your dog to step sideways or stand on hind legs for a few seconds. These moves build balance and stability.
Progress to uneven surfaces. Walk your dog over soft grass or foam mats. This challenges balance and coordination.
Add hydrotherapy if possible. Water walking supports your dog’s weight and builds muscle safely.
Monitor daily. Check for swelling, limping, or pain after each session. Use the “next-day test”—if your dog is worse the next day, scale back and call your vet.
Exercise Type | Description | Progression Details |
|---|---|---|
Walking (Slow, Controlled, Leashed) | Encourages weight bearing and balance. | Start with multiple five-minute walks per day for one week, then gradually increase duration or frequency. |
Walking (Uneven Surfaces) | Improves coordination and balance. | Slowly walk your dog over unstable surfaces to challenge balance. |
Static Stretching | Involves straightening and bending the affected limb. | Hold each position for five seconds, repeat ten times to improve limb extension. |
Cookie Stretches | Encourages head movement to stretch different body parts. | Use treats to guide the dog’s head in various directions. |
Circles (Spins) | Small circles encouraged by a treat to improve coordination. | Perform clockwise and counterclockwise spins slowly and controlled. |
Stairs (Incline and Decline) | Encourages climbing and descending stairs slowly. | Use treats to entice the dog, ensuring controlled movement up and down the stairs. |
Note: Always progress based on your dog’s ability, not just the calendar. Your dog should master each skill before moving to the next step. Watch for balance, stability, and comfort at every stage.
Internal-link prompts: hock/Achilles support, rear-lift, paw protection, recovery wear
You can make recovery safer and more comfortable with the right tools. Explore our guides on hock/Achilles support, rear-lift assistance, paw protection, recovery wear, and anti-lick tools. These aids help you protect your dog during each step of dog tendon injury rehab. They add comfort and safety but do not replace your veterinarian’s advice.
Canine physical therapy: rebuilding strength
Leash-walk progression
You start canine physical therapy by working on safe leash walks. This helps your dog get stronger and feel more sure. Begin with short, slow walks using a leash. Set a timer for five minutes each walk. Do this three times every day. This means your dog walks for 15 minutes total each day. For example, if you walk your dog for five minutes, three times, that adds up to 15 minutes. Write down your walks in a weekly chart:
Day | Walk 1 | Walk 2 | Walk 3 | Total Minutes |
|---|---|---|---|---|
Monday | 5 | 5 | 5 | 15 |
Tuesday | 5 | 5 | 5 | 15 |
… | … | … | … | … |
If your dog gets better, your vet might tell you to walk longer. Studies show dogs get stronger faster with a leash-walk plan. The table below shows how much stronger dogs get:
Group | Peak Vertical Force (PVF) | Vertical Impulse (VI) | Comparison to Normal Limb |
|---|---|---|---|
Physical Therapy Group | 18.5% greater | 13.9% greater | Statistically identical |
Exercise Restriction Group | Baseline | Baseline | Not applicable |
Hydrotherapy options
Hydrotherapy is an important part of canine physical therapy. Water helps support your dog’s body. This makes moving easier and safer. You can use an underwater treadmill or let your dog swim. Hydrotherapy has many good effects:
Water pressure helps blood flow and keeps your dog steady. This can lower swelling.
Moving in water builds strength and helps your dog last longer.
Water’s lift makes it easier on sore tendons. This helps your dog move and hurts less.
Warm water relaxes muscles and helps your dog heal faster.
Hydrotherapy helps joints move better and speeds up healing.
Always do hydrotherapy with a trained person watching. Look for signs your dog is tired or not feeling well.
Quick Reference Card
Use this checklist to keep track of your dog’s therapy and strength:
Move from gentle to active rehab as your dog gets better.
Add safe exercises like leash walks and sit-to-stand.
Try hydrotherapy and gentle hands-on therapies.
Watch for swelling, limping, or pain after each session.
Write down leash time and progress every week.
Be happy about small steps in strength and movement.
Tip: Canine physical therapy works best when you follow each step and look for progress. Always make safety the most important thing.
For more comfort and safety ideas, see our guides on hock/Achilles support, rear-lift assistance, paw protection, recovery wear, and anti-lick tools.
Monitoring progress and when to call the vet
You are very important in your dog’s recovery. Watching your dog closely helps you find problems early. This keeps your dog safe. You should know what signs show your dog is getting better. You also need to know what signs mean you should call your vet soon. Some signs mean you must get help right away.
Green/Yellow/Red decision table
Check this table every day to help you know what to do. Green means your dog is healing as expected. Yellow means you should call your vet today. Red means you need to get help from your vet right now.
Status | What You See | What You Should Do |
|---|---|---|
🟢 Green | Walking with a small limp, eating well, no swelling, using the hurt leg, bandage is clean and dry | Keep doing your normal care and exercises. Watch your dog every day. |
🟡 Yellow | Swollen knee, hard time getting up, crying when you touch the knee, cannot jump on furniture, mild swelling, licking the bandage, slow healing | Call your vet today for advice. Change your dog’s activity if needed. |
🔴 Red | Suddenly cannot stand on the leg, new plantigrade stance, swelling gets worse fast, bandage may be too tight, bad smell or discharge, fever, wound opens, strange nerve signs, cannot put weight on the leg, very bad pain, clear broken bone or joint out of place | Call your vet right away. Stop all exercises and keep your dog still. |
Safety Tip: If you see any red signs, do not wait. Call your vet or an emergency clinic right away.
Symptom log and reporting
Keeping track of your dog’s healing helps you and your vet. Write down your dog’s symptoms and what they do each day. Write how your dog walks, stands, eats, and rests. Notice any changes in swelling, pain, or how your dog uses the hurt leg. Write down when you change the bandage and any problems you see.
Use a chart to track your dog’s exercises every day.
Write notes about what your dog does and how they feel.
Show your notes to your vet at every checkup.
Work with your vet to change the rehab plan if needed.
Regular checkups are important. Most dogs need to see the vet again about 2–3 weeks after surgery or injury. Bring your notes to every visit. Your notes help your vet see how your dog is doing and find problems early.
Note: Small problems can happen during healing. If you see slow healing, new pain, or swelling, call your vet for help.
When to call the vet now
Some signs mean you need help right away. Watch for these warning signs:
Suddenly cannot stand on the leg
New plantigrade stance (walking flat-footed)
Swelling gets worse fast
Bandage may be too tight
Bad smell or discharge from the bandage
Fever or very tired
Wound opens
Strange nerve signs (confused, weak, seizures)
Cannot put weight on the leg
Very bad pain (crying, yelping, will not move)
Clear broken bone or joint out of place
If you see any of these, stop all exercises and call your vet or an emergency clinic right away.
Alert: Acting fast can stop big problems and keep your dog healthy.
Internal-link cue for comfort and safety aids
You can help your dog heal better with the right tools. Check our guides on hock/Achilles support, rear-lift help, paw protection, recovery wear, and anti-lick tools. These tools help you keep your dog safe and comfortable during recovery. They make things easier but do not replace your veterinarian’s advice.
FAQ
Safety-first answers for owners
You want to help your dog heal safely at home. Many owners have the same questions about tendon injury rehab. Here are answers to the most common questions:
How long does it take for my dog to recover from a tendon injury?
Can my dog’s tendon heal without surgery?
What are the risks of home exercises?
How do I know if my dog is in pain during rehab?
What should I do if my dog refuses to do an exercise?
Will my dog get arthritis after tendon or joint surgery?
How can I prevent muscle loss during recovery?
Is swimming or hydrotherapy safe for my dog?
What types of physical therapy help most?
When should I call the vet during rehab?
How do I keep my dog safe at home during recovery?
You can make home rehab safer by following these key steps:
Safety Precaution | Description |
|---|---|
Safe Environment | Set up a quiet, predictable space for therapy. |
Non-Slip Flooring | Use mats or carpet runners to stop slips and falls. |
Calm Atmosphere | Keep the area quiet so your dog can focus. |
Prevent Interference | Keep other pets away during rehab sessions. |
Organized Setup | Place all needed items within reach before you start. |
Monitor Dog’s Signals | Watch your dog closely. Stop if you see pain, limping, or stress. |
Tip: Always watch your dog’s body language. If your dog seems tired, sore, or upset, stop the session and let them rest. Never force an exercise.
You can support your dog’s comfort and safety with the right tools. Explore our guides on hock/Achilles support, rear-lift assistance, paw protection, recovery wear, and anti-lick tools. These aids help you create a safer rehab plan at home.
You help your dog get better by doing exercises every day. Watch your dog closely for any changes. Healing takes a while. Sometimes your dog may have pain or swelling. This is normal during recovery. Most dogs get back to normal if you follow a good rehab plan. Some dogs might get hurt again. If your dog is not getting better or you see warning signs, call your vet. Work with your vet and use comfort tools like hock/Achilles support, rear-lift help, paw protection, recovery wear, and anti-lick tools. These things help your dog heal safely.
Common Setbacks | Management Strategies |
|---|---|
Inflammation control | Put something cold on the area after exercise |
Pain management | Watch for pain and ask your vet for help |
Gradual progression | Make exercise harder slowly and let your dog rest if needed |
