
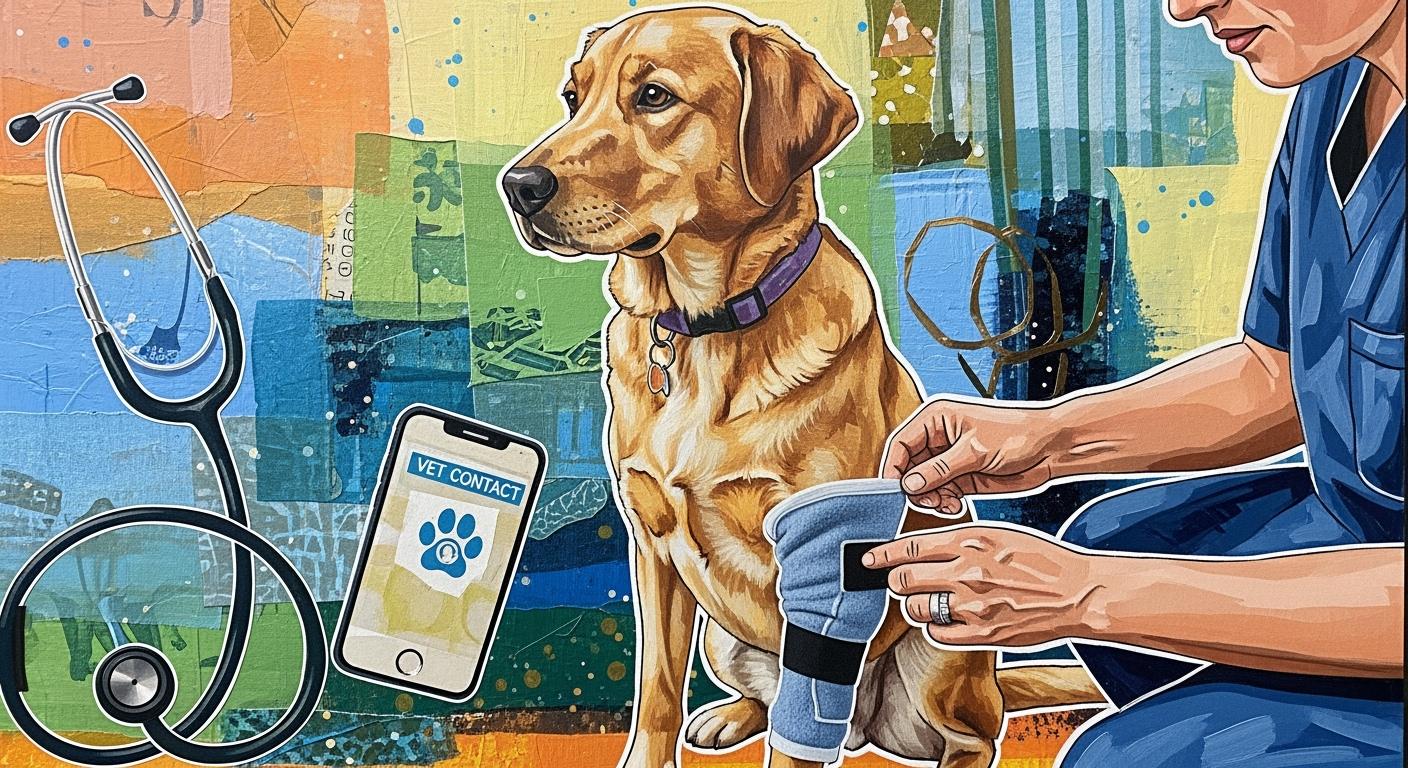
You want your dog to heal safely and feel comfortable after surgery. A dog recovery sleeve helps protect the spot where your dog had surgery. It lowers the chance of infection. The sleeve acts like a shield. It stops your dog from licking or scratching the wound. This keeps germs away from the healing area. Your dog can still move around with the sleeve on. This makes recovery easier for you and your dog. If you follow the steps and check the fit, you can help your dog heal at home.
Key Takeaways
A dog recovery sleeve covers wounds after surgery and stops licking. This helps lower the chance of infection.
Always look at how the sleeve fits. It should fit close but not squeeze. This keeps your dog comfy and able to move.
Check your dog’s skin and the sleeve every day. Look for redness, swelling, or if your dog seems upset.
Listen to your vet’s advice for the best healing. Know when you should call for help.
Use a checklist each day to watch your dog’s healing. Make sure you do all the care steps.
When to use a dog recovery sleeve or suit
Wound locations a dog recovery sleeve can protect
Step 1: Confirm the sleeve is appropriate for the wound location and your dog’s behavior. If your dog chews or licks aggressively, ask your vet if a sleeve is safe.
Step 2: Check the wound location. Recovery sleeves work best for wounds on the elbows and other bony areas. You can use a sleeve to prevent licking, scratching, and pressure on these spots.
Step 3: Review your vet’s discharge instructions. Always follow their advice for wound care and protection.
Step 4: Use the sleeve for post-surgical recovery or conditions like hygromas. The sleeve offers targeted protection and helps your dog heal comfortably.
Tip: Take a photo of the wound before and after putting on the sleeve. This helps you track healing and coverage.
When a dog recovery suit or cone is better
Step 5: Decide if a dog recovery suit or cone is needed for better wound protection.
Step 6: Use a dog recovery suit for wounds on the chest, belly, or back. The suit allows your dog to eat, drink, and move freely. It also helps reduce anxiety compared to a cone.
Step 7: Choose an e-collar or cone for wounds on the limbs, face, or tail. These options limit your dog’s ability to reach the area and provide reliable protection.
Wound Location | Best Option | Why Use It? |
|---|---|---|
Elbow, bony areas | Recovery sleeve | Targeted protection |
Chest, belly, back | Dog recovery suit | Comfort and mobility |
Limbs, face, tail | E-collar or cone | Limits reach, better wound protection |
Note: Always check the fit and comfort of any recovery product. If you see swelling, redness, or your dog seems uncomfortable, contact your vet right away.
Sizing and prep for a dog surgery recovery suit
How to measure chest and leg length
Step 1: Gather your tools before you start. You need a soft tape measure, some treats, a helper, and your phone camera for fit photos.
Step 2: Measure your dog’s chest circumference. Place the tape around the widest part, just behind the front legs.
Step 3: Measure the leg length. Start from under the armpit and go down to the wrist for the front leg, or from the groin to the hock for the hind leg.
Step 4: Write down both measurements. Double-check for accuracy.
Step 5: If your dog moves a lot, ask a helper to gently hold them still. Use treats to keep your dog calm and happy.
Tip: Always measure when your dog is standing on a non-slip surface. This helps you get the most accurate numbers.
Size | Length (inches) | Weight (lbs) | Example Breeds |
|---|---|---|---|
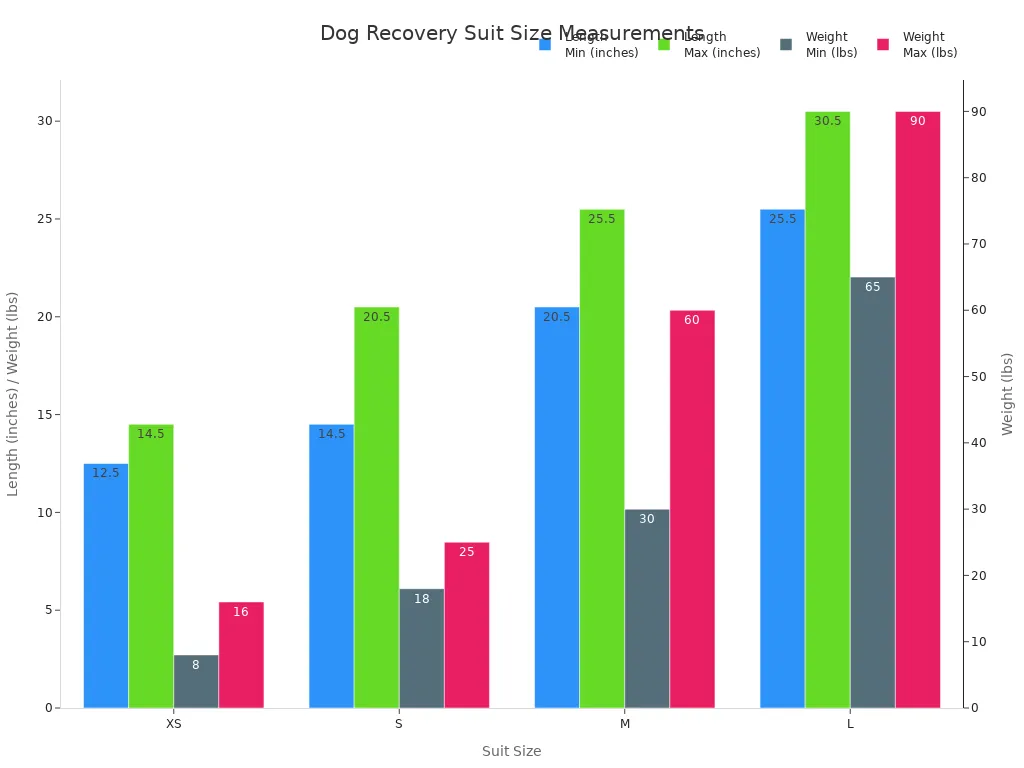
XS | 12.5–14.5 | 8–16 | Toy Poodle, Pug, Yorkshire Terrier |
S | 14.5–20.5 | 18–25 | Beagle, French Bulldog, Shih Tzu |
M | 20.5–25.5 | 30–60 | Husky, Cocker Spaniel, Bulldog |
L | 25.5–30.5 | 65–90 | Labrador, Golden Retriever, German Shepherd |
Choosing the right size: snug but not tight
Step 6: Use the measurements to pick the best surgery recovery suit size. If your dog’s numbers fall between two sizes, choose the larger size for comfort.
Step 7: Check the fit standard. The suit should feel snug but not tight. Straps must not pinch, and your dog should walk without tripping.
Step 8: Make sure the suit wraps gently and gives light compression. This helps calm your dog and supports rest.
Step 9: Avoid a suit that is too tight or too loose. A tight suit can restrict movement and breathing. A loose suit may sag and fail to protect the wound.
Step 10: Always follow your vet’s discharge instructions for using surgical recovery suits. If you notice irritation or discomfort, stop and call your vet.
Note: Choosing the right recovery suit helps your dog heal safely. Well-fitted suits prevent rubbing and keep your dog comfortable.
How to put on a dog recovery sleeve step by step

Open, guide, and secure the sleeve
Step 1: Unbuckle all closures and lay the dog recovery sleeve flat. Look for left and right icons printed on the sleeve. These icons help you choose the correct side for your dog’s leg.
Step 2: Position your dog so the leg needing protection is easy to reach. If your dog just had surgery, ask a helper to support your dog gently. Make sure your dog feels calm and safe.
Step 3: Roll the sleeve up and slide it over your dog’s paw. Pull the sleeve up to the ankle, stretching the material until the foot comes out the other end. The logo or icons should face outward.
Step 4: Put it on by opening closures fully, guiding the leg through gently, and closing straps evenly to snug but not tight. The dog recovery sleeve should cover the wound and fit smoothly. Never force your dog’s joints.
Step 5: Wrap the long strap under your dog’s belly and around the back. Secure the buckles and adjust the strap for a snug fit. The sleeve should not pinch or twist.
Step 6: Check that the dog recovery sleeve protects sutures and covers the incision. Make sure the fabric does not bunch up or leave gaps. Adjust as needed for comfort and coverage.
Step 7: Let your dog take a few slow steps. Watch for slipping, twisting, or signs of discomfort. Always follow your vet’s discharge instructions for safety.
Front leg vs hind leg: key differences
You can use a dog recovery sleeve on either the front or hind leg. The reversible design and left/right icons make it easy to fit both legs. For the front leg, guide the sleeve from the paw up to the armpit. For the hind leg, start at the paw and pull up to the groin. Always check that the sleeve does not rub or restrict movement.
Comfort tips for anxious dogs
Some dogs feel nervous after surgery. Give treats and speak softly while you put on the dog recovery sleeve. Take breaks if your dog seems stressed. Use gentle, slow movements to help your dog relax. If your dog struggles, ask your vet for advice or try a practice run before surgery.
Fit checks and first walk test
Coverage, circulation, and rub checks
Step 1: Check the sleeve’s coverage. Make sure the fabric covers the incision or bandage completely. The sleeve should not fold into the wound or leave gaps.
Step 2: Look at your dog’s toes and skin. The toes should stay warm and their normal color. If you see swelling, cold tissue, or pale skin, loosen the sleeve and call your vet.
Step 3: Inspect for rubbing or chafing. Check the edges near the armpit, groin, and cuff line. Redness or open sores mean the sleeve needs adjustment or removal.
Step 4: Watch your dog’s behavior. If your dog seems tired, limps, or shows pain when you touch the sleeve, stop and check for problems.
Step 5: Use the fit check table below to guide your inspection. Repeat these checks at least twice a day. Take photos if you notice changes and share them with your vet.
Table 1: Fit Checks for Dog Recovery Sleeve
Check Type | What to Look For | What to Do If You See a Problem |
|---|---|---|
Coverage | Incision fully covered, no gaps | Adjust sleeve for better coverage |
Circulation | Toes warm, normal color, no swelling | Loosen sleeve, call vet if persists |
Rub Points | No redness, chafing, or open sores | Remove sleeve, contact vet if severe |
Slipping | Sleeve stays in place, no twisting | Re-seat and re-tighten straps |
Mobility | Dog walks without tripping or limping | Adjust fit, consult vet if needed |
Tip: The stretchy fabric helps the sleeve fit snugly and allows your dog to move. If your dog is between sizes, choose the smaller size for a better fit.
Leash-walk test for mobility
Step 6: Prepare for a short leash walk. Use a martingale collar or a harness that fits well. Hold the leash with a thumb lock for control.
Step 7: Walk your dog for 10 to 20 slow steps. Watch how the sleeve moves. The leash should form a gentle U-shape. If the sleeve twists or slips, stop and adjust the straps.
Give treats to keep your dog calm and focused.
Check that your dog walks normally and does not trip.
Repeat the walk test after each adjustment.
Note: Always follow your vet’s discharge instructions. If you see swelling, pain, or changes in your dog’s movement, contact your vet right away.
Troubleshooting common sleeve problems
Twisting, slipping, and bunching
Step 1: Watch your dog move around after you put on the sleeve. If you see the sleeve twist, slip down, or bunch up, check the straps. Adjust them so the sleeve fits snug but not tight.
Step 2: Make sure the sleeve sits high enough on the leg. If it keeps slipping, re-seat the sleeve and tighten the straps evenly. Dogs that move a lot may need more frequent checks.
Step 3: Look for signs that the sleeve is not working well. If your dog chews the sleeve, or if it slips off, the fit may be wrong. Some dogs can damage the sleeve or reach the wound if it is loose.
Tip: Always check the sleeve’s position after walks or playtime. Active dogs may need extra adjustments.
Rolling the cuff and adjusting length
Step 4: If the sleeve is too long, roll the cuff gently to shorten it. Make sure the rolled cuff does not press into the wound or cause rubbing.
Step 5: Check the edges of the sleeve for redness or chafing. If you see irritation, adjust the length or try a different size. Clean the sleeve often to keep it soft and comfortable.
Step 6: Watch for swelling above or below the sleeve. Swelling can mean the sleeve is too tight or not fitted right. Loosen the straps and call your vet if swelling does not go away.
If your dog can still reach the wound
Step 7: If your dog can lick or chew the wound, the sleeve may not cover the area well. Try a different closure or ask your vet if a suit or cone is better. Always follow your vet’s discharge instructions for wound protection.
Table 2: Troubleshooting Common Sleeve Problems
Problem | Quick Fix | When to Call the Vet |
|---|---|---|
Slipping | Re-seat and tighten straps | If sleeve will not stay in place |
Swelling above/below | Loosen sleeve, check fit | If swelling does not improve |
Distract, use bitter spray | If dog damages or eats the sleeve | |
Toe coldness | Loosen or remove sleeve | If toes stay cold or pale |
Rubbing at cuff | Adjust length, roll cuff | If redness or sores appear |
Common problems include slipping, chewing, and bunching.
You should check the sleeve and your dog’s skin at least twice a day.
If you see swelling, cold toes, or your dog seems uncomfortable, stop using the sleeve and call your vet.
Always monitor your dog’s condition and ask your vet if you have any doubts.
Daily care and cleaning for a dog recovery sleeve
Skin checks and monitoring
Step 1: Check your dog’s skin under the sleeve every morning and evening. Look for redness, swelling, or wet spots.
Step 2: Gently lift the sleeve and inspect the area around the wound. Use your phone to take photos if you notice changes.
Step 3: Watch for signs of irritation, such as scratching or licking. If you see open sores or discharge, remove the sleeve and call your vet.
Step 4: Keep a simple log of your observations. This helps you track healing and spot problems early.
Tip: Always follow your vet’s discharge instructions for wound care and monitoring.
Washing and drying rules
Step 5: Prepare the sleeve for washing by closing all snap buttons and Velcro. Turn the sleeve inside out to protect the fabric.
Step 6: Wash the sleeve in cold water on a delicate setting. Use a fragrance-free, hypoallergenic detergent to avoid skin irritation.
Step 7: Place the sleeve in a laundry bag to prevent rough fibers. Wash with similar colors to keep the sleeve looking new.
Step 8: Dry the sleeve under the sun or use a low-heat dryer if allowed by the label. Do not use bleach or harsh chemicals. Avoid tumble drying, as heat can damage the sleeve’s elasticity.
Step | Instruction |
|---|---|
1 | Machine wash cold on a delicate setting. |
2 | Dry under the sun or use a low-heat dryer. |
Note: Clean sleeves help prevent infection and keep your dog comfortable.
Set a daily routine
Step 9: Check the sleeve and your dog’s skin at least twice a day. Wash the sleeve as needed, following care rules.
Step 10: Track any redness or changes with photos. Share updates with your vet if you notice problems.
Step 11: Build these steps into your daily routine to support safe healing.
Safety reminder: If you see swelling, discharge, or pain, stop using the sleeve and contact your vet right away.
Printable daily checklist for sleeve care
You can print this checklist and keep it near your dog’s recovery area. Use it every day to help your dog heal safely. Always follow your vet’s discharge instructions.
Daily Sleeve Care Steps
Step 1: Before putting on the sleeve (Morning)
Check the wound and skin for redness, swelling, or wetness.
Look for any funky odors or unusual discharge.
Make sure your dog does not have a fever or seem restless.
Step 2: Check sleeve position
Place the sleeve so it covers the wound completely.
Make sure the sleeve does not bunch up or leave gaps.
Step 3: Secure straps
Fasten all straps so they feel snug but not tight.
Straps should not pinch or leave marks on the skin.
Step 4: After your dog walks 10 steps
Watch your dog walk slowly.
Check that the sleeve stays in place and does not twist or slip.
Make sure your dog does not limp or trip.
Step 5: Inspect the sleeve and skin (Evening)
Remove the sleeve and check the skin for redness, swelling, or open sores.
Look for streaks, bleeding, or signs of infection.
Use your phone to take a photo if you see changes.
Step 6: Wash the sleeve as needed
Follow label instructions for washing.
Always dry the sleeve completely before the next use.
Step 7: Call your vet if you notice any of these warning signs
High fever or your dog seems very tired.
Unpleasant smells from the wound.
Red streaks around the incision.
Excessive bleeding or open wounds.
Swelling, redness, or cold toes.
Poor appetite or increased restlessness.
Severe limp or your dog will not use the leg.
📝 Tip: Print this checklist and check off each step daily. Careful monitoring helps your dog heal and keeps you aware of any problems early.
You play a key role in your dog’s recovery. Check the sleeve and your dog’s skin every day. Make sure the fit stays snug but not tight. Watch for any changes or warning signs. Call your vet if you feel unsure or see problems. Most dogs get used to the sleeve with gentle care and patience.
Always follow your vet’s discharge instructions for the best results.
Looking for more tips? Read our guides on dog cone alternatives after surgery and dog licking incision prevention to help your dog heal safely.
FAQ
How often should you check your dog’s recovery sleeve?
You should check the sleeve and your dog’s skin at least twice a day. Look for redness, swelling, or wetness. Always follow your vet’s discharge instructions.
Can your dog wear the recovery sleeve while sleeping?
Yes, your dog can sleep with the sleeve on if your vet approves. Make sure the sleeve fits snug but not tight. Check for signs of discomfort each morning.
What should you do if the sleeve gets wet or dirty?
Remove the sleeve right away. Wash it following the care instructions. Dry the sleeve completely before putting it back on your dog.
Is it safe to use a sleeve instead of a cone?
Ask your vet before switching. Some wounds need a cone for better protection. Use the sleeve only if your vet says it is safe for your dog’s wound.
How do you know if the sleeve is too tight?
Check your dog’s toes and skin. Toes should stay warm and normal color. If you see swelling or cold toes, loosen the sleeve and call your vet.
