
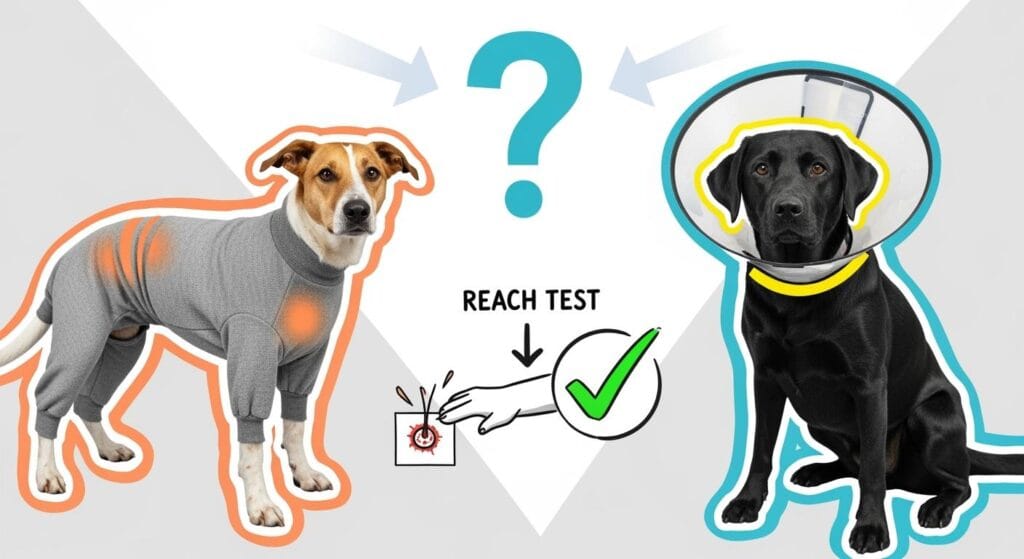
Choosing a dog recovery suit vs e-collar starts with one practical question: can the barrier stop your dog from reaching the wound in every normal position? A recovery suit is usually more suitable for covered torso or abdominal areas, while an e-collar is often more reliable for the face, ears, paws, tail, or any site a dog can still reach around fabric. Your veterinarian’s instructions should override general guidance, especially after surgery or when a wound is bandaged.
Key takeaways
- A recovery suit is mainly a body-coverage barrier. It does not automatically protect the face, paws, tail, or every leg incision.
- An e-collar is often the safer first choice when the wound is outside the suit’s coverage area or the dog can bend around the fabric.
- Run a reach test after fitting either option and repeat it after the dog sits, lies down, walks, or turns.
- Switch barriers when fabric shifts, the collar slips, the wound becomes exposed, or the dog can make contact even once.
- Contact your veterinarian if the wound opens, bleeds, develops discharge or odor, or cannot be protected reliably.
What a recovery suit and e-collar can—and cannot—do
Both options are physical barriers. They are intended to reduce access to a wound, incision, hot spot, or bandaged area; they do not treat the underlying condition. The better option is the one that maintains coverage during real movement without causing a new fit or skin problem.
A dog recovery suit can provide broad coverage across the belly, chest, back, and sides. It may allow easier eating, drinking, resting, and movement than a rigid cone. Its main limitation is coverage: openings, cuffs, seams, and shifting fabric may leave the wound accessible.
An e-collar creates a barrier around the head. When its length and neck fit are appropriate, it can stop the mouth from reaching areas that clothing does not cover. Its limitations may include bumping into objects, difficulty reaching bowls, neck rubbing, slipping, or inadequate length for a flexible or persistent dog.
The four-step reach test
Do not judge protection only while your dog stands still. A barrier can look secure and fail as soon as the dog changes posture.
- Fit the barrier. Put on the recovery suit or e-collar according to the product’s size and fitting instructions.
- Observe the dog from several angles. Check whether the mouth, tongue, front paws, or back paws can contact the wound or move the barrier.
- Repeat during movement. Recheck while the dog sits, lies down, turns, walks a few steps, and reaches toward the area.
- Use a fail-fast rule. If the dog touches the wound, exposes an incision edge, licks through fabric, or works around the collar, the current setup has failed.
| Reach-test result | What to do |
|---|---|
| The wound stays covered and the dog cannot make contact | Continue use and repeat fit checks throughout the day |
| The dog repeatedly tries to reach but is currently blocked | Increase supervision and recheck fit after movement and rest |
| The dog touches the wound or exposes an edge | Switch to a more reliable barrier or use a veterinarian-approved combination |
| The wound opens, bleeds, smells abnormal, or develops discharge | Contact your veterinarian |
For night-time monitoring and persistent licking attempts, see the step-by-step guide to stopping a dog from licking stitches at night.
Dog recovery suit vs e-collar by wound location

Wound location gives you a starting point, but the reach test makes the final decision. The table below combines the first choice, backup option, common failure sign, and next action.
| Wound location | Usual first choice | Backup option | Common failure sign | Next step |
|---|---|---|---|---|
| Belly, chest, back, or side | Recovery suit | E-collar or combined protection | Fabric shifts, bunches, becomes damp, or exposes the wound | Refit, replace wet gear, and repeat the reach test |
| Torso incision close to a leg opening | Recovery suit only if the full incision stays covered | E-collar | The incision edge appears when the dog sits or walks | Use a barrier that maintains coverage during movement |
| Leg or joint area | Targeted sleeve when appropriate for the exact site | E-collar | The sleeve rotates, slides, bunches, or leaves an edge exposed | Change the coverage method; do not rely on a body suit that stops above the wound |
| Paw, toes, nail bed, or lower tail | E-collar or veterinarian-directed protection | Site-specific cover when appropriate | The dog bends around the collar or removes the cover | Check collar length and ask the veterinarian about a more secure setup |
| Face, ear, eye area, or neck | E-collar | Veterinarian-selected alternative | The collar is too short or the dog can scratch around it | Refit or replace the barrier and seek veterinary guidance if access continues |
| Hot spot or rash | Depends on location and veterinary instructions | Alternative barrier | Continued licking, scratching, heat, or moisture | Stop relying on the failed barrier and contact the veterinarian when irritation worsens |
A standard body suit often stops at the upper leg. For a stifle, hock, paw, or lower-leg incision, read why a recovery suit may not cover a leg incision before assuming broader body coverage is enough.
Fit and failure checks
Fit should be checked each time the barrier is put back on and whenever the dog changes activity. Follow the size chart and instructions for the specific product rather than applying one universal sizing rule.
| Check | Recovery suit | E-collar |
|---|---|---|
| Coverage | The full wound and all incision edges remain covered in standing, sitting, lying, and walking positions | The rim prevents the mouth from reaching around to the wound site |
| Security | The suit does not twist, roll, bunch, or pull an opening across the wound | The collar stays in position and does not slide over the head |
| Skin contact | No seam, cuff, or opening rubs directly across the healing area | The neck attachment does not create pressure, pinching, or persistent rubbing |
| Moisture | Fabric stays dry and free from urine, wound fluid, saliva, or heavy soiling | The neck and inner surface stay clean and dry |
| Function | The dog can move and toilet without the wound becoming exposed | The dog can drink and move safely with an adjusted environment |
| Failure sign | Exposed edges, wet fabric, chewing damage, shifting, or licking through an opening | Reaching around the rim, slipping, neck irritation, or inability to use the barrier safely |
Recovery suit checks
- Use the manufacturer’s measurements and size chart. Do not automatically size down when measurements fall between sizes.
- Check the armpits, groin, neck opening, leg openings, seams, and closures for rubbing.
- Remove and replace the suit when it becomes damp or soiled, following the veterinarian’s wound-care instructions.
- Confirm that potty access does not expose or contaminate the healing area.
- Replace the suit or change methods if the dog chews through the fabric or repeatedly moves it.
E-collar checks
- Follow the fitting instructions supplied with the collar and verify that it cannot slip off.
- Confirm that the rim extends far enough to block access to the specific wound.
- Check the neck for redness, dampness, pressure, or friction.
- Use an uncluttered recovery area and adjust bowls if the collar interferes with normal drinking.
- Do not remove the barrier for unsupervised breaks when the dog can reach the wound without it.
For a closer comparison of targeted limb coverage and cones, see anti-lick recovery sleeve vs cone.
When one option is not enough
Some dogs can defeat a suit, a soft collar, or an inflatable collar because of flexibility, persistence, or wound position. Do not keep relying on a barrier after it has failed. Depending on your veterinarian’s instructions, the next step may be a longer or more rigid e-collar, a better-fitting suit, targeted limb protection, or a combination of barriers.
| Status | What you may see | Action |
|---|---|---|
| Green | The barrier stays secure, the wound remains inaccessible, and the skin stays dry without rubbing | Continue the current setup and routine checks |
| Yellow | The suit shifts, the collar moves, the dog repeatedly tests the barrier, or mild skin redness appears | Stop and refit; increase supervision and repeat the reach test |
| Red | The dog contacts the wound, damages the barrier, opens the incision, or develops bleeding, discharge, odor, or marked irritation | Prevent further access and contact your veterinarian |
Never assume that a more comfortable option is adequate after the dog has demonstrated that it can reach the site. Comfort matters only after effective wound access control has been confirmed.
Wound and skin signs that need veterinary guidance
Contact your veterinarian when the wound changes unexpectedly or the barrier cannot be used safely. Relevant warning signs include:
- An incision or wound that opens or starts bleeding
- Increasing redness, heat, swelling, pain, or sensitivity
- Pus, unusual discharge, or an abnormal odor
- Loose or missing sutures
- Persistent licking or chewing despite appropriate barriers
- Skin breakdown, pressure marks, or raw areas caused by the suit or collar
- A wet or contaminated dressing, when a dressing is present
- A dog that cannot eat, drink, rest, or move safely with the current setup
For a more specific incision-monitoring routine, see the guide to dog spay incision care, licking prevention, and when to call the vet. Do not apply antiseptics, creams, bandages, or cleaning solutions unless your veterinarian has instructed you to use them.
FAQ
Is a recovery suit better than a cone for dogs?
Neither option is always better. A recovery suit may be suitable for a covered belly or torso wound, while an e-collar is often more reliable for the face, ears, paws, tail, and exposed leg areas. The correct choice is the barrier that prevents access during movement.
Can a dog still lick through a recovery suit?
Yes. A dog may lick through damp fabric, work at an opening, move the suit, or expose an incision edge. If the dog can make contact, the suit is not providing adequate protection for that wound and fit.
How do I know whether an e-collar is long enough?
Use the product’s fitting instructions, then perform the reach test for the exact wound location. The collar is not adequate if the dog can bend around the rim and contact the site, even when the collar appears correctly positioned at the neck.
Can a dog wear a recovery suit and e-collar together?
In some cases, a veterinarian may recommend combined barriers when one option does not reliably prevent access. Check both items for rubbing, restricted movement, shifting, and interference with eating or drinking.
How often should the barrier and wound be checked?
Check whenever the barrier is fitted or repositioned and at regular intervals throughout the day. Recheck after sleep, movement, toileting, or any time the dog works at the equipment. Follow any more specific schedule provided by your veterinarian.
Final decision rule
Choose a dog recovery suit vs e-collar by matching the barrier to the wound location, then verifying the choice with a movement-based reach test. Use a suit when body coverage remains stable and dry. Use an e-collar when the wound is outside the suit’s coverage or the dog can reach around fabric. Change the setup as soon as protection fails, and involve your veterinarian when the wound worsens or reliable access control cannot be maintained.
