
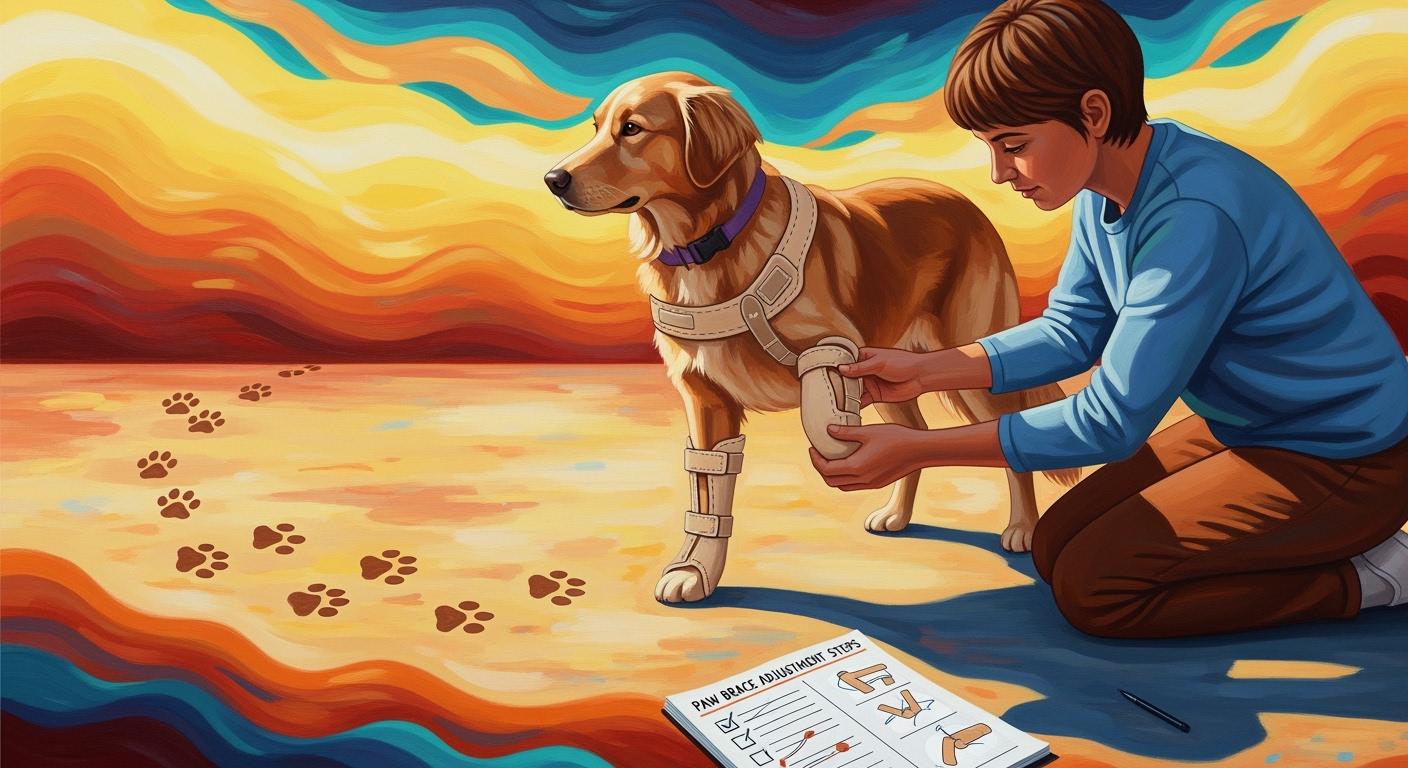
You want your dog to walk easily and feel good every day. A paw dragging support brace can help your dog stand and walk safely. If you fit the brace the right way, your dog’s paws stay safe and walking gets better. Look at the table below to see how a dog support brace can make your dog feel better and give more help:
Benefit | How It Helps Your Dog |
|---|---|
Support | Holds the paw in a safe spot and lowers injury risk |
Mobility | Makes your dog feel braver and move with less trouble |
Comfort | Lessens pain and helps your dog like walks again |
Fit | Good fit keeps the brace on and stops it from slipping |
Protection | Guards your dog’s paw from cuts and sore spots |
Key Takeaways
A paw dragging support brace helps dogs walk safely by keeping their paws in the right position.
Early signs like paw flipping or toe dragging mean your dog might need a brace. Check with a vet for advice.
Start with short wear times and gradually increase. Check your dog’s skin for redness or sores after each use.
Paw Dragging Signs in Dogs
Paw Flipping vs Nail Scuffing
You may notice your dog walking differently. Some dogs flip their paw under and walk on the top instead of the pad. This is called knuckling. Other dogs drag their toes, which makes a scraping sound on hard floors. Both of these are common signs your dog needs a brace. You might see your dog’s nails wear down or even bleed. These changes can happen slowly, so you need to watch your dog closely every day.
Here is a table of common signs you might see if your dog has paw dragging:
Observable Signs | Description |
|---|---|
The dog stands or walks on the top of their paw and cannot flip it back. | |
Toenails scrape the ground and you can hear it when walking. | |
Wobbliness | The dog looks off balance or sways while walking. |
Delayed paw replacement | It takes longer to fix the paw position when flipped. |
Crossing legs | The legs may cross over each other when moving. |
Muscle loss | Not using one leg can make muscles shrink. |
Why Early Signs Matter
You want your dog to stay safe and active. If you spot signs your dog needs a brace early, you can help prevent bigger problems. Early detection means you can stop small issues from turning into serious ones. For example, if you see your dog scratching the ground or walking with a limp, you should talk to your veterinarian. Quick action can help your dog avoid wounds, pain, or even paralysis. Early help gives your dog a better chance to walk comfortably and enjoy daily life.
Tip: Check your dog’s paws every day for redness, scrapes, or worn nails. Daily checks keep your dog safe and help you catch problems early.
Causes of Paw Dragging in Dogs
Neurologic Weakness and Age Anchors
Sometimes, dogs drag a paw because their nerves change. This happens more in older dogs. Degenerative myelopathy is one reason for this. Dogs with this problem are usually 8 to 14 years old. Over time, their back legs get weaker. Many dogs get worse in 6 to 12 months. You should check your dog’s support tools as things change. Intervertebral Disc Disease (IVDD) can also cause paw dragging. IVDD stops signals from the brain to the legs. Your dog might walk on the top of the paw or drag toes. These changes make moving harder and can cause injuries.
Note: Always look for new signs of weakness. Finding problems early helps keep your dog safe and happy.
Injury, Surgery, and Vet Planning
Dogs of any age can drag a paw after getting hurt. For example, Philomena the Pug had a brachial plexus injury. This made her front leg partly paralyzed. She dragged her paw and walked on the top, which caused scrapes. Dogs may also drag paws after surgery. A support brace helps protect the paw and makes walking safer. Your veterinarian will help you plan care after surgery. Always listen to your vet and check your dog’s paws every day for scrapes or redness.
Cause | Typical Age Range | What You Might See |
|---|---|---|
Degenerative Myelopathy | 8–14 years | Back leg weakness, dragging |
IVDD | Any age | Sudden paw dragging |
Injury/Surgery | Any age | Abrasions, paw flipping |
Who Needs a Paw Dragging Support Brace
Good Candidates for Dog Braces
You want your dog to stay active and safe. Some dogs need a paw dragging support brace when they show signs of paw flipping, toe scraping, or trouble walking. Dogs with weak back legs, especially those between 8 and 14 years old, often need extra support. If your dog loses mobility or starts dragging a paw after injury or surgery, a brace can help protect the paw and improve walking. Dog braces work best for preventative support and for dogs who still walk but need help keeping their paw in the right position.
Here is a quick checklist to help you decide if your dog is a good candidate for dog braces:
Your dog drags toes or flips the paw under while walking.
You notice nail wear, scrapes, or redness on the paw.
Your dog has trouble standing or loses balance.
Your dog’s mobility changes quickly or slowly over weeks.
You want to use dog leg braces for preventative support before wounds start.
Tip: Always check your dog’s paws for signs of injury before using a brace.
Step set A: Should You Brace Your Dog Today?
Watch your dog walk. Look for paw dragging, flipping, or scraping.
Inspect the paw for redness, cuts, or nail damage.
If you see bleeding or deep wounds, pause and contact your veterinarian.
If your dog shows mild signs, proceed to fitting and walk test with a dog support brace.
When to See a Vet First
You should talk to your veterinarian before using dog braces. Your vet will check your dog’s health and mobility. They may diagnose conditions like IVDD or degenerative myelopathy. The vet will examine your dog’s gait, reflexes, and response to touch. Sometimes, your vet will order X-rays to rule out bone problems or use MRI scans for a closer look. You should discuss when symptoms started and how they changed. Dog leg braces help with support, but your vet will guide you on the safest plan.
Veterinary Assessment Steps | Purpose |
|---|---|
Diagnosis for IVDD | Find the cause of paw dragging |
Physical and neurological exam | Check gait and reflexes |
Symptom review | Track changes over time |
X-rays | Rule out bone issues |
MRI or CT scan | Get detailed images |
Note: Always follow your vet’s advice before starting any new brace or support for your dog.
Finding the Right Dog Brace Type
Choosing the right brace for your dog can make a big difference in comfort, safety, and mobility. You need to know the different types of dog braces and how each one works. This section will help you with finding the right brace by comparing the main types and showing you how to measure your dog for the best fit.
Toe-Up and No-Knuckling Braces
Toe-up and no-knuckling braces help dogs who drag their paws or flip them under while walking. These braces use a lightweight, high-elastic band with a cushioned toe cord. The design helps lift the paw and keeps it in the correct position. Some no-knuckling braces stimulate between the toes to encourage the paw to land pad-first. You can use these braces for dogs with general hind leg weakness or neurological problems.
Here is a table to help you compare the main features of toe-up and no-knuckling braces:
Feature | Description |
|---|---|
Superior Toe Protection | Microfiber leather toe cap prevents injuries from dragging. |
Anti-Collision Design | Durable material protects against impacts, wear, and tear. |
Thickened Anti-Slip Sole | Provides a firm grip on various surfaces for enhanced stability. |
Enhanced Grip Texture | Special texture design improves traction and resists bending and tearing. |
Maximum Comfort for All-Day Wear | Breathable fabric keeps paws cool and dry; soft and lightweight for extended wear. |
Secure Fit | Heel fixing Velcro and double straps ensure the boot stays in place and is easy to apply/remove. |
Nighttime Safety | Reflective strips enhance visibility during nighttime travel. |
You should measure your dog’s paw and leg before choosing this type of brace. Measure the length from the paw pad to the hock and the width of the paw at its widest point. This helps you find a custom fit and keeps the brace from slipping or twisting. Always check the straps and make sure they are snug but not too tight. A good fit means the brace stays in place and your dog can walk with confidence.
Tip: If you use a training-sock style tool for rehab, keep sessions short—about 2–5 minutes each. This tool helps with proprioception exercises, not for all-day use.
Protective Boots for Paw Scraping
Protective boots work well for dogs who already have scrapes or nail wear from dragging their paws. These boots act as a barrier and prevent further injury. They also give your dog more confidence when moving. You should look for lightweight boots that do not add extra strain. The right boots help with proper paw positioning and make walking easier.
Here are some key points about protective boots:
Protective boots prevent injuries from scraping and help your dog move with confidence.
Lightweight boots reduce strain and support natural movement.
Durable soles provide traction and stability, which is important for dogs that drag their paws.
Boots help prevent secondary issues like skin injuries, inflammation, or infection.
You should measure your dog’s paw for a custom fit. Measure the width and length of the paw and check the boot’s closure system.
A secure fit keeps the boot in place and protects the paw during walks.
You need to check the boots daily for wear and make sure they stay clean and dry. If you see redness or sores, remove the boot and let your dog’s paw rest for 20–30 minutes before trying again.
Lift-Assist Dog Support Braces
Lift-assist dog support braces help dogs who have trouble standing or walking because of weakness in their back legs. These braces provide extra support and help you lift your dog safely. Lift-assist braces are useful for dogs who need help with balance or who cannot move on their own.
Here is a table to compare the main types of dog braces for paw dragging:
Feature/Function | Toe-Up Brace | No-Knuckling Brace | Lift-Assist Brace |
|---|---|---|---|
Design | Lightweight SBR high elastic band with toe cord cushioning | Stimulates between toes to evoke withdrawal reflex | Provides lift assistance for mobility |
Function | Helps lift the foot higher for better gait | Corrects hind paw placement and improves gait | Assists in lifting the dog’s body for movement |
Ideal For | Dogs with general hind leg weakness | Dogs with neurological impairments | Dogs needing extra support for mobility |
You should measure your dog’s body length, chest, and leg height to find a custom fit for a lift-assist brace. This helps you support your dog’s weight evenly and prevents slipping. Always check the straps and handles before each use. A good fit means your dog feels secure and you can help them move safely.
Note: Always use the right type of dog brace for your dog’s needs. If you are not sure which type of dog brace to choose, talk to your veterinarian.
How to Measure Your Dog for a Custom Fit
Finding the right brace starts with accurate measurements. You should measure your dog’s paw, leg, and body as needed for each type of brace. Use a soft tape measure and write down each number. Check the manufacturer’s size chart to match your dog’s measurements for a custom fit. Repeat the process if your dog’s weight or condition changes.
Which Type of Dog Brace Is Best?
You need to think about your dog’s symptoms, activity level, and daily needs. Some dogs need a paw dragging support brace for walking, while others need protective boots or lift-assist support. The best way to find the right brace is to measure your dog, check the fit, and watch how your dog moves. If you see any problems, adjust the brace or try a different type.
Remember: Dog braces help with support and protection. They do not cure the underlying disease. Always check your dog’s paws and skin every day and follow your veterinarian’s advice.
Quick Guide: Types of Dog Braces and How Dog Braces Work
Toe-up and no-knuckling braces help lift the paw and improve gait.
Protective boots shield the paw from scrapes and give traction.
Lift-assist braces help you support your dog’s weight and balance.
Each type of dog brace has a custom fit and works best when you measure your dog carefully.
Knowing how dog braces work helps you choose the right one for your dog’s needs.
By understanding the different types of dog braces and how to measure your dog, you can make the best choice for your dog’s comfort and safety. Finding the right brace keeps your dog active and protected every day.
Fitting and Walk Test for Dog Support Brace
Placement and Strap Guidelines
You want your dog to feel comfortable and safe when wearing a paw dragging support brace. The right fit, comfort, and adjustability help your dog walk with confidence and protect their paw from injury. Start by measuring for the right fit. Use a soft tape measure to check the circumference of the joint and the area above and below it. Measure the length from the joint to the ground. Consider your dog’s breed and size, since these can affect how to measure and fit a dog brace. Ask a helper to hold your dog still while you measure, so you get accurate numbers.
When you apply the brace, follow these placement steps:
Locate the tibial crest and patella to find where the brace should sit.
Align the brace’s mechanical joint with your dog’s stifle joint for stability.
Adjust the suspension sleeve and brace position using the marked line.
Cycle your dog’s leg through flexion and extension to check alignment.
Position the suspension sleeve straps just above the calcaneus.
Make sure there is enough space between the brace and the groin for comfort.
Adjust the knee strap so the knee pad meets the tibial crest when extended.
The brace should feel snug but not tight. Your dog should move naturally without limping or discomfort. You should be able to insert two fingers between the brace and your dog’s limb. Check for rubbing or chafing against the skin. If you see redness, let your dog rest for 20–30 minutes before trying again.
Common fitting errors include improper sizing, which can cause misalignment and strain. Always measure your dog’s leg precisely and follow the sizing chart. Gradual adaptation prevents muscle stiffness and pressure sores. Start with short sessions and increase the duration over time. Monitor your dog for signs of discomfort, such as licking or avoiding walking. Check for redness or swelling daily and adjust the brace if needed.
Step set B: How to Measure and Fit a Dog Brace and Prepare for the Walk Test
Measure your dog’s leg and paw for a custom fit.
Select the correct size using the manufacturer’s chart.
Apply the brace, following the placement and strap guidelines above.
Check that the brace is snug but allows natural movement.
Make sure you can fit two fingers between the brace and your dog’s limb.
Let your dog wear the brace for 30–60 minutes, 3–5 times a day for the first few days.
Inspect your dog’s skin and paw after each session for redness or irritation.
Tip: Always check the brace position before each walk. A good fit helps your dog move safely and protects their paw.
Walk Test: Pass or Fail Signs
After you fit the dog support brace, run a walk test to see how your dog moves. The walk test helps you decide if the brace is working or if you need to adjust it. Watch your dog walk on a flat surface. Look for these signs:
Walk Test Outcome | What to Look For | What to Do Next |
|---|---|---|
Pass | Paw pads land first, toes do not scrape, brace stays in place | Continue with gradual increase in wear time |
Fail | Toes drag, paw flips under, brace rotates or slips, rubbing starts quickly | Stop use, adjust fit, or try a different brace |
A pass means your dog’s paw pads touch the ground first and the toes do not scrape. The brace should stay positioned without twisting or moving. Your dog should walk with improved mobility and confidence. If you see any fail signs, such as dragging toes, paw flipping, or the brace slipping, stop use right away. Adjust the fit or try a different brace. Never push through longer wear if you see a fail sign.
You want your dog to feel comfortable and safe. Check for signs of discomfort, such as licking, limping, or avoiding walking. Inspect the skin for redness or swelling. If redness lasts longer than 20–30 minutes after removing the brace, pause use and refit. Gradual adaptation helps your dog get used to the brace and supports daily mobility.
Note: Dog braces help with support and protection. They do not cure the underlying disease. Always monitor your dog’s comfort and mobility and consult your veterinarian if you have concerns.
Step set B: Walk Test and Adjustment Guidance
Let your dog walk with the brace for 30–60 minutes.
Watch for pass signs: paw pads land first, no toe scraping, brace stays in place.
If you see fail signs, stop use and adjust the brace.
Check your dog’s skin and paw after each session.
Increase wear time gradually as your dog adapts.
If problems persist, consult your veterinarian for advice.
🐾 Daily walk tests help you keep your dog safe and active. A well-fitted paw dragging support brace supports your dog’s mobility and protects their paw every day.
Break-In and Daily Checks for Dog Braces
Initial Wear Schedule
When you first use a dog support brace, you want your dog to feel comfortable and safe. Start with short sessions to help your dog get used to the new fit. Begin by letting your dog wear the brace for 15 to 30 minutes at a time. This short period helps your dog adjust and prevents soreness. Over one to two weeks, slowly increase the time your dog wears the brace each day. Watch your dog’s walk and check the fit after every session. A gradual break-in makes it easier for your dog to accept the brace and lowers the risk of skin problems.
Tip: Always check the fit before each session. A good fit keeps your dog moving safely.
Step set C: Break-In Schedule for Dog Braces
Put the brace on your dog for 15–30 minutes.
After each session, remove the brace and inspect your dog’s skin and paw.
Look for redness, swelling, or sore spots.
Check your dog’s nails and paw pads for any signs of scraping.
If the skin looks healthy, increase the next session by 10–15 minutes.
Repeat these steps for 1–2 weeks until your dog can wear the brace for longer periods.
Skin and Paw Inspection
Daily checks help you keep your dog’s skin and paws healthy. You need to look for any signs of irritation or injury every time you remove the brace. Use the table below as a quick guide:
Action Item | Description |
|---|---|
Inspect for skin irritation | Check for any signs of redness or sores. |
Contact veterinarian | Call your vet if you see any irritation or swelling. |
If you notice redness that lasts more than 20–30 minutes after removing the brace, pause use and adjust the fit. Never ignore swelling or open sores. Your dog’s comfort and safety come first. Regular checks and a careful break-in schedule help you protect your dog’s paws and keep the fit just right.
Troubleshooting Paw Dragging Support Brace Issues
Persistent Dragging: What to Adjust
If your dog still drags its paw while wearing a paw dragging support brace, you need to check a few things. First, make sure the brace fits snugly and sits in the right spot. The straps should hold the brace in place without pinching. If the paw still flips under, try adjusting the tension on the toe cord or repositioning the brace. Sometimes, using a training sock for short sessions (about 2–5 minutes) can help your dog learn to lift the paw better. You can also use a dog boot to protect the paw from scrapes when not using the brace. For extra support, a bootie splint may help keep the paw in the right position.
Check brace fit and strap tension.
Adjust toe cord if needed.
Try a training sock for short sessions.
Use a dog boot for added protection.
Consider a bootie splint for more support.
Twisting or Slipping: Reseating Tips
A dog support brace should not twist or slip during use. If you notice this problem, reseat the brace with these steps:
Have your dog lie on its side.
Open the latch on one side of the brace.
Gently roll your dog onto its back.
Open the other latch and remove the brace like a book.
Always use a clean T-shirt under the brace for comfort.
With help, slide the brace back under your dog while it lies down.
Close the brace and secure the straps so they are snug but not too tight.
This method helps you keep the brace in the right place and prevents twisting.
Rubbing or Redness: When to Pause
You must check your dog’s skin every time you remove the brace. If you see redness that lasts more than 20–30 minutes, or if you notice blisters, sores, or a rash, pause use and let your dog rest. The table below shows when to stop using the brace and seek help:
Clinical Sign | Description |
|---|---|
Persistent Redness | Redness that does not fade within 30 minutes after removing brace |
Blisters or Sores | Blisters or open sores under the brace |
Rash Under the Brace | Rash where the brace touches the skin |
Tip: Always put your dog’s comfort and safety first. If you see any of these signs, stop using the brace and talk to your veterinarian.
Decision Tools and Comparison Tables
Traffic-Light Decision Table
You can use this table to decide if your dog is ready for a support brace, needs an adjustment, or should pause use. Look for these signs during your daily checks.
Color | What You See | What to Do Next |
|---|---|---|
🟢 Green | Paw pads land first, no toe scraping, brace stays in place | Continue with gradual increase in wear time |
🟡 Yellow | Mild redness (fades in 20–30 minutes), brace slips or twists | Adjust fit, check straps, repeat walk test |
🔴 Red | Persistent redness, sores, paw still flips under, brace rotates | Stop use, consult your veterinarian |
Fit Troubleshooting Table
If you notice problems with your dog braces, use this table to find the likely cause and what you should try first.
Problem | Likely Cause | Fix to Try First / When to Stop |
|---|---|---|
Incorrect strap tension | Reseat brace, tighten straps, check alignment | |
Redness or swelling | Pressure or rubbing | Remove brace, let rest 20–30 minutes, refit |
Paw still drags | Brace not positioned correctly | Adjust placement, check toe cord tension |
Dog avoids walking | Discomfort or poor fit | Inspect skin, check for sores, adjust fit |
Dog Brace Comparison Table
Compare the main types of dog braces to find the best support for your dog. Each type has its own strengths and limits.
Gear Type | Best For | Limits | Daily Checks | When to Escalate |
|---|---|---|---|---|
Toe-up/No-knuckling support | Dogs with paw flipping or dragging | Not for open wounds | Inspect skin, check fit | If dragging persists or sores develop |
Protective boot/paw cover | Dogs with scrapes or nail wear | May not correct gait | Clean boot, check for moisture | If wounds worsen or infection appears |
Lift-assist support | Dogs with hind-end weakness | Not for paw injuries | Check straps, inspect skin | If balance declines or mobility drops |
FAQs on Dog Support Braces
How long should my dog wear the brace? Start with 30–60 minutes, 3–5 times a day. Increase slowly.
Can my dog wear the brace outside? Yes, but check for dirt and moisture after each walk.
Is the brace custom fit? Most dog braces are adjustable and fit many breeds. Measure your dog for best results.
What should I do if my dog gets sores? Remove the brace, let the skin rest for 20–30 minutes, and consult your veterinarian.
Can my dog use stairs with a brace? Supervise closely. Start with short sessions and watch for slipping.
When should I pause use? If you see redness lasting over 30 minutes, blisters, or if your dog avoids walking, stop and seek help.
How do I plan for progression? Reassess your dog’s support needs every few months, especially if mobility changes.
Tip: Always consult your veterinarian before making changes to your dog’s support plan.
You help your dog stay active and safe when you choose the right paw dragging support brace. Start with short wear times and check your dog’s skin often. Gradually increase use to support comfort and mobility. Regular checks and a clean dog support brace protect your dog’s mobility. Always ask your veterinarian for advice. Your care keeps your dog’s mobility strong and daily life happy.
