
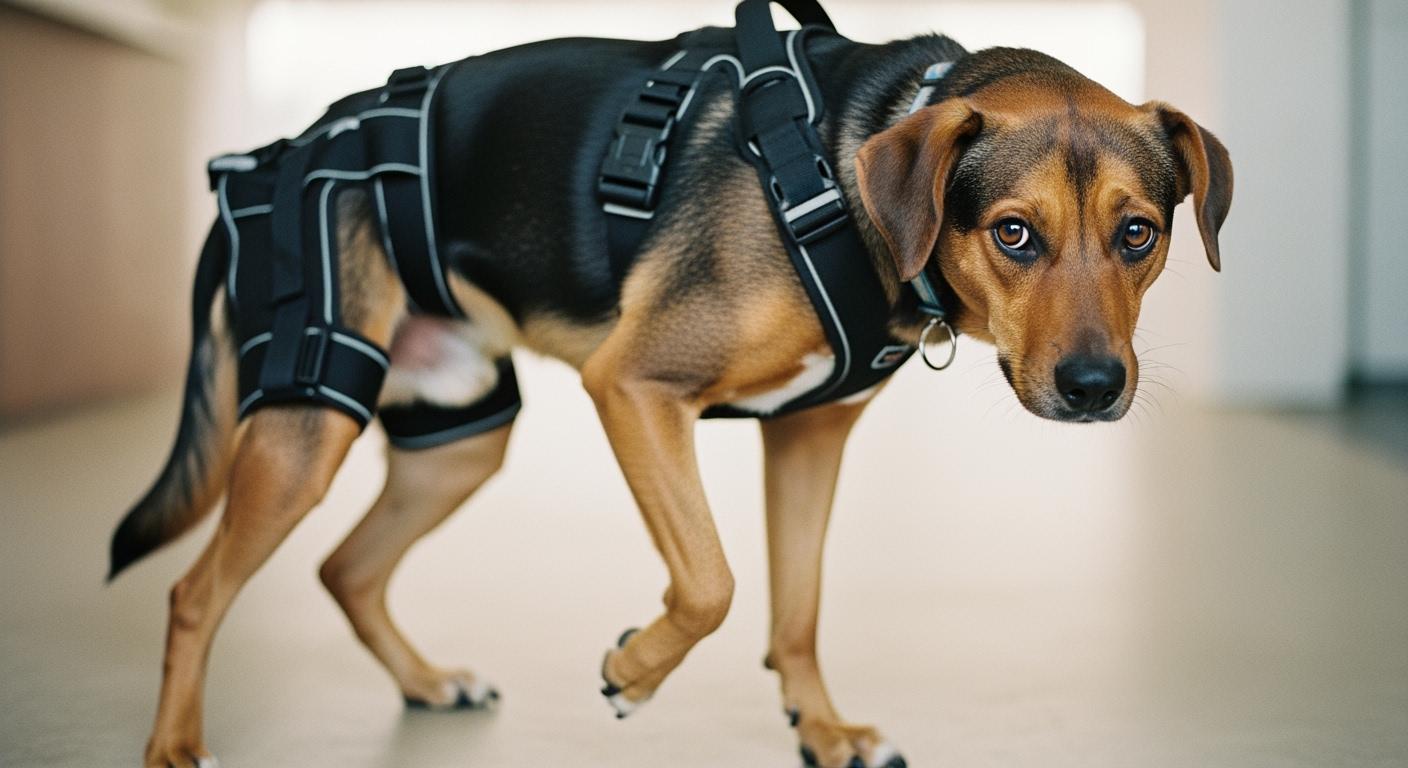
A rear support harness can help a dog stand and walk a few steps. That is the easy part. The problems begin when the dog turns, climbs stairs, or tries to urinate. These moments expose whether the harness structure actually works — or whether it introduces a new set of failures while addressing the original one. Most harness failures are visible within the first few minutes of use. A harness that sat square at rest slides forward as the dog shifts weight from one hind leg to the other. Front legs that were steady before the lift begin to tremble. The dog stops mid-stair and will not move. This is not about handler technique. It is about how force travels through the harness — and where the structure lets it go.
Where Rear Support Harnesses Fail During Real Movement
A harness that performs well during a static standing lift can come apart mechanically the moment the dog moves. Turns, stairs, and car entry each impose a different force direction on the harness, and each one can exploit a different structural gap. The underlying problem follows a predictable chain. When a handler lifts from the rear, the upward force enters the harness at the handle attachment point and travels down through the straps toward the dog’s body. If those straps are narrow, the force does not spread. It concentrates along a thin line of contact against the groin and inner thigh. That concentrated force finds the path of least resistance, which is forward, toward the groin. As the harness slides, the pelvic support that was supposed to anchor the hindquarters shifts with it. The rear lift now pulls against soft tissue instead of bone. The front legs, suddenly carrying more load than they were structured for, begin compensating. Compensate long enough, and they shake. That is a force-path problem built into the strap geometry, not a training gap. After a supported walk, slide two fingers under the rear strap where it crosses the hip bone. If the strap has crept forward visibly from its starting position, the pelvic anchor has already begun to fail. The failure patterns are consistent enough to map. Narrow straps and a handle length that does not match the handler, dog, or movement task can produce similar problems across different breeds and body shapes, because the underlying force path does not change.
| What happens in use | Why the rear support fails | Better structure or product direction |
|---|---|---|
| Harness slides toward groin | Narrow straps concentrate force at a single edge, and that edge follows the path of least resistance forward | Wider pelvic cradle distributes load across a broader contact surface |
| Front legs shake or buckle | Weight shifted forward as pelvic anchor slips; front legs take on hindquarter load they are not built for | Verify front leg stability before choosing rear-only support; balanced lift geometry |
| Rear panel twists on turns | No anti-rotation surface; narrow contact patch rotates freely around the dog’s body axis | Anti-slip lining, broad pelvic contact patch that resists rotational moment |
| Dog refuses stairs | Handle length and lift angle do not match the handler, dog, or stair direction | Adjustable handles, controlled lift angle, and a second handler for larger dogs |
| Potty area gets blocked | Panel extends too far forward, covering the anatomical clearance zone | Toilet-area cutout positioned to match breed-specific anatomy |
| Skin shows rubbing or trapped moisture | Strap edges dig in under load; non-breathable lining traps sweat against skin | Breathable padding, twice-daily skin inspection during repeated use |
Why the Pelvic Cradle Loses Its Anchor
The pelvic cradle is the one part of a rear support harness that determines whether the lift helps or hurts. If it stays put, force transfers cleanly to the hindquarters. If it shifts, every other failure follows. Three structural decisions determine whether the cradle holds. Strap width is the first. A narrow strap makes contact along a single line. Under a dog’s lifted weight, that line becomes a pressure edge. The edge digs, the dog tenses, the tension creates a gap between strap and skin, and the harness slides. A wide pelvic panel spreads the same force across several times the surface area. No single pressure point spikes high enough to trigger the dog’s withdrawal reflex. The harness stays where it was placed. Pressure points from narrow straps most often develop where the rear panel crosses the groin crease — a high-motion zone that amplifies every millimeter of strap movement. Handle length is the second. The useful length is not simply “short” or “long.” It must let the handler keep the dog level, respond when weight shifts, and avoid pulling the rear panel forward toward the belly. A handle that is too short for the handler can create a steep upward pull. A handle that is too long for stairs can add slack and delay position correction. Adjustability matters because flat walking, vehicle entry, and stair movement place the handler at different heights and change the lift direction. Test the setup on a flat surface first. If the panel moves forward, the rear rises above the shoulders, or the handler has to jerk the handle to maintain support, the working length or lift angle needs to be reset. Anti-slip lining is the third. Without it, the inner face of the pelvic panel is just fabric against fur — a low-friction interface that rotates freely when the dog turns. On stairs, the lift angle changes with every step, and each change applies a small rotational moment to the panel. Without an anti-slip surface to resist those micro-rotations, they accumulate. After several steps, the panel has twisted far enough to lose its anchor entirely. Toilet-area clearance is not a comfort feature. It is a structural requirement. If the rear panel extends forward past the anatomical clearance zone, the dog cannot urinate or defecate without the harness interfering. The dog learns to associate the harness with discomfort at the moment of highest biological urgency. That association is fast to form and slow to undo. A harness that blocks potty access will be rejected, regardless of how well it lifts.
Why Rear Support Harnesses Slip on Stairs
A rear support harness can appear stable on level ground and still fail on the first stair. Flat walking keeps the lift direction relatively consistent. Stairs change the dog’s body angle with every step, adding a forward component to the lift force. If the pelvic panel is narrow, flat, or poorly anchored, that force can push the sling away from the hips and toward the belly. The difference between going up and going down also matters. On ascent, the dog must place the front paws and move the body upward while the handler supports the rear. On descent, the front legs must control forward movement and braking. If the rear is lifted too high, or the sling has already migrated forward, the dog’s balance shifts toward the front end. A dog with limited front-leg stability may freeze, scramble, or tip forward even though the same harness seemed acceptable on flat ground. Before approaching stairs, complete a flat-ground check:
- Confirm that the rear panel remains behind the groin crease and under the pelvic support area.
- Check that the dog’s back stays close to level rather than rising sharply at the rear.
- Remove excess handle slack while keeping enough adjustment for controlled movement.
- Stop before the stairs if the panel already shifts, twists, pinches, or causes front-leg trembling.
| Stair-use status | What the handler sees | Recommended response |
|---|---|---|
| Proceed cautiously | Rear panel stays anchored, front paws place normally, and the dog moves without panic | Use slow, controlled steps and recheck the panel after the stair sequence |
| Reassess before continuing | Minor sling shift, hesitation, uneven rear height, or increasing dependence on the handler | Return to level ground, reset the panel and handle length, and reconsider rear-only support |
| Stop stair use | Slipping, scrambling, forward tipping, collapse, pain signals, panic, or repeated refusal | Do not continue the stair attempt; consider a ramp, single-level access, or front-and-rear support |
A rear-only harness cannot create front-leg braking strength that the dog does not have. When the front paws repeatedly slide, the shoulders drop below the hips, or the dog cannot control descent, the problem is no longer limited to hind-leg lift. In that situation, the choice between rear-only and front-and-rear support should be based on whether the front end can still steer and brake independently. If it cannot, stairs may need to be replaced with a ramp or avoided rather than solved by applying more rear lift.
When Rear-Only Support Is Not the Right Tool
Rear support harnesses solve one problem: hind legs that need lift assistance while the front end remains stable. The moment the front end becomes part of the equation, the tool is wrong for the job. Front-leg weakness changes the force balance entirely. A rear harness assumes the front legs can carry the dog’s weight minus whatever the handler lifts from the back. If the front legs are themselves weak — shaking on stairs, buckling after brief standing, favoring one side — then shifting even a portion of the rear load forward creates a cascading overload. The front legs that were barely managing before now face an impossible demand. The dog compensates by leaning, which twists the harness, which shifts more weight forward. The failure loop closes. Larger dogs amplify every structural limitation. A heavy dog on stairs generates significantly more rotational force on the pelvic panel than a small dog, simply because the lever arm from the dog’s center of mass to the handle attachment point is longer. The same narrow strap that held adequately on a small dog now faces far greater sliding force. A full-body harness distributes the lift across chest and hindquarters, which cuts the rotational moment at the pelvic cradle — not because the materials are different, but because the force pathway is split across two anchor zones instead of concentrated at one.
Disclaimer: This analysis assumes a dog with standard breed proportions. Dogs with angular limb deformities, very deep chests, or body shapes that fall well outside their breed norm may show pressure patterns that visual inspection alone cannot catch. For these dogs, run a hand under every strap contact point after the first few minutes of supported walking — subtler rub marks need tactile checking, not just a glance.
Car entry and other uneven transfers expose a similar limitation. How a lift harness routes force through the hindquarters changes when the dog’s body is moving between surfaces at different heights. If the rear panel rotates, slides toward the belly, or lifts the hindquarters above the shoulders, rear-only support may no longer match the task. For larger dogs or unstable transfers, a second handler or a full-body harness may provide a more controllable force path.
| Dog condition | Rear-only support | Full-body support | Reason |
|---|---|---|---|
| Hind legs weak, front balance stable | Works for standing, short walks, potty breaks | Not needed | Rear lift matches the problem |
| Front legs also weak, balance poor | Not enough — shifts overload forward | Safer choice | Split anchor points prevent front-leg cascade failure |
| Large dog, stairs or car entry | Works only with second handler and longer handles | Often better | Dual lift zones reduce rotational force on each anchor |
Design Features That Change Daily Performance
The difference between a harness that works and one that fails is rarely visible on a product page. It shows up in how the harness behaves under load, during movement, and across repeated use. Four design details separate the two. Pelvic panel width. A wide panel does more than spread pressure. It creates a contact patch large enough to generate meaningful friction against the dog’s coat, which resists the forward-sliding force that narrow straps cannot counter. Verifying whether the rear panel stays anchored during a supported walk is the single most reliable check — if the panel has not shifted by the end of that walk, the width and surface are doing their job. The contact patch also bridges across bony landmarks — the ischial tuberosities and the iliac crests — converting point loading into distributed support. A narrow strap cannot do this because it lacks the surface area to span between skeletal anchor points. Anti-slip backing. A silicone or rubberized inner face increases the static friction coefficient between the harness and the dog’s coat dramatically compared to uncoated fabric. That friction resists the micro-rotations that accumulate during turns and stair climbing. In production, the difference between a panel that stays anchored and one that creeps is often just the durometer and pattern density of the anti-slip coating — details that are invisible in a product photo but dominate real-world performance. Handle length and adjustability. A handle that adjusts across a meaningful range lets handlers of different heights maintain control without forcing one fixed lift angle across flat walking, stairs, and transfers. Too little working length can pull the panel upward and forward; too much slack can delay correction when the dog shifts weight. The handle should let the handler guide rather than jerk, while keeping the rear panel anchored and the dog’s body close to level. Toilet-area clearance. The cutout must be positioned far enough rearward to clear the anatomical zone for the specific breed’s body length. A clearance zone that works for a Dachshund may sit too far forward on a Labrador. Wider pelvic support panels with adjustable clearance zones let the same harness design accommodate different breed proportions without sacrificing the structural anchor that keeps the cradle in place.
FAQ
How do I verify the harness fits without relying on the size chart?
Place the harness on the dog and support a standing lift briefly. Mark the strap position at the hip bone with a small piece of tape. Walk the dog on a flat surface, then check whether the tape has moved forward relative to the bone. Visible forward shift means the panel width or anti-slip surface is not holding. Size charts cannot account for coat density, body fat distribution, or the dog’s specific pelvic angle — all of which change how a given panel width performs in practice.
Why does the harness slip forward more on some breeds than others?
Coat type and body geometry interact with the harness surface in ways that a single size chart cannot capture. A short-coated dog with a deep chest and tapered waist — common in sighthounds — presents a downhill slope from pelvis to ribcage that encourages forward sliding. A double-coated breed with a broader, flatter back provides more natural friction. If a harness slides consistently on a particular dog despite correct sizing, the issue is usually the mismatch between the panel’s contact geometry and the dog’s body slope, not the size label.
Why can a harness stay in place on flat ground but slide on stairs?
Flat-ground movement keeps the lift direction relatively steady. Stairs change the body angle and add a forward component to the lift force. A rear panel with limited width, contour, or anti-slip contact may resist vertical lift but still migrate when that forward force appears. This is why stair use should only begin after the panel remains stable during a controlled flat-ground check.
What are the signs that mean stop using the harness and reassess?
Front leg trembling that begins during supported walking and continues after releasing the lift. A harness that shifts forward visibly during a single stair climb. Redness, dampness, or hair loss at any strap contact point found during twice-daily skin checks. Sudden refusal to move while the harness is on — especially in a dog that previously accepted it. Any of these signals means the current harness configuration is not matching the dog’s real movement needs, and continuing with the same setup tends to worsen the underlying fit failure rather than resolve it. If the dog shows sudden paralysis, severe pain, repeated falling, swelling, open sores, cold paws, or loss of bladder or bowel control, stop using the harness and contact a veterinarian before further mobility attempts.
