
A dog four leg recovery suit sleeve cuff can look secure when you first fasten it — then fail the moment the dog moves. You check the body fit, the zipper, the neckline. Everything passes. But the cuffs? They sit flat for about ten seconds. Walk. Sit. Curl. The cuff edge drifts. A gap opens. Your dog’s tongue finds it.
This is not a sizing error. It is a cuff design problem. Straight-tube sleeves that rely on circumferential tension alone cannot lock onto a tapered canine limb. The friction between fabric and coat is not enough to counteract the forces generated when a hip flexes or a knee bends. Every joint angle change pulls the cuff in a new direction. No fixed anchor point means no fixed position.
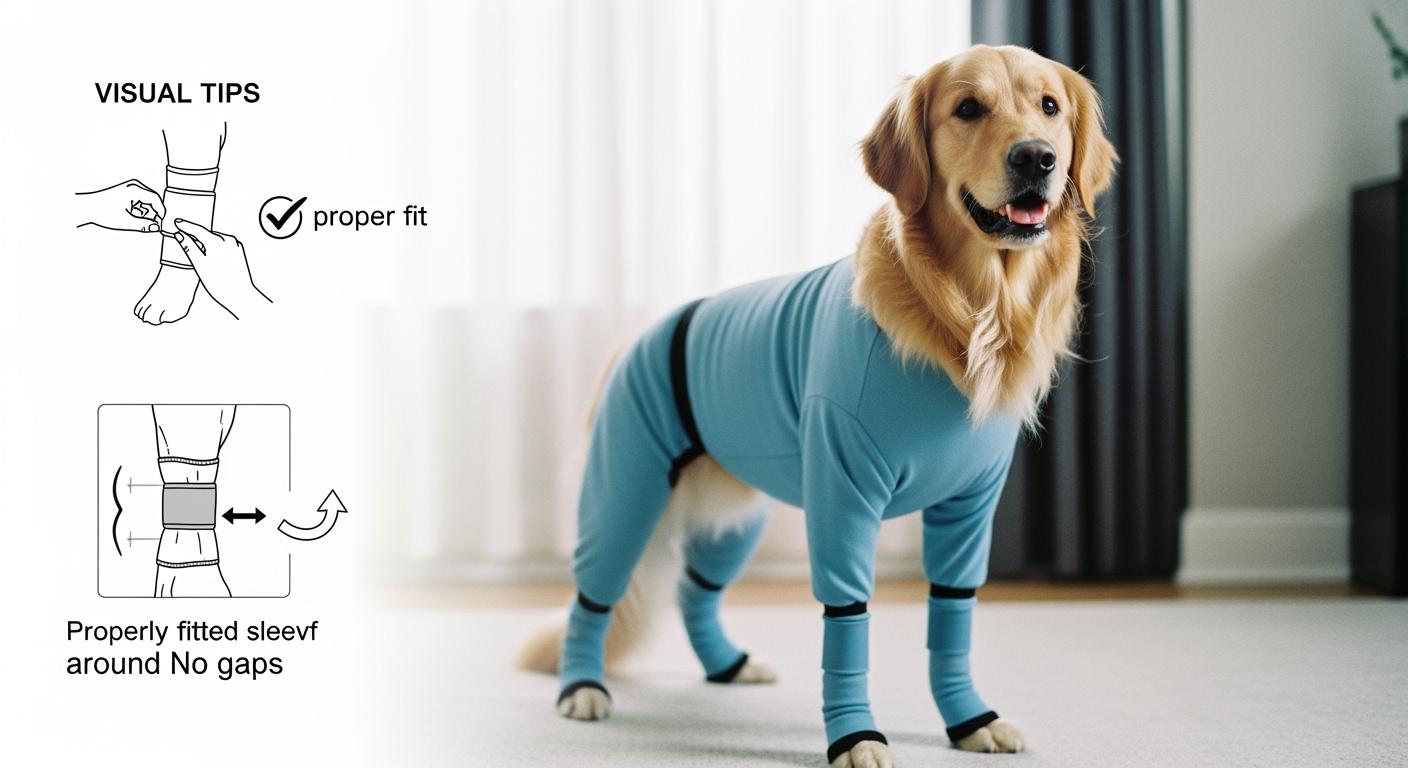
Two structural decisions determine whether a recovery suit sleeve blocks access or just delays it: how far past the wound the cuff extends, and whether the upper sleeve anchor holds position when the leg bends.
Why Loose Cuffs Make a Four-Leg Recovery Suit Fail
The suit passes the standing test. The cuffs sit at the wrist and hock, fabric smooth, coverage complete. You feel confident. Then the dog moves.
Here is what happens mechanically: a cuff that grips entirely through elastic hoop tension has no mechanical interlock with the limb. When the dog walks, the hip and knee rotate through arcs that cyclically stretch and relax the fabric. Each stride introduces a tiny displacement. Over ten strides the cuff has shifted a quarter inch. Over a walk around the block it has ridden up past the wound edge entirely. The suit still looks like it fits. It does not protect.
Sitting is worse. Hip and knee flexion pull the sleeve proximally toward the body. The cuff bunches behind the joint. Fabric wrinkles create a channel — a gap wide enough for a tongue or paw. That gap sits directly over the incision.
Curling compounds all of this. The rear legs tuck, the spine rounds, and the sleeve is pulled in three directions at once. A cuff with no independent anchor point simply follows the path of least resistance — which means sliding off the narrowest part of the limb.
You cannot fix this by tightening the cuff further. More tension on a straight elastic band increases circumferential pressure without improving positional stability. The cuff stays tight but still slides. And tighter cuffs introduce their own failure mode:
| Failure Sign | Likely Cause | Coverage Risk | Better Design Choice |
|---|---|---|---|
| Cuff slides after walking | Elastic tension only, no anchor | Dog reaches wound | Multi-point body adjustment + shaped cuff |
| Fabric bunches behind the joint | Sleeve too long or straight-cut | Tongue or paw enters gap | Tapered sleeve pattern |
| Dog noses under cuff edge | Wide opening, no secondary closure | Lick or chew access | Adjustable cuff tab placed outside bite path |
| Cuff stretches after washing | Elastic fiber degradation | Gap opens after laundry | Stable-recovery stretch fabric |
| Body fits but sleeve opening is wide | Limb shape mismatch | Incision exposed at wrist or hock | Tapered sleeve matched to breed limb profile |
| Rear leg slips out when curling | Sleeve too short or unanchored | Wound fully exposed during rest | Longer sleeve + aligned body adjustment |
Four-Leg Suits vs. Body-Only Suits: Why Cuff Failure Carries More Risk
A body-only suit covers the torso and leaves the legs free. Sleeve cuffs are not part of the equation. A four-leg recovery suit adds full-length sleeves specifically to protect wounds on the limbs, joints, or paws. That extra coverage comes with an extra failure surface: four cuff openings, each a potential entry point.
The front legs compound the problem. A dog with a deep chest and narrow wrists — Greyhounds, Dobermans, most sighthounds — has a dramatic taper from shoulder to paw. A straight-tube sleeve that fits the upper limb hangs loose at the wrist. The cuff has nothing to grip. Walk ten steps and the lower edge drifts half an inch. Half an inch is all a tongue needs.
The test is simple. After 10–20 steps, look at the cuff position relative to a known reference point — a wrist bone, a hock callus, a shaved surgical site border. If the cuff has moved more than a half inch from its starting position, coverage has degraded. Check this across standing, walking, sitting, lying down, curling, and after washing:
| Test Position | What to Watch | Pass or Fail Signal |
|---|---|---|
| Standing | Cuff sits flat, covers wound with margin | Pass: No gap; Fail: Gap visible |
| Walking 10–20 steps | Cuff stays within half inch of start position | Pass: Stable; Fail: Slides up or down |
| Sitting | No bunching behind elbow or knee | Pass: Smooth fabric; Fail: Wrinkled channel forms |
| Lying down | Cuff edge remains past wound margin | Pass: Covers; Fail: Wound edge visible |
| Curling | Sleeve stays on limb, cuff stays sealed | Pass: Holds; Fail: Leg escapes or gap opens |
| Potty posture | Cuff holds position through squat or leg lift | Pass: No gap; Fail: Gap forms |
| After washing/drying | Cuff returns to original shape and tension | Pass: Shape holds; Fail: Fabric relaxed or wavy |
Where Sleeve Cuffs Loosen First — and Why
Front Leg Cuffs: Wrist and Elbow
Front leg cuffs loosen near the wrist or elbow because the canine forelimb has a pronounced taper from the upper arm to the carpus. The elbow bends, the shoulder rotates, and each motion sends a shear wave down the sleeve. If the sleeve pattern is a straight tube — the same circumference at both ends — the cuff cannot maintain differential grip. The narrow end slips first.
Check this after walking: run your finger around the inside of the cuff. Feel for skin that is damp versus dry. Damp skin under a cuff that has been on for 20 minutes signals trapped moisture — the fabric is not breathing, or the cuff is sealing too tightly without ventilation. Dry skin with the cuff still in place signals adequate airflow. Damp skin with the cuff shifted signals a double failure: poor breathability and poor positional stability.
Rear Leg Cuffs: Hock and Thigh
Rear leg failure concentrates at the hock. This joint has the most dramatic change in limb diameter over the shortest distance — the taper from thigh to hock is steeper than anywhere else on the leg. A cuff positioned just above the hock must grip a rapidly narrowing surface. Every time the dog sits or curls, the hock angle changes sharply and the cuff is pulled distally.
A hind leg sleeve that slips during movement often fails at the hock first. You will see the cuff edge drift downward, exposing the upper hock. The leg may even slip partially out of the sleeve during a tight curl.
Post-Wash Stretch: When the Cuff Degrades Silently
Fresh out of the package, the cuffs feel snug. Three washes later they have relaxed — not visibly, maybe, but enough to lose a quarter inch of grip. Elastic fibers degrade incrementally with heat, detergent, and mechanical agitation. Each wash cycle breaks a small percentage of elastane crosslinks. The fabric holds its visual shape longer than it holds its functional tension.
This is a material selection problem, not a care problem. Recovery fabrics that use a higher denier elastane filament with a tighter knit structure lose tension more slowly through repeated wash cycles. Fabrics that rely on surface coating rather than structural stretch degrade faster — the coating washes off, the base fabric relaxes, and the cuff becomes decorative.
After every wash, run the post-wash cuff check: put the suit on, walk the dog 20 steps, and re-measure cuff position. If the edge has crept closer to the wound compared to the pre-wash baseline, the cuff’s functional life is ending.
| Design Type | Coverage Stability | Comfort Risk | Chewing Risk | Where It Works |
|---|---|---|---|---|
| Straight loose tube cuff | Low — no taper grip | Low — no pressure | High — easy gap access | Thick-limbed breeds only; fails on tapered legs |
| Soft elastic cuff | Medium — grips but no anchor | Medium — can overtighten | Medium | Average-build dogs during supervised short wear |
| Adjustable cuff tab (outer placement) | High — user-tunable tension | Medium — tab can irritate if misplaced | Low — tab outside bite path | Narrow-limbed dogs needing custom circumference |
| Tapered sleeve pattern | High — matches limb geometry | Low — even pressure distribution | Low — gap unlikely | Deep-chested breeds with dramatic leg taper |
| Full-body multi-point adjustment | High — anchors sleeve from body | Low — load distributed | Low — sleeve stays aligned | Active dogs during extended daily wear |
Cuff and Sleeve Design Choices That Hold Position
Not every design feature that looks useful on a product page works under movement. Three specific choices separate cuffs that hold from cuffs that drift.
Elastic That Anchors, Not Just Squeezes
Most recovery suit cuffs use a simple elastic band sewn into a fabric channel. It grips by squeezing. Squeeze harder and it grips more — until it does not, because the underlying limb shape has changed and the elastic has no way to follow it.
A better cuff anchors to a fixed anatomical landmark. The wrist has the accessory carpal pad. The hock has the calcaneal tuber. These are natural anchor points — bony prominences that a properly positioned cuff can sit behind, using the limb’s own geometry as a positional lock rather than relying on friction alone. An elastic cuff positioned behind the accessory carpal pad resists distal migration not because it is tighter but because the pad creates a physical stop.
Adjustable Tabs Placed Outside the Bite Path
Adjustable tabs solve the circumference problem: a single suit size cannot match every limb diameter. But tab placement determines whether the solution creates a new problem. A tab sewn into the inner leg sits directly in the dog’s reach. The dog noses it, chews it, works it loose.
Outer-limb tab placement — on the lateral side, above the midline — keeps the adjustment accessible to human hands and inaccessible to canine teeth. Combined with a tapered sleeve, this gives the narrowest limb enough closure without introducing a chew target.
Tapered Sleeves That Match Limb Geometry
This is the single highest-impact design difference. A straight tube has one circumference. A canine leg has at least three distinct circumferences between shoulder and wrist, or between hip and hock. A straight sleeve that fits the upper measurement hangs loose at the lower one. A straight sleeve that fits the lower measurement constricts the upper one.
A tapered sleeve pattern narrows proportionally from the proximal to the distal end, matching the limb’s natural cone shape. The grip is distributed along the entire sleeve length rather than concentrated at the cuff edge. This means the cuff edge itself does less work — and drifts less as a result.
For a dog recovering from a leg wound or surgery, a recovery suit that holds position through full-range movement makes the difference between protected healing and daily cuff resets. Each gap event is a potential contamination event.
When a Four-Leg Suit Is Not Enough
A four-leg recovery suit is a coverage tool, not a guarantee. There are conditions where even a well-designed suit with tapered sleeves and anchored cuffs is the wrong tool for the job.
The Dog Can Still Reach the Wound
Some wound locations sit at the edge of what a sleeve can cover: high on the shoulder, deep in the groin, at the very base of the tail. A sleeve extends to a fixed length. If the wound is proximal to that length, the cuff cannot reach it — and no amount of cuff tension changes that geometry.
A sleeve works well when the wound falls within the sleeve’s coverage zone. When it does not — when the wound is at or above the elbow or stifle — a sleeve, cone, or collar becomes the safer choice. Stop relying on the suit if the cuff cannot physically reach past the wound margin with the joint at full flexion.
Cuffs Trap Moisture or Rub Skin
A cuff that seals too well without breathability traps moisture against the skin. Feel under the cuff after 20 minutes of wear. Damp, warm skin signals inadequate moisture transfer — the fabric is holding humidity against the skin surface. Over hours, this creates the conditions for skin breakdown.
The fabric choice matters here. A knit with wicking fibers pulls moisture away from the skin and spreads it across a larger surface for evaporation. A knit with absorbent fibers holds moisture in place. The difference is invisible on a product page and immediately apparent after one wear session. Proper recovery sleeve fit balances seal tightness against breathability — a cuff should close gaps without creating a moisture chamber.
When a Cone, Sleeve, Bandage, or Different Approach Is Safer
If the dog defeats the cuff — paws it open, noses under it, chews through the fabric — the suit has failed regardless of how well it fits. Some dogs are determined enough to bypass any fabric barrier. In those cases a hard cone, soft recovery collar, or a stand-alone sleeve with rigid internal structure provides a barrier the dog cannot defeat.
If you check the cuff twice daily and find it displaced both times, the suit is not working for this dog in this recovery. Switch to a different barrier type. Continued displacement means continued wound access.
Disclaimer: The cuff-position checks described here assume a short-coated dog where the cuff sits against visible skin or a thin layer of fur. Double-coated breeds — Huskies, Malamutes, Samoyeds, and similar — may show subtler rub marks that need hand-checking rather than visual inspection. Run your finger under the cuff edge to feel for moisture, heat, or skin texture changes that dense undercoat can hide. If the dog’s leg conformation falls outside typical breed norms — particularly dogs with angular limb deformities or unusually deep chests — the fit checks described here may not catch every pressure point.
FAQ
Why do the cuffs look fine standing but gap open during movement?
Standing is a single static position. Movement introduces joint angle changes that stretch and relax the sleeve fabric cyclically. A cuff that relies on hoop tension alone has no anchor point to resist these directional pulls. Each stride or position change shifts the cuff incrementally until a gap opens.
Can I tighten the cuffs myself to fix the gap?
Tightening increases circumferential pressure but does not improve positional stability. The cuff stays tight and still slides — it just slides while squeezing harder. Overtightened cuffs create pressure marks, trap moisture, and can irritate the skin under the band. If the cuff drifts, tightening alone will not solve it. The issue is anchor, not tension.
How many washes before the cuffs lose their grip?
This depends on the elastic denier and knit structure. Lower-quality fabrics with surface-coated stretch may show functional tension loss after 3–5 washes. Higher-denier elastane filaments in a tighter knit can hold functional tension through 20+ wash cycles. The only reliable check is to test cuff position after every wash against a known reference point on the leg.
When should I stop using the suit and try a cone instead?
Stop using the suit if: the cuff drifts past the wound margin during any movement position, you find the cuff displaced at both daily checks, the dog chews through or noses under the cuff repeatedly, or you see moisture, redness, or skin texture changes under the cuff. A cone or rigid collar is the fallback when a fabric barrier fails.
