
You might see your dog limping after surgery. This can happen for many reasons. Some reasons are too much movement, infection, or a problem with an implant. Always check if your pet feels okay. Use recovery gear to help your dog. Listen to your veterinarian’s instructions first. If you are not sure, call your veterinarian. Your veterinarian’s instructions are more important than general advice.
Key Takeaways
Watch your dog as it gets better. Check for swelling or redness. Notice if your dog acts different. Call your veterinarian if you see anything strange.
Pick the right gear to help your dog heal. Slings, harnesses, and traction socks stop slips. These tools help your dog get better.
Listen to your veterinarian’s instructions after surgery. Their advice helps your dog heal safely. Follow what they say for a good recovery.
Dog limping after surgery: first steps and gear basics
Soreness, compensation, or setback?
Sometimes, your dog limps after surgery. This can be from soreness, shifting weight, or slow healing. You need to know what is normal and what is not. Mild limping is common in the first days. Your dog should get better each day. If the limp gets worse, or your dog will not use the leg after 10–14 days, call your veterinarian.
Tip: Your veterinarian’s discharge instructions are most important. Always follow their advice first.
Watch for these signs and call your veterinarian if you see them:
Swelling or redness around the incision that looks bad
Yelping or whining when your dog walks
Suddenly refusing to walk after getting better
Not using the leg at all after 10–14 days
Limping on the other leg
Signs of infection like oozing, warmth, or a bad smell
If you notice any of these, do not wait. Call your clinic right away. Acting early helps your dog feel less pain and heal faster.
Preventing slips and licking complications
Slipping and licking can cause big problems after surgery. Slipping on floors can make your dog fall or hurt the wound. Licking or chewing the incision can bring germs and cause infection. You must keep your dog safe from these risks.
Try these easy ways to stop slips and licking:
Put non-slip mats or traction socks on smooth floors.
Block stairs or use a support sling for going up or down.
Use an Elizabethan collar, inflatable collar, or recovery shirt to stop licking.
Check the incision two times a day for 14 days (Quick Reference Card #3).
Keep the wound clean and dry all the time.
Alert: Your veterinarian’s discharge instructions are most important. If you see swelling, redness, or discharge, call your clinic.
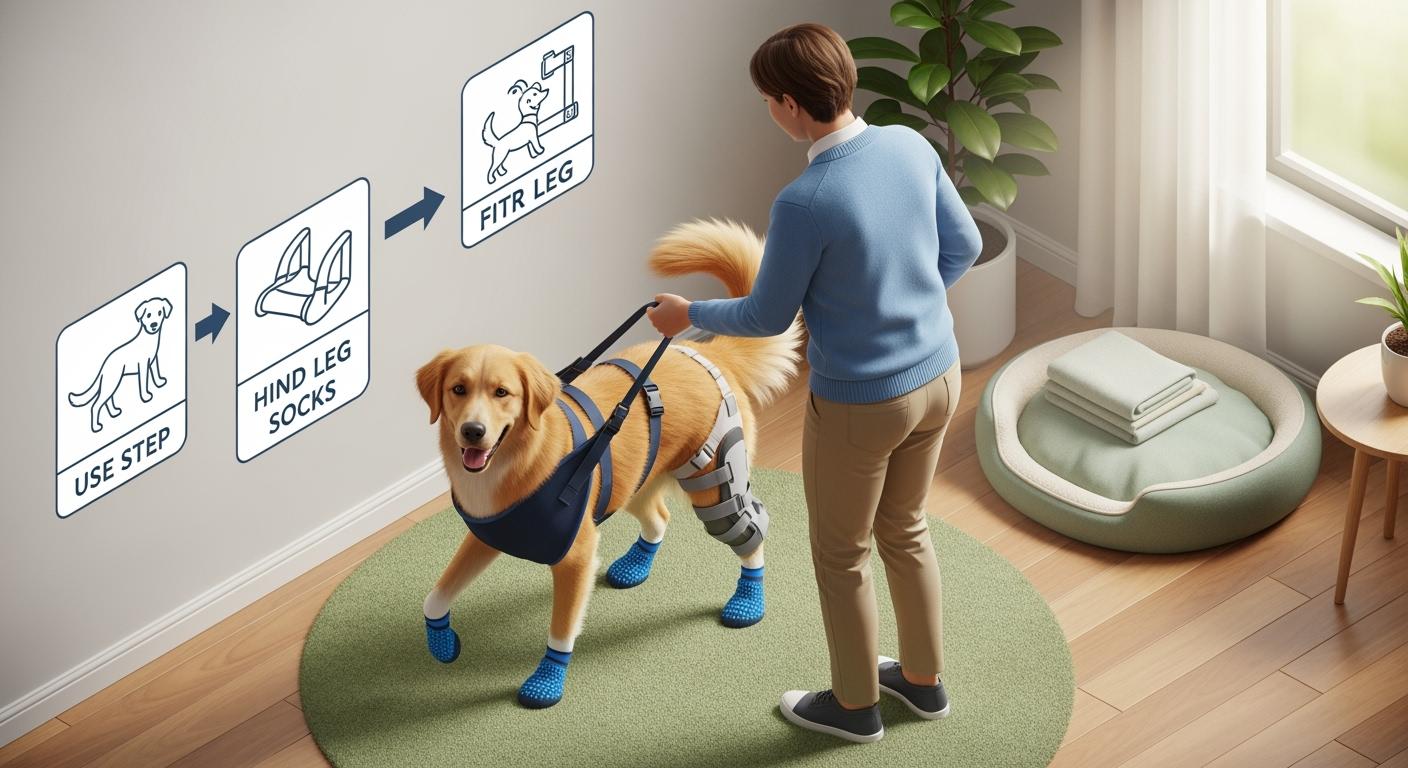
Gear-first approach for stability and comfort
The right recovery gear helps your dog heal safely. Slings, harnesses, and traction socks help your dog move and stay safe. Make sure gear fits well for safety and healing. Pet owners and clinics both need the right gear.
Start with these gear steps:
Stop licking: Use a cone, inflatable collar, or recovery suit for 10–14 days (Quick Reference Card #7).
Stop slipping: Use non-slip socks or mats on hard floors.
Stop unsafe loading: Use a support sling or harness to help your dog stand or walk.
Stop risky motion: Block stairs and watch your dog outside.
Note: Lay your dog down gently and lift the leg if your veterinarian says to. Watch your dog’s pain and comfort closely. If you see sudden changes, call your clinic.
A gear-first plan helps with rehab too. Physical therapy with your veterinarian helps your dog get stronger. Certified canine rehab specialists can make a plan for your dog. Regular check-ins and changes lower the chance of getting hurt again and help your dog heal faster.
Remember these timeframes:
Mild redness and swelling are normal for the first 3 days (Quick Reference Card #2).
Check the incision two times a day for 14 days (Quick Reference Card #3).
If limping lasts more than 1–2 days or gets worse, call your veterinarian (Quick Reference Card #2).
Dog limping after surgery can make you worry, but using the right gear and steps helps your dog heal. Your veterinarian’s discharge instructions are most important. Always ask your clinic if you are unsure.
Traffic-light guide: when to call the clinic
It is important to know when to call your veterinarian after surgery. This traffic-light guide helps you check your dog’s healing. It also helps you decide what to do next. Your veterinarian’s discharge instructions are always the most important.
Green: mild, improving limp
A mild limp that gets better each day is normal. Your dog might feel sore, but should improve slowly. Watch for these signs:
Your dog puts more weight on the leg every day.
The incision looks clean with just a little redness or swelling.
Swelling gets smaller as days go by.
Your dog does not lick or chew the incision.
No slipping or falling when walking.
Your dog can get up and move with help from gear like a sling or harness.
Help your dog by following the recovery plan. Use gear to keep your dog safe. Check slings, harnesses, and traction socks to make sure they fit. This helps stop falls and keeps healing on track. Both pet owners and clinics need the right gear.
Tip: Write down your dog’s progress in a chart or journal. This helps you spot changes early.
Here is a table that shows how long healing takes:
Timeframe | Description |
|---|---|
Weeks 1-2 After Surgery | Strict rest and staying in one place; pain medicine; short, careful leash walks start. |
Weeks 3-6 After Surgery | Slowly do more activity; longer leash walks; light exercises begin. |
Weeks 6-12 After Surgery | Harder rehab exercises can start; swimming and physical therapy are good. |
Months 3-6 Post Surgery | Work on keeping strength and moving well; go to follow-up visits. |
Beyond Six Months | Keep joints healthy and prevent injuries for the long term. |
Yellow: setback after activity increase
Sometimes, your dog limps more after doing more activity. This is a warning sign. Watch for these changes:
More swelling or soreness around the knee
Yelping or whining when stepping on the leg
Suddenly not wanting to walk after getting better before
Redness, swelling, or warmth near the incision
Discharge (pus or blood is a bad sign)
Bad smell from the wound
Tiredness, fever, or not wanting to eat
Pain when you touch the leg, or a stiff walk
Swelling that stays or gets worse
If you see these signs, use the setback rule. Rest your dog for one day and go back to the last activity level. If the limp does not get better in 2–3 days, call your veterinarian for advice. Your veterinarian’s discharge instructions are always the most important.
Alert: Always check that gear fits well and feels good. Badly fitting gear can cause new problems.
Red: sudden, severe, or worsening limp
A sudden, very bad, or worse limp means you must call your veterinarian right away. Watch for these serious signs:
Your dog stops eating or eats much less.
Your dog rests all day or seems very tired.
Sleep is restless or your dog cries at night.
Your dog whines or has trouble walking.
Play stops completely.
Your dog stays away from family or other pets.
Your dog hides or stays alone.
Walking is very hard or not possible.
Your dog changes resting spots a lot or grooms the hind end more than usual.
Your dog does not want to walk or be social.
These signs mean your dog may be in pain or have a big problem. Do not wait. Call your veterinarian for help.
Decision table: expected vs emergency limping
Use this table to help you decide what to do based on your dog’s signs. Check each column for changes. Using gear and checking fit is important for safety and healing.
Status | Limb Use Trend | Incision Appearance | Swelling Trend | Licking/Chewing | Slipping/Falls | Ability to Rise Safely with Gear | Action Needed |
|---|---|---|---|---|---|---|---|
Green | Improving daily | Mild redness/swelling | Decreasing | None | None | Yes | Continue recovery plan |
Yellow | Worsens after activity | Redness, warmth, discharge | Increasing or persistent | Some | Occasional | Needs help | Rest 1 day, call if no better in 2–3 days |
Red | Sudden or severe loss | Severe redness, pus, odor | Rapidly increasing | Constant | Frequent | Unable | Call veterinarian immediately |
Note: Always use gear that fits well and supports your dog. Pet owners and clinics should check gear often.
Dog limping after surgery can make you worry. This traffic-light guide helps you know when to act. Your veterinarian’s discharge instructions are always the most important. Stay alert, use the right gear, and call your clinic if you see warning signs.
Protecting the incision: suits, sleeves, and cones
Choosing gear by incision location and licking risk
You need to protect your dog’s incision after surgery. The right gear depends on where the incision is and how likely your dog is to lick or chew. The Elizabethan collar, often called the “Cone of Shame,” keeps your dog from licking or biting the wound. This helps prevent infection and supports healing. Recovery suits and sleeves can also cover the incision. These options let your dog move more freely and use their senses better than a cone. Some dogs feel less stress with a suit or sleeve, which may help them heal faster.
Your veterinarian’s discharge instructions override general guidance.
Use anti-lick protection for 10–14 days after surgery, especially when you cannot watch your dog. Always check that the gear fits well and covers the incision.
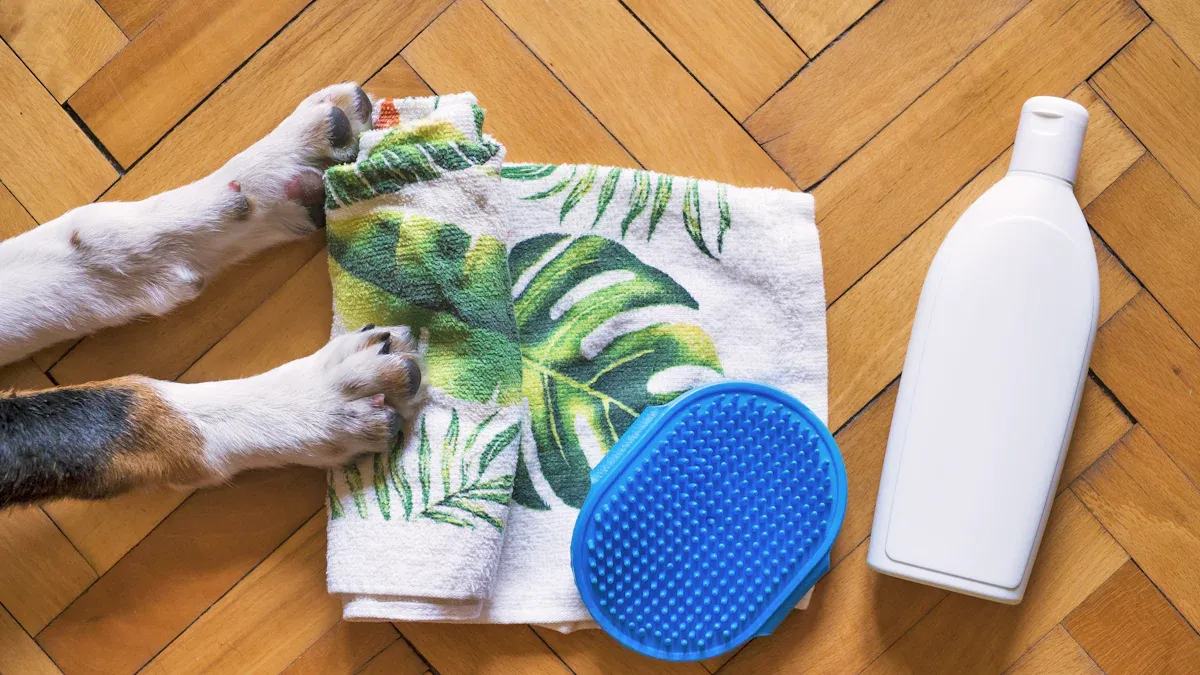
Keeping gear clean and dry
Clean and dry gear helps keep the incision safe. Wet or dirty gear can lead to infection or slow healing. You should check the incision and gear two times each day for 14 days. If the suit or sleeve gets dirty, wash it with mild soap and let it dry before putting it back on your dog. Make sure the cone or collar does not trap moisture around the wound.
Gear Type | Cleaning Frequency | Drying Method |
|---|---|---|
Recovery Suit | Daily if soiled | Air dry |
Sleeve | Daily if soiled | Air dry |
Cone/Collar | Wipe as needed | Towel dry |
Tip: Always check for signs of rubbing or irritation under the gear.
When to contact your vet about the incision
You must watch for problems with the incision. Call your veterinarian if you see swelling, redness, discharge, or a bad smell. If your dog keeps licking or chewing even with gear, contact your veterinarian. Your veterinarian’s discharge instructions override general guidance. Gear use and fit checks are essential for safety and recovery. These steps help both pet owners and clinics keep dogs safe.
Using slings and harnesses for safe movement

Supporting your dog without full lifting
You want your dog to move safely after surgery. Slings and harnesses help you support your dog without picking them up all the way. Let your dog smell the sling before you use it. Give your dog a treat so they feel happy about the sling. Start on a flat floor. Hold your dog gently and let them use their legs if they can. Clip a leash to a chest harness for more control. Always do what your veterinarian says. Giving treats helps your dog feel brave during rehab.
Preventing falls on stairs and slick floors
Falling can slow down healing and cause problems. Block off stairs or use a sling when your dog goes up or down. Put non-slip mats or traction socks on slippery floors. Start with short and careful walks. Do not let your dog jump or run. Your veterinarian’s instructions are most important. Make sure gear fits right and check it often for safety.
Rear vs full-body support options
Some dogs only need help in the back. Other dogs need a harness that lifts their whole body. Rear slings are good for dogs with weak back legs. Full-body harnesses help dogs who have big trouble moving. Pick the gear that works best for your dog. Your dog’s rehab plan might change as they get stronger.
Gear comparison: sling, harness, brace, suit, socks
Use this table to help you choose the right gear today:
Product | Best for | Limits | Fit risks | When to upgrade/escalate |
|---|---|---|---|---|
Recovery Brace | Joint stabilization | Not for all injuries | Skin irritation | If gait worsens or skin changes |
Rear Sling | Hind end weakness | Not for front legs | Slipping off | If full-body support needed |
Full-Body Harness | Severe mobility issues | Bulky for small dogs | Chafing | If dog cannot rise with help |
Recovery Suit/Sleeve | Incision protection | Not for mobility | Overheating | If licking persists |
Non-Slip Socks | Preventing slips indoors | Wear out quickly | Too tight | If falls continue |
Checking gear and making sure it fits helps owners and clinics keep dogs safe while they heal.
Recovery brace: when and how to use
Vet-approved cases for brace use
You can use a recovery brace if your veterinarian says it is okay. Braces help in many ways. They keep joints steady and protect the surgery spot. Braces also help soft-tissue injuries heal. Some dogs need a brace for joint diseases or weak joints. The table below shows why you might use a recovery brace:
Clinical Indication | Description |
|---|---|
Stabilize the joint or spine | Gives support so the joint does not move too much while healing. |
Protect surgical repairs | Keeps the surgery area safe so it can heal well. |
Allow controlled weight-bearing | Lets your dog slowly use the leg again, which helps with rehab. |
Support soft-tissue injuries | Helps sprains or strains get better, so your dog can move with less pain. |
Manage chronic joint diseases | Makes joints more steady for dogs with problems like osteoarthritis or hip dysplasia. |
Address joint hyperextension or luxation | Stops joints from moving too far and getting hurt again. |
General knee or hock instability | Helps dogs walk and feel better if their joints are weak. |
Your veterinarian’s discharge instructions are always the most important.
Break-in schedule and skin checks
Start with short times when your dog wears the brace. Let your dog wear it for 30–60 minutes each time, three to five times a day. This helps your dog get used to the brace. If your dog’s skin and walk look good, add about 25% more time every three or four days. Always check under the brace for red spots, sores, or rubbing. Checking the fit helps stop skin problems and returns. Owners and clinics both need to check often. Your veterinarian’s discharge instructions are always the most important.
Tip: Take off the brace after each session and look at your dog’s skin. A good fit and careful checks keep your dog safe while healing.
Troubleshooting fit and gait issues
If your dog limps, rubs, or walks differently, stop using the brace and call your veterinarian. Make sure the brace is snug but not too tight. Change the straps if you need to. Watch your dog walk every time they wear the brace. A good fit helps your dog heal and keeps them safe from new injuries. Using gear and checking the fit is very important for safety and healing.
Traction socks and indoor safety
Preventing slips and split-leg injuries
You want your dog to stay safe indoors after surgery. Slipping on smooth floors can cause falls or split-leg injuries. Traction socks help your dog grip the ground and move with confidence. These socks protect paws and support weak joints. You can use non-slip runners in hallways and rooms with tile or hardwood. This simple gear reduces preventable setbacks by controlling motion and traction.
Traction socks help prevent slipping on smooth surfaces.
Socks protect injured paws and offer extra grip for dogs with joint problems.
Non-slip runners add safety in busy areas of your home.
Your veterinarian’s discharge instructions override general guidance.
Matching traction to flooring and weakness
Choosing the right traction sock depends on your dog’s size and the type of floor. You need socks that match your dog’s needs and your home’s surfaces. Use this table to find the best option:
Dog Size Category | Recommended Traction Sock Type | Suitable Flooring Types |
|---|---|---|
Lightweight Dogs (<15 lbs) | Silicone dot socks | Laminate, textured tile |
Medium Dogs (15–50 lbs) | Dual-sided prints | Smooth hardwood, semi-gloss tile |
Large/Giant Breeds (50+ lbs) | All-around coatings | Hardwood, glossy tile |
Check the fit of socks often. Make sure they do not slip off or feel too tight. Gear use and fit checks are essential for safety and recovery.
When more support is needed
Some dogs need extra help. If your dog still slips or struggles, add more non-slip runners or mats. You can combine traction socks with slings or harnesses for better support. Always watch your dog’s movement and adjust gear as needed. Your veterinarian’s discharge instructions override general guidance. Both pet owners and clinics benefit from using the right gear and checking fit regularly.
Daily recovery process and routines
Short, controlled outings and rest
You must keep your dog calm and safe while they heal. Take your dog on short leash walks only for bathroom breaks. Do not let your dog run, jump, or play rough. Use a crate, exercise pen, or baby gate to keep your dog in a small, safe space.
Keeping your dog from moving too much is very important for healing. This is extra important after bone or belly surgery. Even small surgeries need rest so the body can heal right.
Use crates, exercise pens, or baby gates to keep your dog in one spot. Short leash walks for bathroom breaks are okay, but do not let your dog run, jump, or play hard until your veterinarian says it is safe.
Give your dog things to do that use their brain, not their body. Try puzzle toys that give treats with little movement. Give new chew toys or teach simple tricks your dog can do while lying down. These activities help your dog feel busy without moving too much.
Your veterinarian’s discharge instructions are always the most important.
Cold therapy: icing plan and skin safety
If your veterinarian tells you to use cold therapy, follow their plan. Put an ice pack on the surgery spot for 10 minutes, two or three times each day, for three days. Always put a towel between the ice and your dog’s skin so you do not hurt them.
Cold therapy helps lower swelling, pain, and heat after surgery or injury.
It makes the area numb and helps healing by slowing blood flow and activity in the tissues.
Cooling the area also slows down muscle spasms and helps your dog get better.
Check your dog’s skin after every ice session. If you see red spots or sore skin, stop and call your veterinarian.
Tracking changes for recheck visits
Write down what your dog does each day. Watch how much they eat and how the incision looks. Write down if your dog limps more or has more swelling. If your dog limps more after doing more, rest them for one day and go back to the last activity level. If your dog does not get better in two or three days, call your veterinarian. Your veterinarian’s discharge instructions are always the most important.
Home recovery gear checklist
Check your gear every day to make sure it fits and feels good. Use this checklist to help owners and clinics:
Sling or harness for support
Traction socks or non-slip mats
Recovery suit, sleeve, or cone
Clean bedding and a safe place to rest
Puzzle toys for mental exercise
Checking gear and making sure it fits right keeps your dog safe while they heal. These steps help both pet owners and clinics.
TPLO surgery recovery: special considerations
Weight-bearing milestones and warning signs
You need to watch your dog closely after tplo surgery. Dogs reach important steps as they heal. Use this table to see what should happen:
Week | Milestone Description | Example Activities |
|---|---|---|
1–2 | Strict rest | Leash-only potty, crate rest |
3–10 | Guided exercises | Controlled leash walks, curb walking, figure 8s, weave cones, weight shifting |
11–16 | Return to normal activity | Gradual increase, regular walks |
If your dog will not use the leg, limps more, or has swelling, call your veterinarian. Your veterinarian’s discharge instructions are more important than general advice. Make sure gear fits well and is used right for safety. These steps help owners and clinics keep dogs safe.
Activity limits for the first two weeks
For the first two weeks after tplo surgery, keep your dog calm and safe. Follow these rules:
Keep your dog in a small space, about 6×6 feet.
Do not let your dog walk around free or play with other dogs.
Take your dog out on a leash for bathroom breaks, 3–5 times each day.
Use a short leash and walk slowly at first.
Do not let your dog run, jump, or play.
Try gentle massage and slow leg movements.
Use ice packs for five days, then warm packs if swelling stays.
Only walk your dog on a leash. No off-leash time is allowed.
Your veterinarian’s discharge instructions are always most important. Check that gear fits and works well for safety and healing.
When to escalate concerns to your vet
Call your veterinarian if your dog limps more, will not walk, or has swelling, redness, or pain. Watch for changes in how your dog eats or acts. If you see any warning signs, call your veterinarian right away. Your veterinarian’s advice is always the most important. Careful gear checks and quick action help both owners and clinics.
Clinic and retailer: building the right recovery kit
Post-op limping kit essentials
You need a good recovery kit to help your dog heal after surgery. Clinics and stores often put these items together to make things easier for you. A full kit helps you act fast if there is a problem and keeps your dog comfortable. Here are important things you should have:
Nonstick bandages protect wounds.
Use a clean towel to dry your dog or as a sling.
An eye dropper helps give medicine or clean wounds.
A muzzle keeps everyone safe if your dog is in pain.
A spare leash helps you move your dog safely.
Antiseptic and antibiotic ointment stop infection.
Styptic powder can help with small cuts that bleed.
Cotton pads or swabs are for cleaning and putting on ointment.
Hot and cold packs help with swelling or pain.
Your veterinarian’s discharge instructions are more important than general advice.
Fit script and sizing checkpoints
It is important that all gear fits your dog well. Measure your dog’s chest, neck, and legs before you buy slings, harnesses, or suits. Try each item on your dog and look for tight or loose spots. Make sure socks and braces do not fall off or rub the skin. Clinics and stores can give you sizing charts and fit guides. Always check how gear fits at home and when you visit the clinic.
Follow-up messaging to prevent complications
Clear messages after surgery help you avoid problems. Clinics and stores should remind you to check gear fit every day and watch for skin changes. You should get updates about activity rules, checking the incision, and when to give medicine. These reminders help you remember what to do and lower the chance of problems. Owners and clinics both do better with good communication.
Checking gear and making sure it fits is very important for safety and healing.
Top 12 mistakes to avoid
Staying away from common mistakes keeps your dog safe and helps them heal faster. Watch out for these problems:
Not watching your dog closely after surgery
Ignoring redness, swelling, or discharge at the incision
Not checking gear fit every day
Taking off protective gear too soon
Letting your dog move too much before your vet says it is okay
Not making a quiet place for your dog to rest
Forgetting to take off suits for bathroom breaks
Not having an extra suit or cone
Not trying out gear before surgery
Missing doses of medicine your vet gave you
Not following your veterinarian’s full recovery plan
Not telling your clinic about problems or changes
Your veterinarian’s discharge instructions are more important than general advice.
Use this checklist for discharge instructions:
Rules for activity and rest
How to use and fit gear
Steps for taking care of the incision
When and how to give medicine
Emergency contact information
A bundled recovery kit helps owners and clinics follow the rules and get better results.
You can help your dog after surgery by following each step. Use the right gear and check if it fits every day. Your veterinarian’s discharge instructions are more important than general tips. Using gear and checking fit keeps your dog safe and helps them heal. Dogs who keep their muscles during recovery do better in the long run. Always listen to your veterinarian’s discharge instructions.
Both owners and clinics do better when they watch dogs closely.
Having a set care plan lowers problems and helps dogs heal.
Most dogs get better if you give them good care and pay attention.
FAQ
How long should my dog wear a recovery sling or harness after surgery?
Keep using the sling or harness until your veterinarian says it is safe. Your veterinarian’s discharge instructions are more important than general advice.
What should I do if my dog keeps slipping indoors?
Make sure the traction socks fit well and use non-slip mats. Checking gear and how it fits is very important for safety and healing. Your veterinarian’s discharge instructions are more important than general advice.
Can I remove the cone or recovery suit early if my dog seems fine?
Do not take off the cone or suit early, even if your dog looks okay. Keeping it on stops licking and infection. Always do what your veterinarian tells you.
